I am a regular educator at conferences nationally and internationally. I have spoken at every UKAPP conference since the first one in 2015, and at every BMXnet conference in Germany (Essen/Berlin) since 2019.
I do not offer any apprenticeships or ‘piercer training’ (see my blog on ‘Apprenticeships’) other than to other piercers in a conference/seminar/workshop setting. Attending my classes does NOT mean a person has apprenticed under me, nor been trained by me. I have never taught someone to pierce, nor had an apprentice at any point in my career. Any claims otherwise are untrue.
EVENTS ORGANISERS: If you would like me to attend to teach any of the following, please email me on skinseamstress@hotmail.co.uk to discuss. I am always happy to accept suggestions on topics for classes/roundtable discussions, and am happy to teach alongside another piercer.
Self Care For The Piercer
1 hour, plus 15mins Q&A. Projector required (PowerPoint presentation).
A class discussing the 3 elements to our health, how to maintain good physical, emotional and mental health. Plus outlining the importance for piercers to practice self care, the many different ways to do it, and why we find it so hard to switch off.
The Compassionate Piercer (1, 2 & 3)
1-1.5 hours each including Q&A. Projector required (PowerPoint presentation)..
A 3-part class (3 separate classes, focusing on each of the following – being eco-friendly, being inclusive/creating a safe and welcoming space for clients and being thrifty).
Collectively, the classes discuss each aspect of our studios – from furniture and décor, to music and technology, to client care, studio management, products and waste systems and the ways they can be tweaked to make our work environment inclusive and environmentally friendly – as well as saving money!
Class 1: “The Eco-Friendly Piercer”
Ways that we, as piercers, can minimise or reduce waste, our carbon footprint, and our impact on the environment – small steps to make a big difference!
Class 2: “The Client Centred Piercer”
Discussing how we can ensure our clients feel safe, cared for, and at ease in our studios and during piercing procedures. Discussing bedside manner, studio management and the little things we can do that make our studios as welcoming as we can.
Class 3: “The Thrifty Piercer”
‘Look after the pennies, and the pounds take care of themselves!’ as the saying goes. This class is focused on how we can save money and cut costs as piercers – both in our practical methods, and in the studio as a whole, without lowering our standards!
OH FUCK!
1.5hrs Projector would be beneficial, but not essential (roundtable style discussion, so can be flexible with time). Designed as a roundtable but has evolved into more of a lecture-style.
A discussion/roundtable class to discuss the ‘oh fuck’ moments we have as piercers, sharing what we would do in certain unexpected or emergency situations and a reminder that while mistakes happen, it is how we deal with them which defines us – not the mistake itself.
Piercer Hacks!
1-1.5hrs including Q&A. Projector required (PowerPoint presentation).
A fast paced ‘flash card’ kind of presentation, sharing small things we can do to make our working lives easier. Working smarter… not harder!
Microdermals – The Ins and….. Ins of Single Point Piercing
1-1.5hrs including Q&A. Projector required (PowerPoint presentation).
A comprehensive class on microdermals. Covering jewellery selection, placement, various techniques and methods, aftercare tips and tricks, the main causes of rejection/migration, removal and managing client expectations. Designed to build on a fundamental knowledge of microdermals.
Any good magician will tell you – always have an ACE up your sleeve!
Who are we?
ACES was the brainchild of Clem, an eco-friendly piercer with over 2 decades in the industry, who wanted a more sustainable way to work disposably. Piercing is an industry which REQUIRES tools, materials and other items to be thrown away from a point of safety, meaning that waste is unavoidable. However, there is always a way to make our impact on the environment as small as possible. ACES offer a disposable metal tool supply as well as a closed-loop recycling system for these tools, sharps (needles), the bins they are disposed of in and a ‘soft’ clinical waste collection/disposal service. The system is designed to significantly reduce waste, minimise our impact on the planet/carbon footprint, and to provide piercers with a simple, flexible option for waste disposal/recycling. You can use as much (or as little) of this service as you want, as frequently as you want/need, with NO CONTRACT for disposal/recycling. As all 3 waste categories are collected in ONE visit from the courier.
Tool purchase is a stand-alone online shop, separate from the disposal service. However, ALL metal tools and sharps can be recycled, meaning you have no obligation to use ACES brand tools, but still take advantage of our recycling service, which is operated via SharpSmart, who are the medical industry leaders for waste disposal.
What makes ACES tools different?
While disposable piercing tools and implements are nothing new, it’s most common to see plastic used for tools, which is sent to landfill or incinerated, meaning that each tool has only one lifecycle. Metal disposable tools offer a more user-friendly experience, they are sturdier, no bending or snapping, and for piercers that have worked with reprocessing their tools (I’m talking to you, old skool brethren!), it also means no ‘change over’ to get used to. The tools are shipped to you pre-sterilised so these are an ideal option for piercers working in a guest spot, conventions and events, or moving studios without needing to factor in an autoclave. The tools are designed to be single use so are not treated with a finish like re-processable tools (this makes them cost a lot less), meaning we can pass this saving on to our clients. Tools are sold in boxes of 30 which means you can order smaller amounts of items you use less of. The boxes are labelled clearly and the boxes themselves are recycled cardboard, which can in turn be recycled! We feel that ACES supply and services offer a great middle-ground between being fully re-processable and fully disposable. A clearly labelled 3-year sterility window
What are the benefits of disposable tools?
The biggest change is saving time and money. No enzyme sprays, ‘dirty’ autoclaves, steri-pouches or scrubbing. Finish up your day at work without having to soak, ultrasonic and scrub/rinse tools. No need for a ‘processing’ room/area, saving space in your working area. If all you need to process and sterilise is your jewellery, you can safely do this in your piercing space. No need to buy rapidex (other detergents are available!), enzyme spray or steri-pouches. Fewer autoclave cycles and no need for a ‘dirty’ area in your room/studio. While working disposable is often seen as wasteful, with the ACES/SharpSmart system, it actually reduces waste! Plus, when your clients comment on your equipment, you can assure them that each item is used once. Babe, show off, you’ve earned it!
Can I use my current plastic/biodegradable plastic disposables?
These items can’t be recycled in the same way metal tools can, so must be disposed of with your clinical waste. The UK government (and other governing bodies around the world) are starting to clamp (pun intended!) down on the use of all single use plastic (biodegradable or not), there is already a ban (from October 2023) on takeaway outlets using single use plastic containers and cutlery, and a 2015 surcharge on plastic carrier bags (started at 5p per bag, now 10p) is still in force to encourage people to re-use bags and buy more sustainable canvas bags. It’s only a matter of time before this ban extends to single use plastics in other industries – including tattoo and piercing studios.
We have a huge range available, and always looking to expand – so get in touch if there’s something you’d like to see! Please e-mail us to request a sample box to see the tools and try them out! We love hearing your feedback too. Email address at the top of this page.
We currently have:
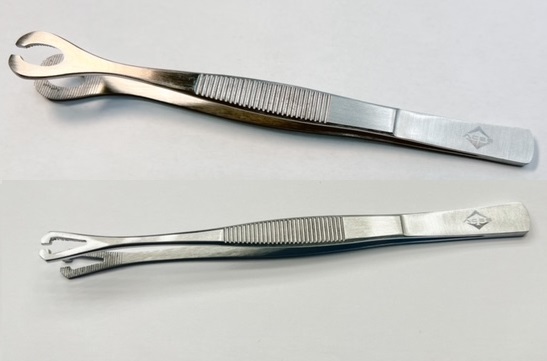
Tweezer-style forceps (foerster and pennington – both slotted)
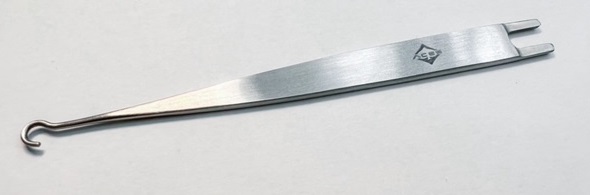
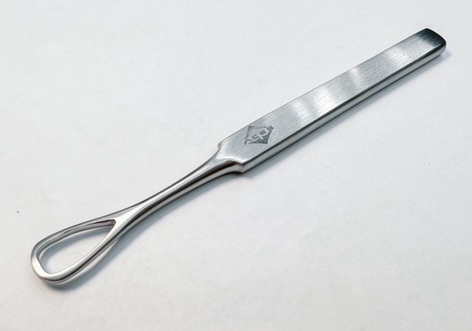
Double ended fork/hook curette
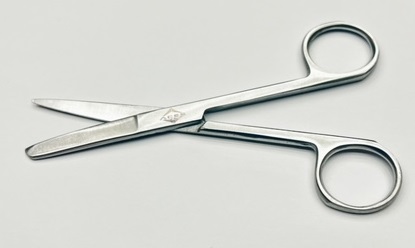
Scissors
Piercing sticks
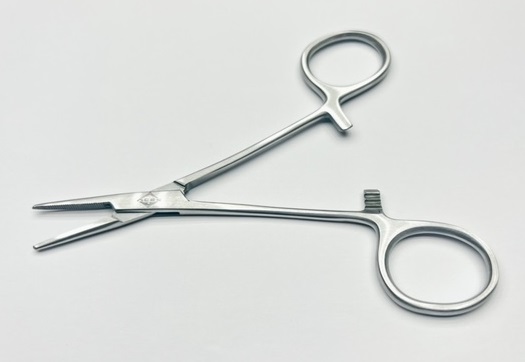
Mosquito hemostats
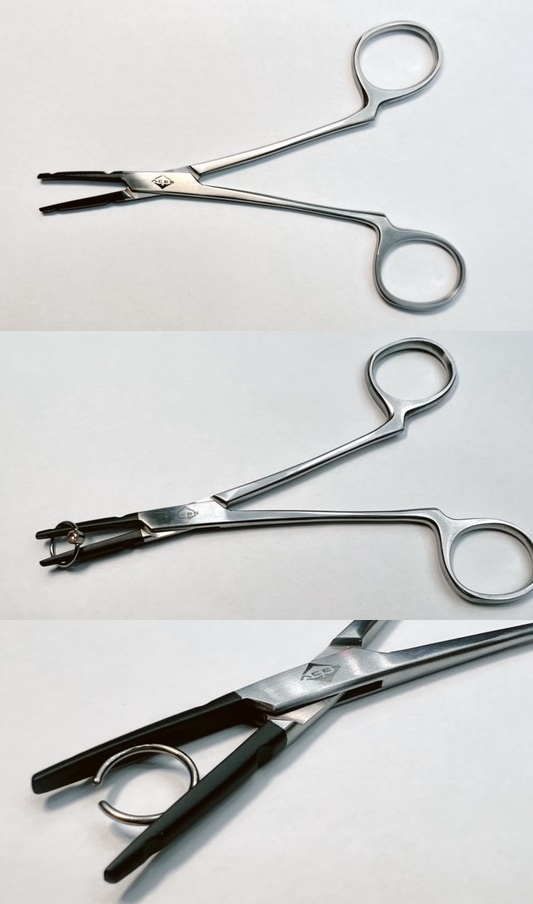
Plastic-tipped jewellery forceps (Powder coated, not actually plastic!)
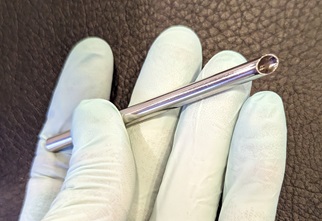
Receiving tubes (4mm, 6mm or 8mm)
Ryder forceps (ideal for holding needles/jewellery posts)
(pic coming soon! – but these will be a game-changer for microdermal attachment changing!)
And we’re hoping to launch septum forceps very soon!
Brushed steel finish and the ACES logo as standard on all forceps.
The above are all shipped in boxes of 30, pre-sterilised and ready to use. Our boxes are made from recycled cardboard, and they can be recycled or re-used. They are sturdy and easy to stack, each box is clearly labelled with its contents.
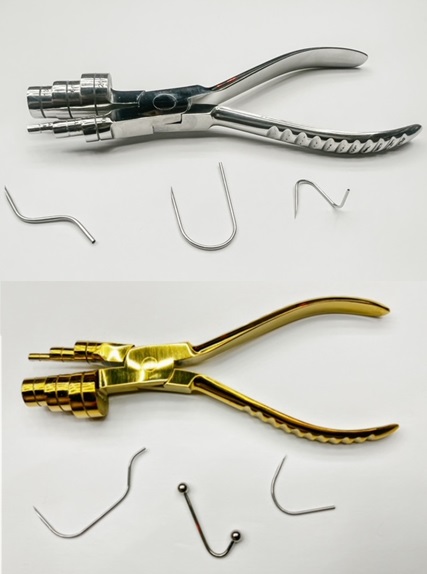
We also have a ‘bending tool’ which is non-sterile (but designed to be re-used) to bend needles/jewellery before sterilising. Silver or gold coloured metal available.
How will the collection/recycling system work?
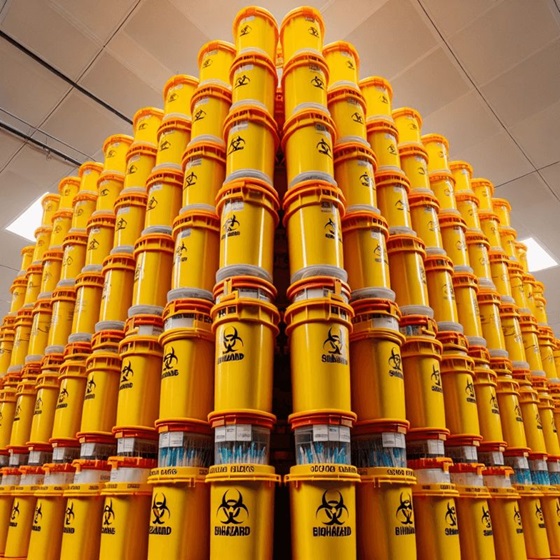
As with your ‘usual’ clinical waste/sharps disposal, a courier will come to your studio, take away your bins (sharps and tools) and soft clinical waste bags, leave you with empty bins/bags and… that’s it! As we are the ONLY disposal company offering a pay-as-you-go system, you will NEVER pay for more than you need. Create an account with us, and whenever you fill a bin/bag (or, if you can store them in your studio, you can just arrange for when your storage area is full!) simply fill in an online form from your account, a courier will contact you directly with a pickup date and time (we are hoping that this will be no more than 3-5 working days after you submit your request). This means you never have to have a huge storage of clinical bins/bags, saving you studio space! Once the bin is full, the lid would be locked shut and stored in your studio ready for collection. As the recycling system is an outsourced company you can recycle ANY metal tools (not just ACES brand) as well as sharps. The bins provided are 14 litre capacity – which, compared to the 5 litre cylindrical ones we usually see – they can hold almost 3x the capacity, meaning fewer collections (another positive impact on our carbon footprint!) Once you’re signed up with ACES, just tell us when you need a collection, you’ll get a text reminder of your collection date so all you need to do is have your bins ready! We take care of the rest!
How can you guarantee a recycling service?
ACES is proud to work with SharpSmart (‘Daniel’s Healthcare’ in Canada, the USA, Australia and South Africa) to provide our courier and tool/sharps recycling service. You can read more about the company on their website: https://www.sharpsmart.co.uk they were established in Australia in the mid 80’s and are have a trusted long-term partnership with hospitals and medical facilities worldwide – so it’s clear that their system works. This tried-and-tested system is now available to smaller-volume businesses (that’s us!) for the first time ever, and we couldn’t be more excited! SharpSmart have an exclusive courier system and their routes cover 90% of the UK, they would collect your bins (tools and/or sharps and/or soft waste) from your studio. The bins are taken to a SharpSmart recycling plant and the soft waste incinerates, and the tools/sharps bins contents emptied, decontaminated and melted down to be re-used. The bins themselves are treated and sanitised to a hospital grade and re-used. This means that they aren’t incinerated or sent to landfill. Each component of the bins (handles, lid, locking mechanism, etc.) is replaceable, meaning that during the inspection of each unit after decontamination, if there is any fault or just generic wear and tear, the affected part of the bin is replaced (not the whole thing). As each component – and the container itself – reaches the end of its life, it is fully recyclable, which means your carbon footprint is reduced even further! It’s estimated that each bin can be reprocessed 500 times. 500 bins going to landfill vs ONE fully recyclable bin…. The choice is clear! The service and system are already in place, ACES are just making it available for piercers!
Quite simply, there is no other company offering what they do, this is an exclusive service that you only get from SharpSmart, and via ACES, it is available to body art practitioners. Recognised as an industry leader in clinical waste since the mid-1980s, their system WORKS. SharpSmart offer employees a safe working environment, fair pay, all protective clothing and safety garments are provided, and constant training to ensure each employee is maintaining the high standards that they pride themselves on. Additional training is offered with new job roles/promotions and the team can work in a friendly and relaxed environment. SharpSmart have a dedicated customer service team based in their County Durham headquarters, meaning there’s no automated menus, just a friendly voice and ONE number to call to discuss any aspect of your account. We had the pleasure of visiting the headquarters in November 2023 and we were looked after incredibly well, given a guided tour of the facility, chatted with staff, and we were even given our dinner!
Do the bins provided meet/exceed council requirements?
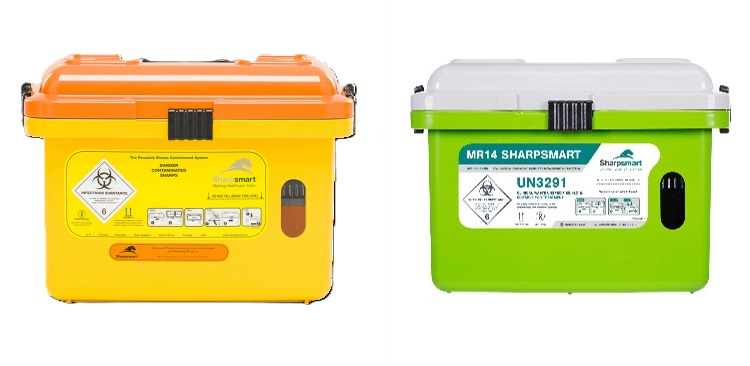
The bins are easily wall mounted and have a secure, closeable/lockable lid – each bin has a spill-proof mechanism for user safety, and once full it can be locked ready for storage/collection/transportation. ACES offer SharpSmart’s standard yellow bin for sharps and a green bin for tools – both have the same mechanisms which are tried and tested in the medical field. The main difference is capacity, the standard-issue sharps bins from most clinical waste supplies are 5-7 litres. ACES/SharpSmart offer 14 litres as standard. The wall mount is left on the wall and the bin is slotted on and off as needed.
What is provided as part of the tools/sharps/waste recycling/removal service?
In a word – everything. The bins are provided for you, delivered to your studio, when you open an account with us. You can request sharps disposal, tools disposal and clinical waste disposal only, or a combination of the 3! When your bin(s)/storage area are nearly full, fill in a collection request within your account on our website, and our courier will contact you directly with a collection date/time. The courier will take away your full bin(s)/bags and leave you with fully decontaminated empty ones. A one-off payment per collection (which can be as frequent as you want). The main problem with existing clinical waste collection/disposal companies is how rigid the contracts are, but with ACES, you only pay for what you need, when you need it!
How much will the tools and service cost?
Email us for a pricelist and esimation for waste collection – we will not disclose prices to the public, only registered piercers.
OK, gimme some numbers!
Switching to a sharps only contract with ACES will reduce your related carbon footprint by 83%.
One SharpSmart bin has the lifecycle of 500 standard bins.
Let’s say you work 5 days a week and do 5 piercings a day, each piercing uses one tool and you spend an hour collectively each day reprocessing, packing and labelling tools:
Tool Use
5 units per day
25 a week
100 a month
1200 a year
That’s 1200 pieces of plastic going to landfill.
Time Saved:
1 hour of tool processing per day
5 hours a week
20 hours a month
240 hours a year
What could you do with an extra 10 days a year?
Interested? Why not request a sample pack and price list? Tool purchase is available wholesale with council registered tattoo/piercing studios ONLY, and will never sell our products or services to the public/retail. The waste disposal/recycling is also available to 90% of the UK, so just ask for an estimate on your needs!
We love to hear feedback, so please get in touch with any enquiries, suggestions and reviews!
I am very excited to be the first place in Teesside to be offering permanent jewellery! This blog will answer a lot of your questions and explain the process, but if you have any additional queries, send an email to skinseamstress@hotmail.co.uk with the subject ‘Permanent Jewellery’
WHAT IS PERMANENT JEWELLERY?
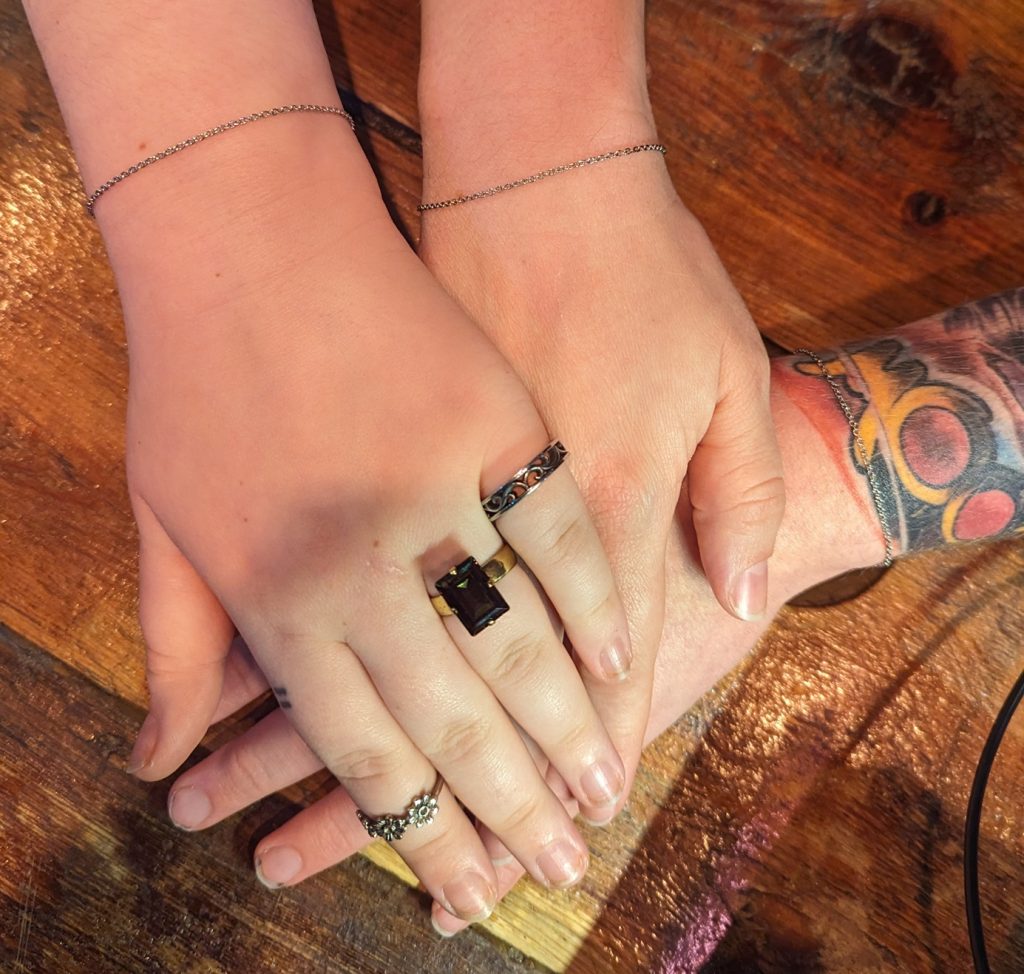
Permanent jewellery is a length of chain (cut to size) with the ends connected with a tiny ‘jump ring’, the jump ring is closed and the ends are welded together. No clasps, no clips, no knots. While we use the term ‘permanent’, the jewellery can be removed by cutting the chain with a wire cutter or a strong pair of scissors, so it can be removed if needed. I can do this for you, or you can easily do it yourself. The chain can be re-welded back on for an additional cost. There are photos of my work throughout this blog (all photos featured are my work).
Welded steel bracelets
SO, WILL THE JEWELLERY LAST FOREVER?
While we do use the term ‘permanent’, just like any jewellery, the chain can snap or warp if it snags on something. The chain used is very fine and it can break if enough force is applied. With proper care and attention, it will stay put for a long time.
HOW IS IT DONE?
You select your chain (style, material, colour), and if you want a bracelet, necklace, anklet or ring (the length of the chain will determine the price, which we’ll cover soon). You can choose a charm (or charmS!) if you want to add them (this is optional). Then a micro welder is used to join the ends of the chain together… and you’re done! You would leave with your jewellery the same day as long as it’s a chain/charm I have in stock – but I can order in anything requested (50% non-refundable deposit would be paid to order in, with the remainder to be paid in cash on the day of fitting).
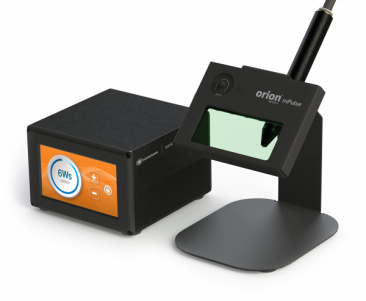
This is a stock photo of my welder!
DOES IT HURT?
No! it’s completely painless – the weld is between the ends of the jump ring, so it doesn’t touch your skin. There is a loud ‘click’ as the welder works though.
WILL THE METAL TARNISH OVER TIME?
Gold will not tarnish, nor will steel, but silver CAN tarnish over time. You can buy polishing cloths from me what will shine it right back up!
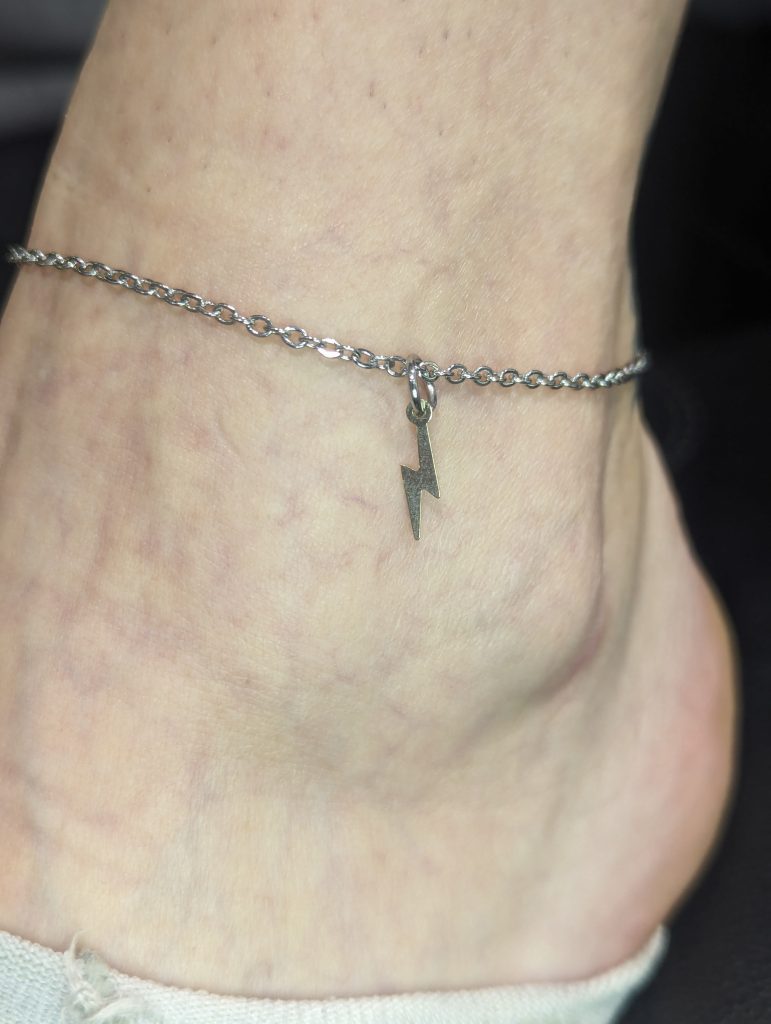
Steel chain with 9ct yellow Gold lightening bolt
AS IT CAN’T BE REMOVED, WHAT ABOUT AIRPORT SECURITY, MRI SCANS, ETC?
Chain as thin and delicate as this will not cause a problem in the airport – and as the materials are not magnetic, they can be worn in an MRI scanner, however if the chain has to be removed, it can be easily cut off (see above) and re-fitted for an additional cost, but the same chain can be re-used.
WHAT CHAINS AND CHARMS CAN I HAVE?
I use 9ct gold (yellow, white and rose), sterling silver and steel. Obviously, the prices will vary depending on materials and length of chain needed. 9ct is great for chains as it is robust and sturdy. Gold is a soft metal and 24ct gold is not suitable for jewellery as it warps and snaps easily. Lower carats are made by combining gold with other metals which gives the gold more durability. As mentioned, 9ct gold is NOT suitable for body jewellery (14ct minimum) as it passes through the body, so we can only use metals that are suitable for human implantation, however for jewellery worn externally, 9ct is fine! I can get 14ct and 18ct gold chains on request, but there will be a price difference. For charms, I carry a small selection of 9ct pieces, but if you had something specific in mind, get in touch and I’ll try and source it. I could also fit charms/pendants that you already have onto your welded chain, just bring it with you. I will have ‘jump rings’ to attach charms to an already-fitted chain. Some of the charms are customisable and can be engraved as a truly bespoke piece – for this option, you would buy the charm from me, take it away and get it engraved as you wish, and then bring it back to me to be fitted (charm is already paid for, so just the chain service to pay). Stock will vary, so do call in to see what’s available, but ordering in for you is no problem.
My chain is sourced from Cookson Gold and Tish Lyon (as are my charms and jump rings) so it is genuine and traceable. In the UK, gold pieces under 1 gram are not required to be hallmarked but I am happy to provide proof of the source of my gold on request.
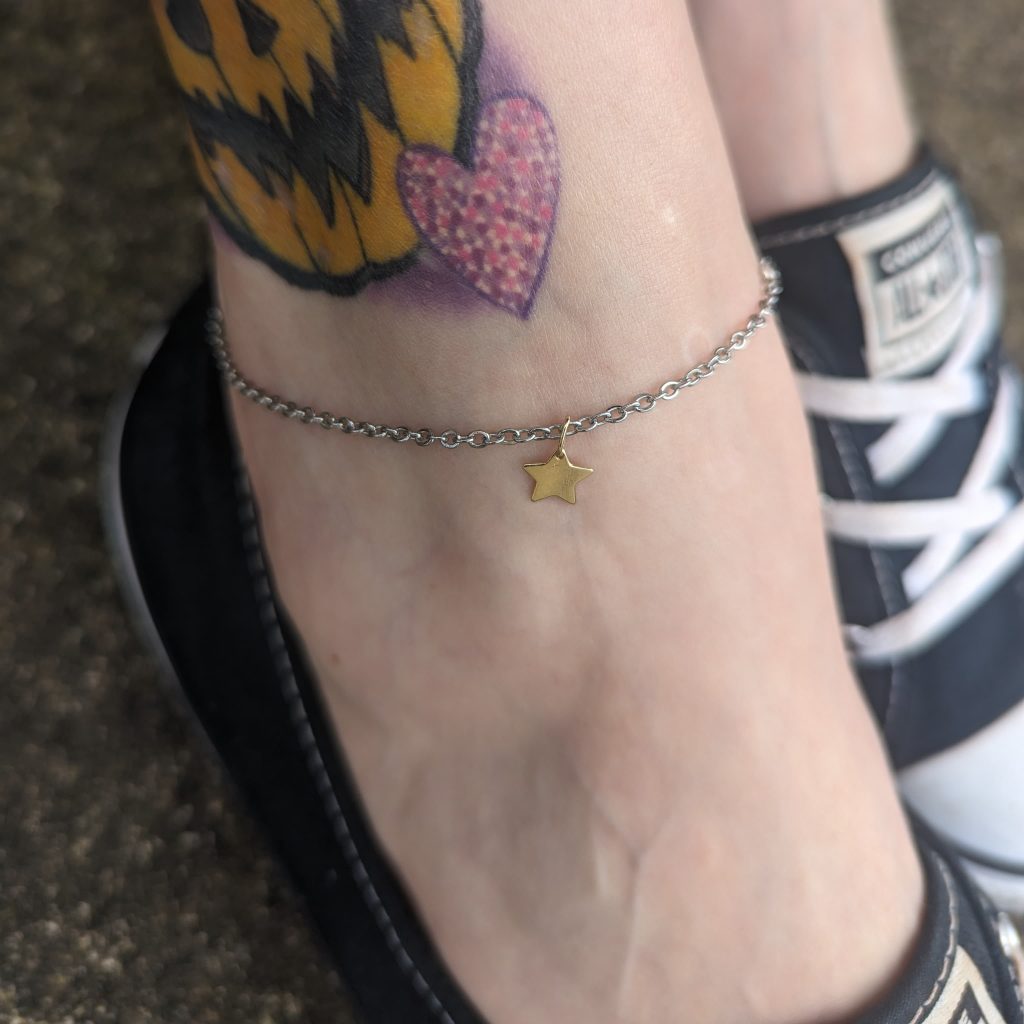
Steel chain with 9ct yellow gold star.
HOW MUCH DOES IT COST?
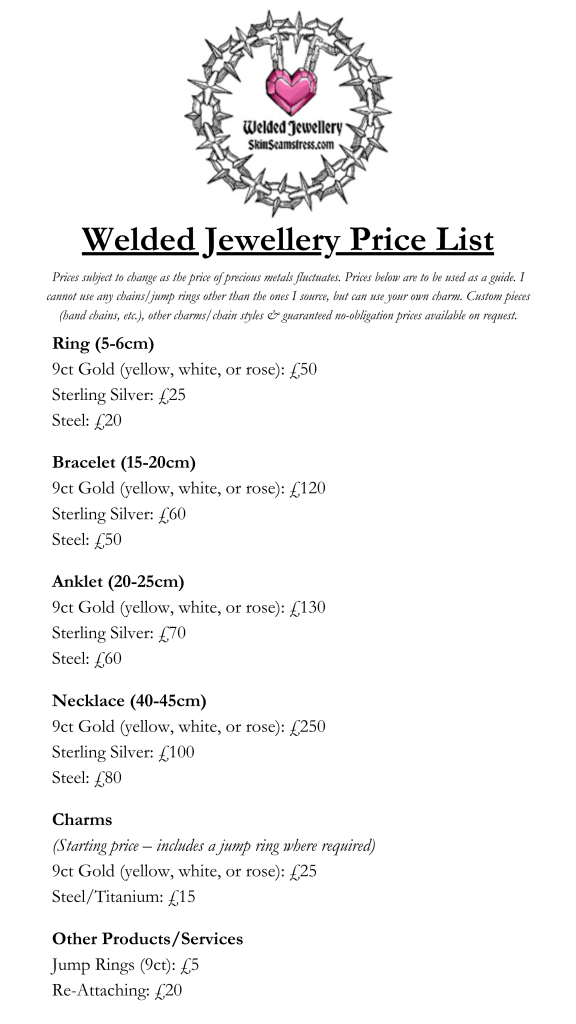
As each piece is different, there’s no set cost (a bit like a tattoo). A rough guide is below, but do bear in mind that as gold prices fluctuate, these WILL change. I’ll aim to update the info below as needed, but for a definite price, call in for a no-obligation quote. The prices below are for a simple trace chain, other styles will vary, and charms are extra (and can be added to the chain at a later date). Reservations & ordering-in require 50% deposit up front, (remainder to be paid on collection). I cannot use any chains/jump rings other than the ones I source, but I can use your own charm. Custom pieces (hand chains, etc.) are available on request. For all welded jewellery, ask in the studio for a no-obligation quote.
IS THERE AN AGE LIMIT?
The studio is strictly 16+, as we don’t allow children into our studio, but there is no legal age limit. Do bear in mind that schools rarely allow jewellery and any jewellery worn has to be removed for P.E., so this may be best saved for after school ages.
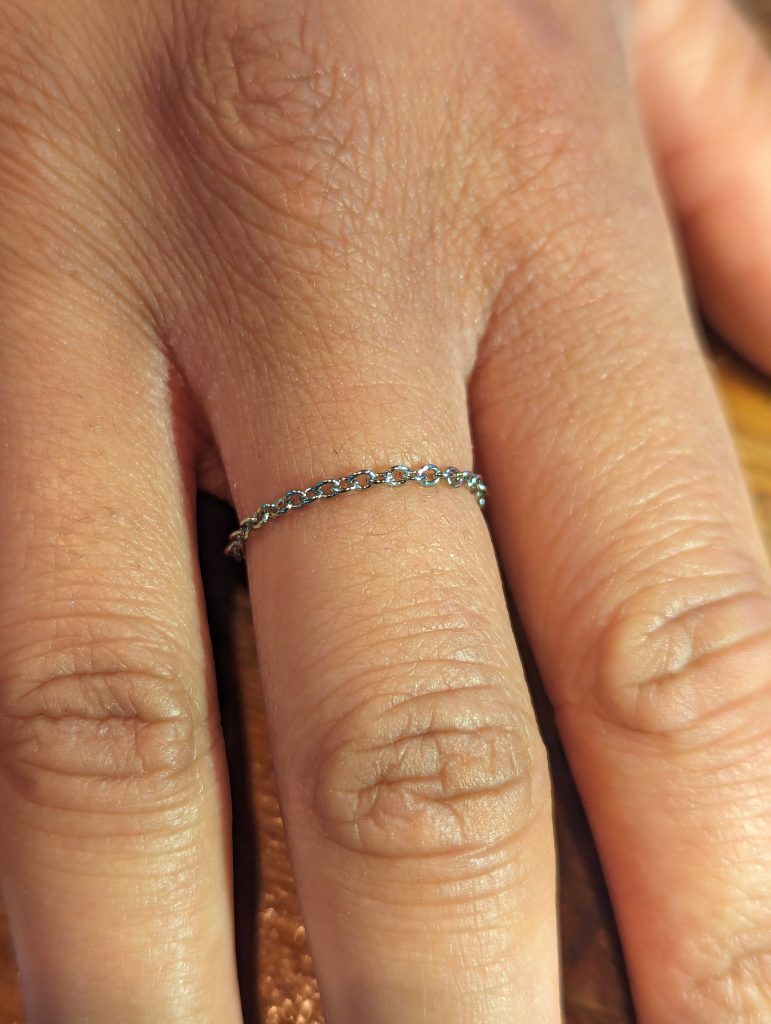
Welded steel ring
WHAT IF I NEED TO TAKE IT OFF?
As mentioned, the chains are very fine and can be cut off – it’s recommended to cut through the jump ring to preserve the chain, which can be reattached as needed. If you decide you no longer want the chain, it can be ‘cashed in’ at a goldsmiths. For sterling silver and steel jewellery, the resale will be less.
WHEN CAN I GET IT DONE?
I’ll be offering this as a walk-in service, so you can just call in! The procedure is quick – choosing your jewellery takes longer!
More questions or an enquiry about a specific chain/charm? Just drop me an email on skinseamstress@hotmail.co.uk or call in!
Something I have wanted to blog about for ages… but I have no way of giving it a short ‘n sweet ramble (on this or any other topic) so was a little reluctant to start, but here we are! All the photos in this blog are my work unless otherwise stated.
WHAT DOES ‘ANATOMY DEPENDENT’ MEAN?
In short – a piercing that not everyone can get due to their body’s shape. Notice I say ‘shape’ and not ‘size’. The size of a body part is rarely a factor, it’s the SHAPE that matters. Navel (bellybutton) is a good example. I see people relatively often who will mention how much they want to get their navel pierced but have been told (often by other piercers) that they are ‘too big’ or ‘too skinny’. Not only is this language untrue, but it is also body-shaming at it’s finest. Body positivity is a whole other blog, but a reminder that loving your body is a huge part of your self-care routine, but there is such a thing as ‘toxic positivity’ whereby people are made to feel bad BECAUSE they can’t accept a body part. I never allow anyone to shame their body in my room, we don’t use words like that about our friends – so we won’t be saying them about ourselves! Wow, 2 paragraphs in and we have our first tangent! Someone once told me that “if you don’t like a body part of yours, pierce it or tattoo it and you will fall in love with it all over again”. No truer words have ever been spoken!
So. ‘Anatomy Dependent’ – meaning that certain body parts cannot safely be pierced (we will come back to ‘safely’ later) due to the individual’s specific anatomy. Technically ALL piercings are anatomy dependent – Voldemort couldn’t get a nostril piercing. We’re not going to discuss things like microdermals or surface piercings in this blog (there are other blogs up if you are interested) but bear in mind that certain placements, though possible, are not advised (hands and feet, inner wrists, the hollow between your collarbones) because they just don’t last. But they are not technically ‘anatomy dependent’.
WHICH PIERCINGS ARE ANATOMY DEPENDENT?
As mentioned above, ALL piercings are anatomy dependent, but I’d say that if less than 90% of people can get a piercing, it’s an anatomy dependent piercing. Most common anatomy dependent piercings are: Navels, industrials, smileys, snugs and most intimate piercings. I’m not going to list all the possibilities of anatomy with the above, as it would take too long. But in short….
NAVELS: must have a clear ‘ridge’ of soft tissue. ‘Outies’ can sometimes be pierced, but it’s not common – and its usually the bottom of the navel that is pierced. Please note that the ‘outie’ part in the centre of your navel should absolutely NEVER be pierced. It could cause an umbilical hernia and is extremely dangerous. Navels without a lip can sometimes have a ‘floating’ navel piercing, where the jewellery is hidden inside the navel, but the top of the jewellery is usually fancied up with flowers, clusters, etc – the ‘standard’ navel bars can’t usually be worn in floating navels (but in SOME cases, a ‘J-curve’ can be worn). I’m also seeing a lot of people who have had ‘tummy tuck’ surgery, but this usually results in a tight ring of scar tissue around the navel, which can’t safely be pierced.
Standard Navel (fresh)
Floating Navel (healed)
Inverse Navel (on an ‘outie’ – fresh)
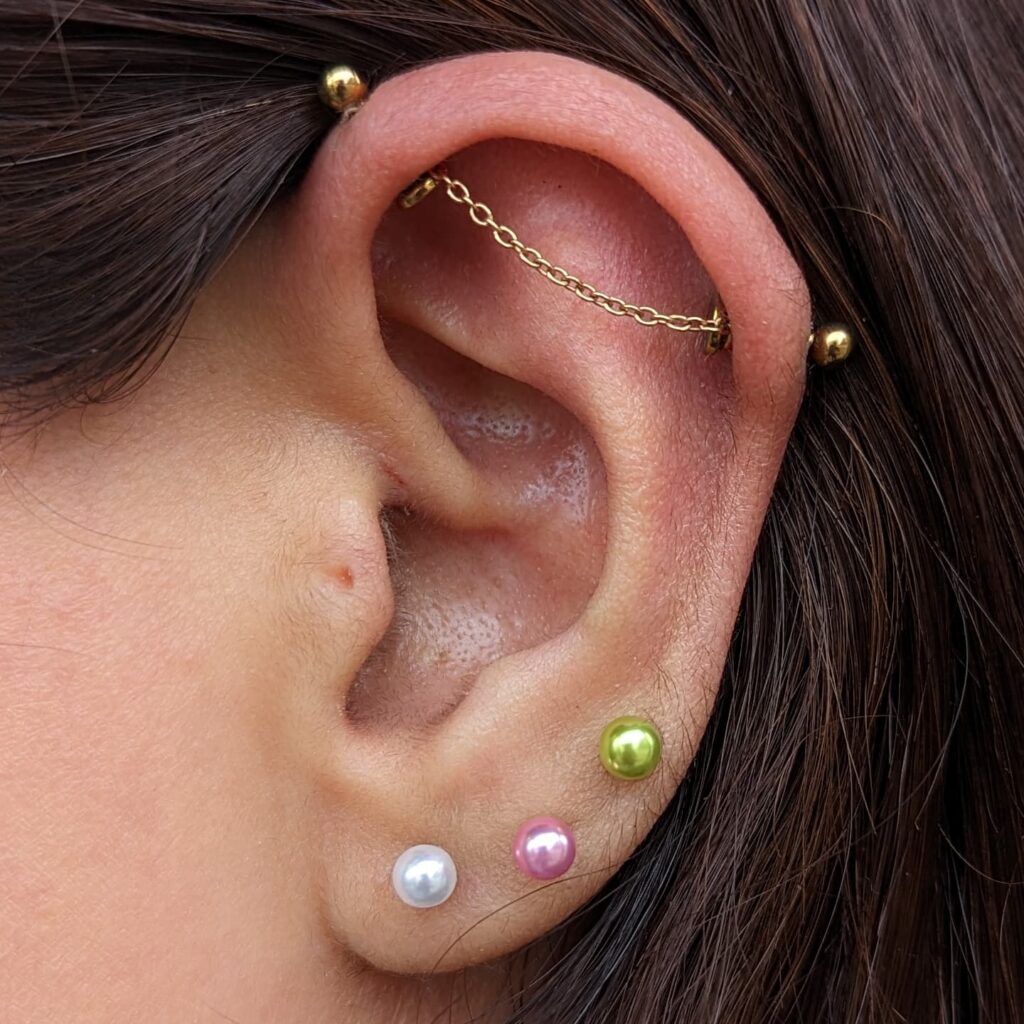
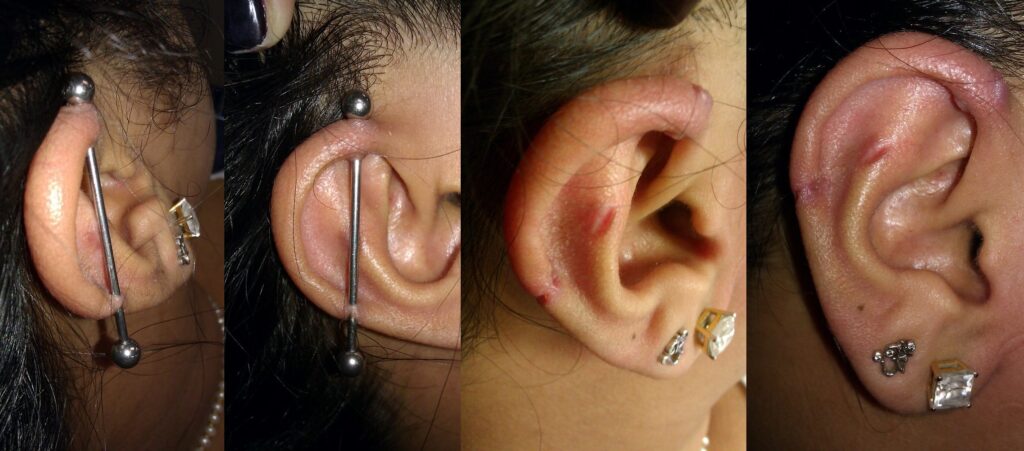
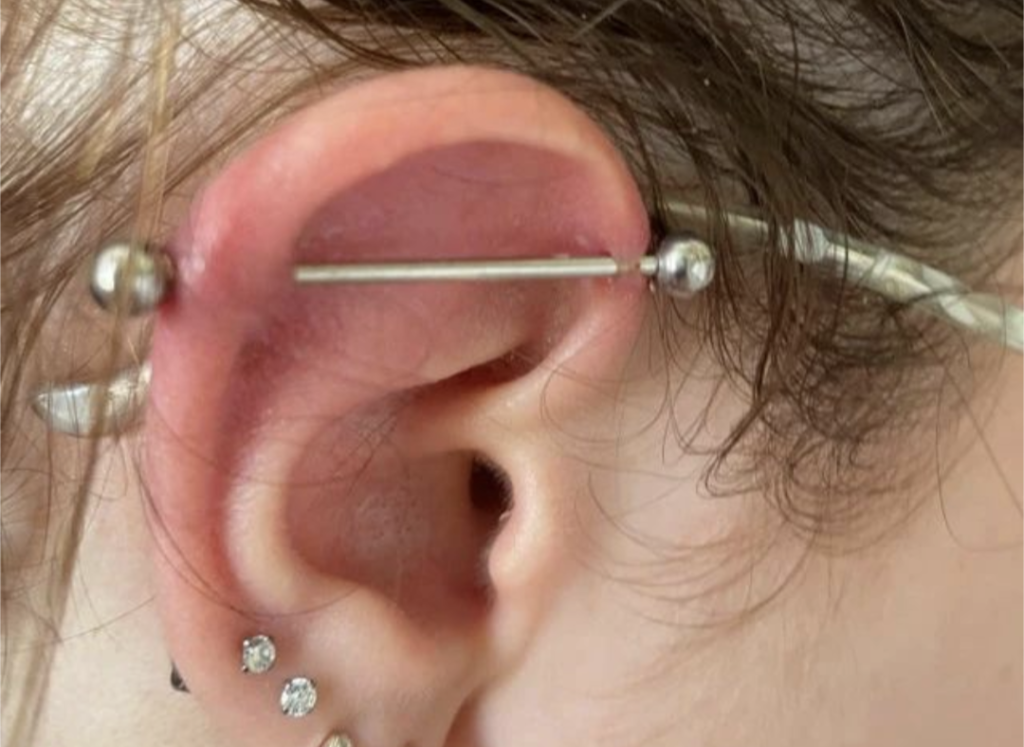
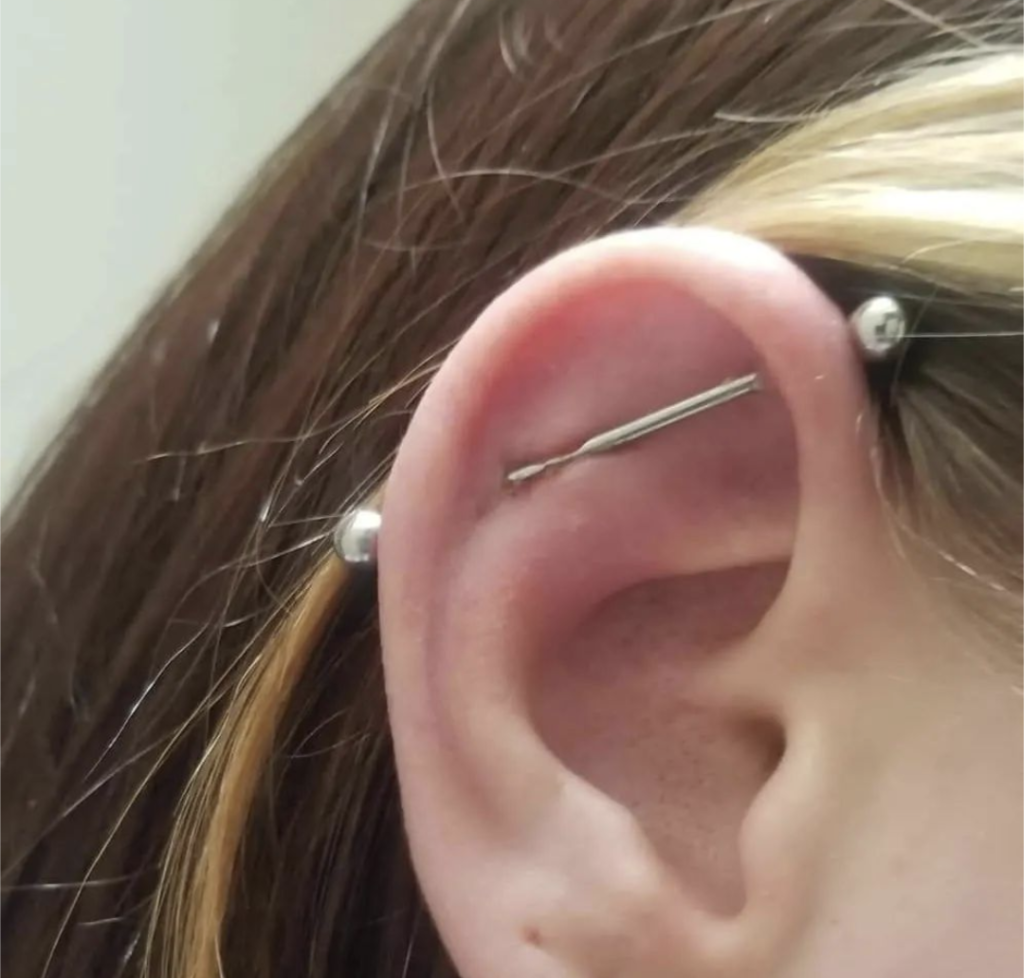
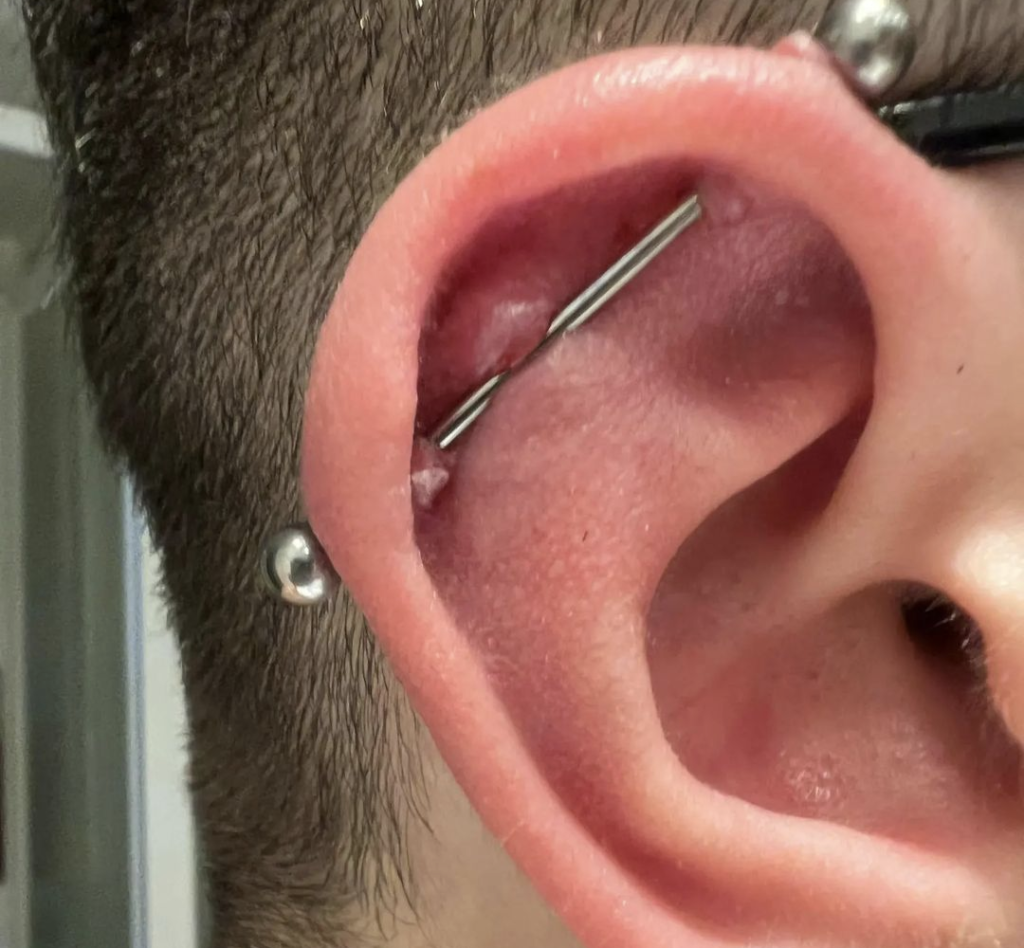
INDUSTRIALS: by FAR the most commonly refused ‘standard’ piercing service. You need a large, prominent ridge ‘helix fold’ around the top of the ear, and the semi-circle under it (often called the ‘flat’ or ‘scapha’) has to be flat, or very nearly flat. There CAN be placement variations that can make it work, so do be flexible with where you want the piercing – and more often than not, one ear is absolutely possible to do this on, and the other isn’t! While the prominent helix fold is a must for a standard industrial, the scapha area not being completely flat can sometimes be worked around – like placing the piercings higher/lower/at a different angle to avoid any ‘rises’ on the scapha. If a standard/traditional industrial is not possible, there are some options. Custom bending the bar is possible (but obviously means that your jewellery options are limited), using 2 shorter bars and linking them with a chain looks great, or using a ball and socket jointed piece. While this is definitely the most commonly refused piercing, it is also the one with the most options as an alternative.
Getting Creative! (This was a LONG time ago, can’t remember if it’s fresh or healed!)
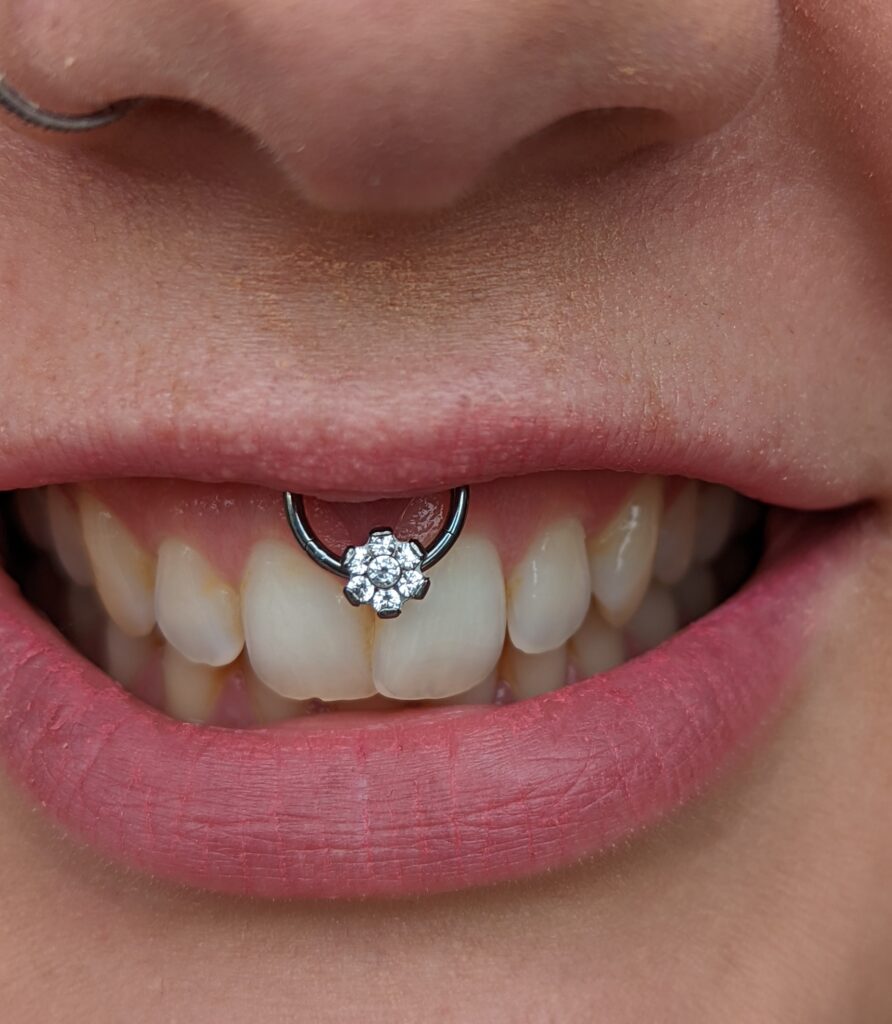
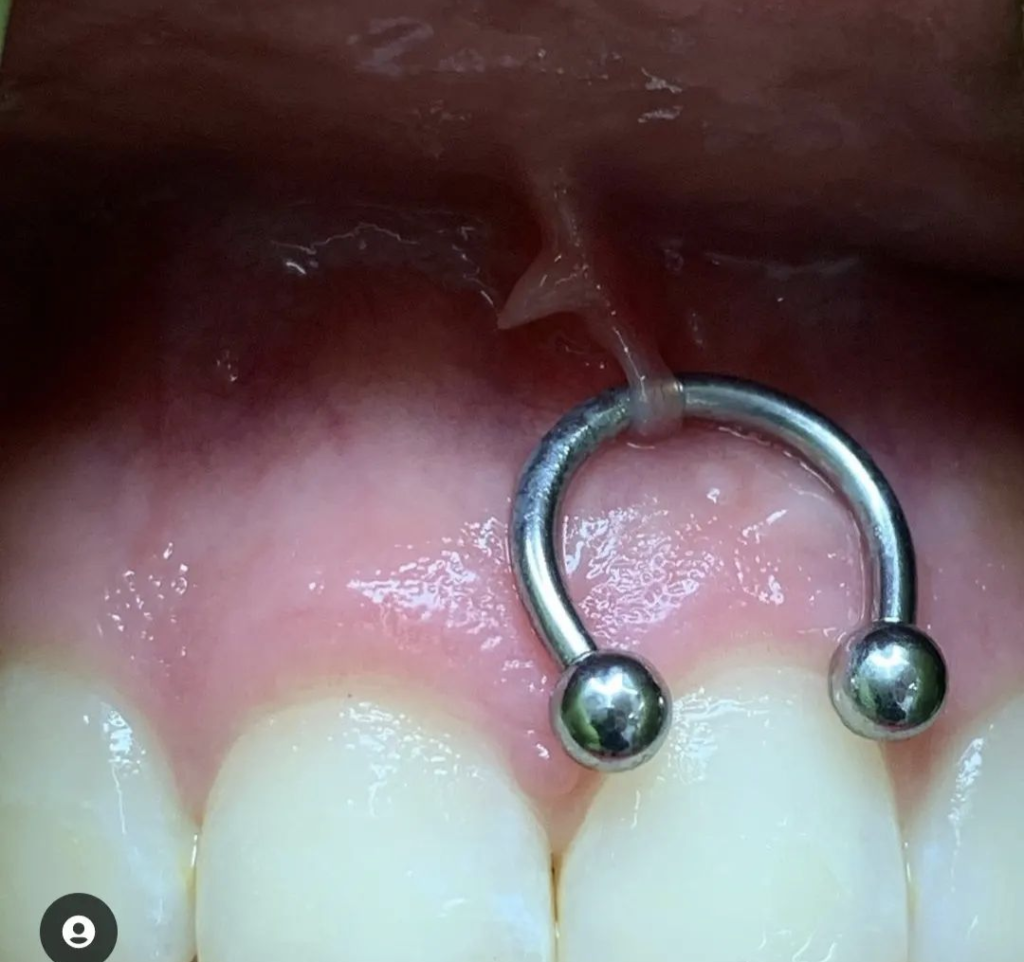
SMILEYS: there has to be a visible and good-sized ‘web’ attaching the upper lip to the gum. Unfortunately, this is one that doesn’t have any wiggle-room for variations.
Smiley piercing with appropriate anatomy (healed)
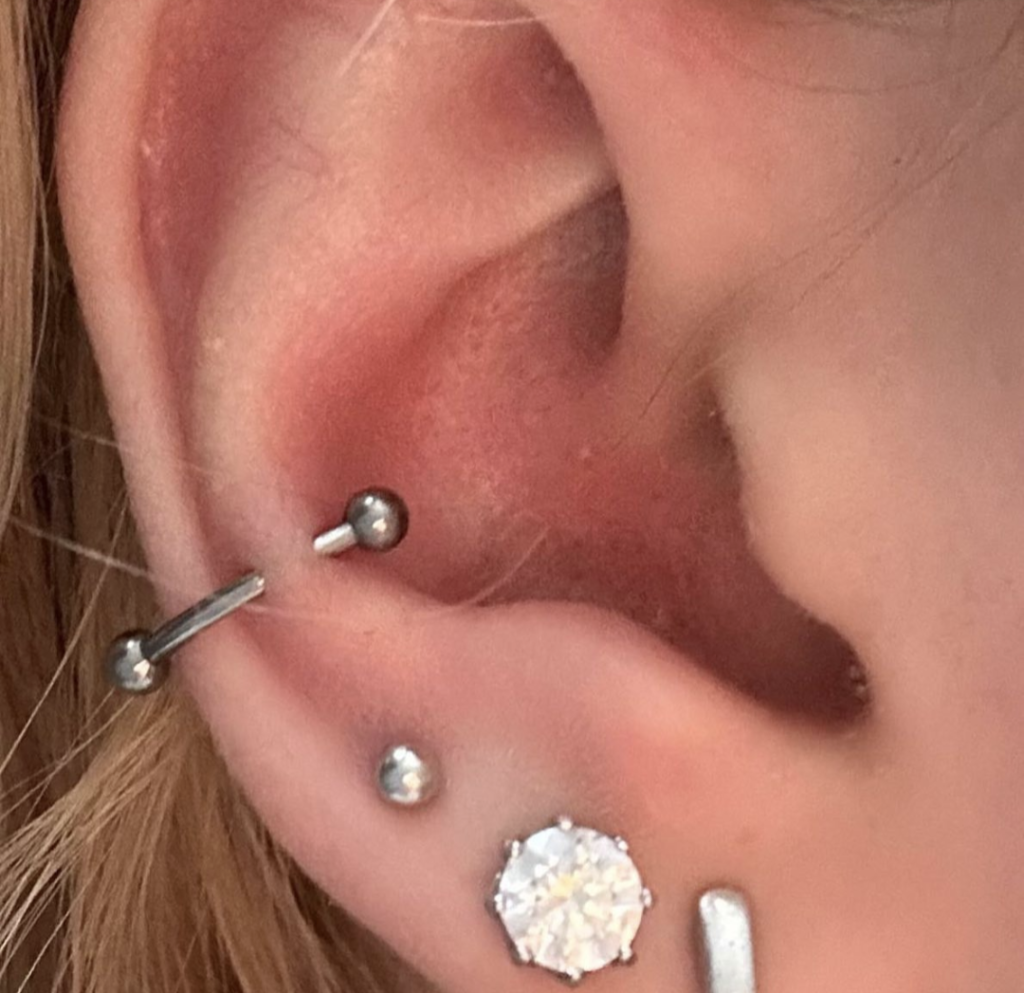
SNUGS: This is a hard one to heal, even with perfect anatomy. But the ridge between the conch and outer helix has to be prominent and ideally ‘tall’ and at a sharp angle away from the ear. There IS another option – which a lot of people go for even if their anatomy is suitable, due to the problematic healing of this one – a ‘faux snug’. A faux snug is 2 separate piercings – conch and helix – positioned to LOOK LIKE a snug. They often heal much more easily, and if you wanna tell people you have a snug piercing, not a faux snug, your secret is safe with me!
Snug piercing (healed)
Faux snug (fresh)
INTIMATE PIERCINGS: No two people’s intimate area is the same, and anatomy there can be very different. Often not having the right anatomy for one piercing means you have perfect anatomy for another! For vulva piercing, if someone doesn’t have suitable anatomy for a ‘Christina’ piercing, it’s usual for them to have perfect anatomy for a VCH. Like smileys, there’s no real wiggle room for these, but other intimate piercings are often do-able.
No pictures of intimate piercings, but I’m always happy to have an anatomy check and consultation with anyone unsure which intimate piercings would be suited to their anatomy.
HOW CAN I TELL IF MY ANATOMY IS SUITED?
It’s often hard to anatomy check yourself, but there are certain things you can do – the infamous ‘cotton bud test’ for a VCH, for example. It’s always best to ask an experienced piercer for help with any anatomy dependent piercings, and ask to see examples of their work on different anatomies. I am always happy to have a consultation and anatomy check with a client, with no plans to pierce there and then – ONLY to discuss the possibilities. This is a free service and no obligation to get anything done at any stage. During an anatomy check, I ask the client what their goal is, and then kinda work backwards from there until we get to a point that the client is happy with the planned piercing, and I am happy that it’s safe (we’re getting to ‘safe’ being discussed, I promise!) and viable. I will always talk through the options with clients if their ‘1st choice’ isn’t possible, but with the understanding that they have come to me asking for ‘A’ and I am offering ‘B’ or ‘C’ instead. Sometimes people want to go away and think about the options, and sometimes they are happy to go for it there and then – both of these things are fine and my client is always in control of how we proceed.
IF MY ANATOMY ISN’T SUITABLE, WHAT CAN I DO?
As mentioned above, sometimes there are options. Sometimes the piercing is viable, but you may be limited on which jewellery styles you can wear. Sometimes I will forward clients to another piercer who maybe has more experience with this particular piercing – getting a ‘2nd opinion’ on it. But unfortunately, sometimes its just not the piercing for you.
BUT COULD YOU DO IT ANYWAY?
If by ‘do it’ you mean put a needle through and put jewellery in, usually, yes. But this is where we’re discussing the mentions of the word ‘safe’ from earlier. But if we ‘just do it anyway’, KNOWING that the anatomy is not suitable, the piercing is likely to not heal, not stay in there (‘grow out’) or potentially cause a lot of damage/scarring to the area, it is not a safe piercing, and it’s not a viable piercing. I’d rather turn down a request than do something that I am pretty sure will not work out. It’s not ethical, its not fair on clients, and it’s going to potentially cause a lot of problems (scarring, pain, damage to the surrounding area) further down the line. Just because you CAN, doesn’t mean you SHOULD.
The following photos show what can happen if unsuitable anatomy is ‘pierced anyway’. These were either taken by me (or other piercers who have had the client come to them for help) with the clients’ consent, or found on google. No studios will be named, these are not being shared to shame anyone, simply to illustrate what happens when clients’ anatomy is not considered.
Often, newer piercers are pushed to do a specific placement by a client, this is something that I think every piercer has done at some point in their career, so no shaming at all. But it also means that while we can look at the pictures below and be quick to blame the piercer – we have no context or back story as to what was requested, warnings given, etc.
**TO BE CLEAR, THE IMAGES BELOW ARE NOT MY WORK**
Industrial pierced without a prominent helix rim
Industrial pierced without the upper ear being flat (or the piercing NOT being positioned in a way that could work)
Looking at these ears, I would say they are absolutely appropriate anatomy for an industrial piercing, but the piercing has been placed too deep/in the wrong position or angle. So, while their anatomy is fine, the piercing has – for whatever reason – been placed incorrectly.
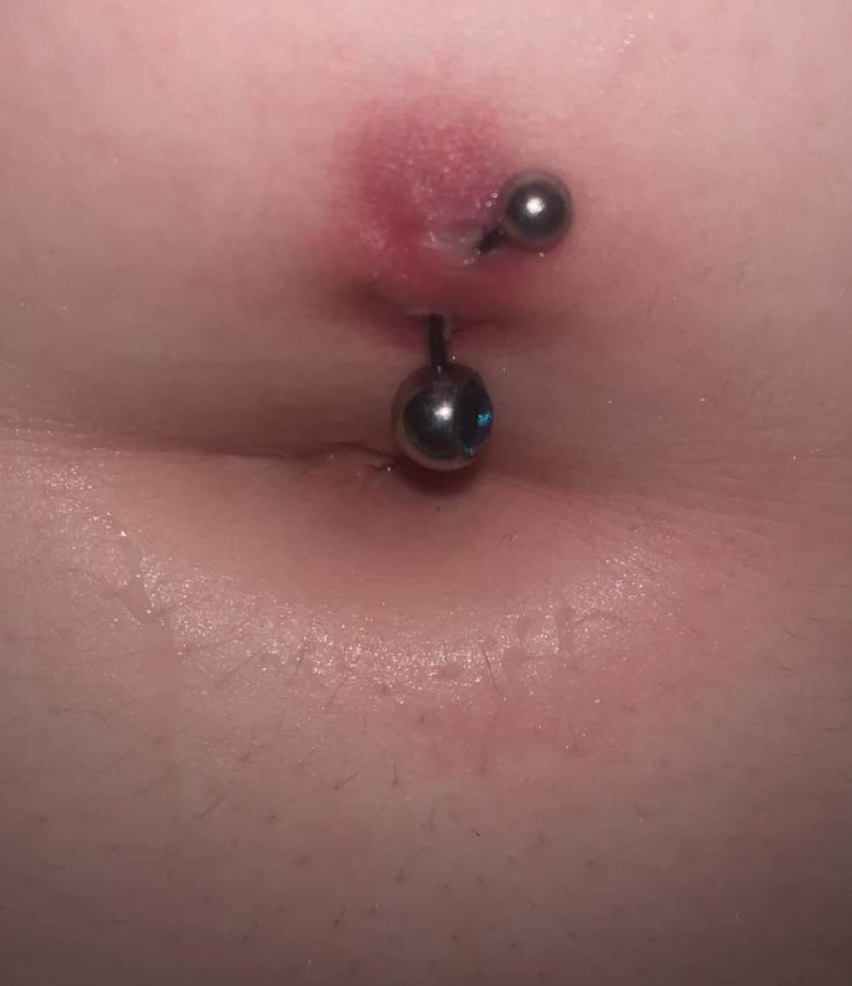
Navels – the pic quality on these isn’t great, but it illustrates what can happen if care isn’t taken to assess anatomy and pierce to work WITH the anatomy, not against it.
This navel is – in my opinion – unsuitable for a standard OR floating placement.
The upper piercing here looks fine (and healed) but the other 2 have been pierced where there is no ‘lip’ or rise, and will likely grow out, leaving scarring.
This one is not even in the navel – likely when the client sits down, their navel will fold inwards, but the piercing will still be visible. This navel might have been suited for a floating navel though.
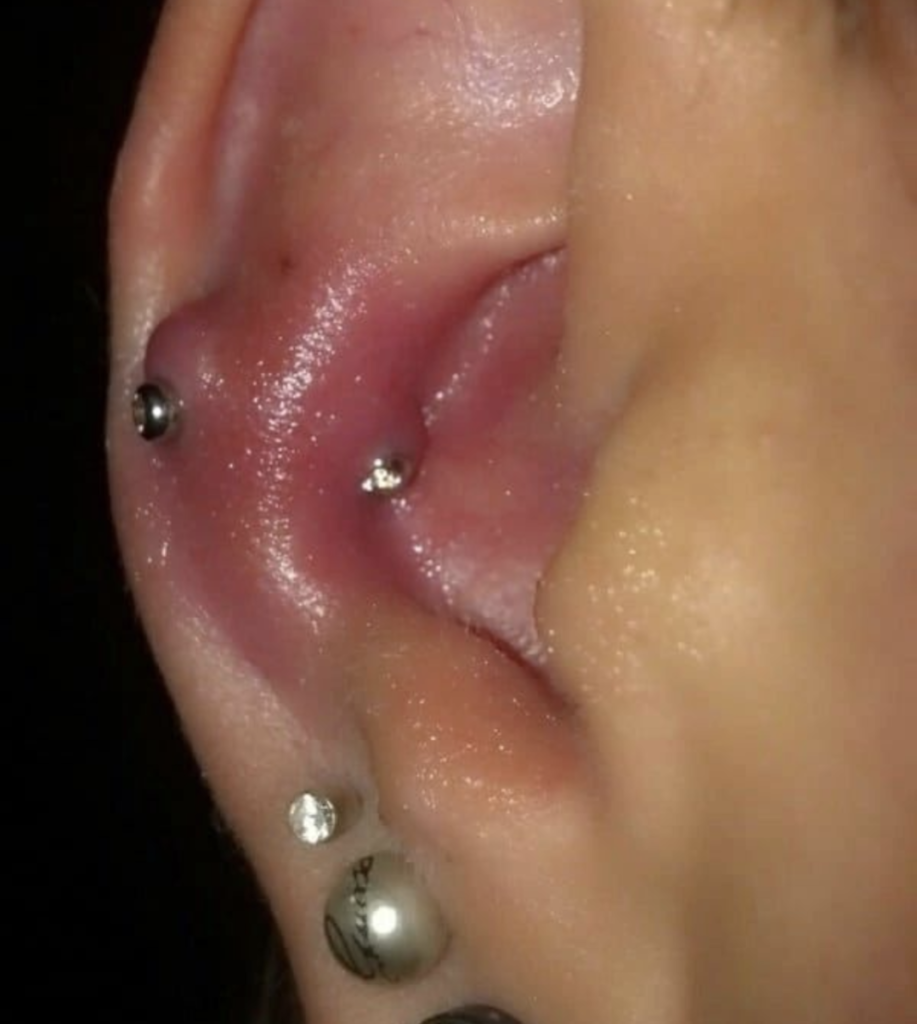
Snugs – difficult to heal even with perfect anatomy. The swollen one is hard to tell what the anatomy is like, as it’s super swollen, but I suspect that it wasn’t a high enough ‘rise’ and so has been pierced super deep. The one that appears healed is the opposite – the anatomy isn’t perfect, and I probably wouldn’t have done it, but it HAS healed (in a fashion!) however, the jewellery is way too large, and it looks like the piercing channel is no longer through the cartilage (so it was either pierced like this – waaaay too shallow, or the piercing has migrated out). In this instance, a ‘faux snug’ would be a great alternative.
Smiley – so this little guy is hanging on for dear life! Arguably, as with the snug above, it IS a piercing that has held on against all odds, it doesn’t appear fresh. But one granola bar could take this out very easily!
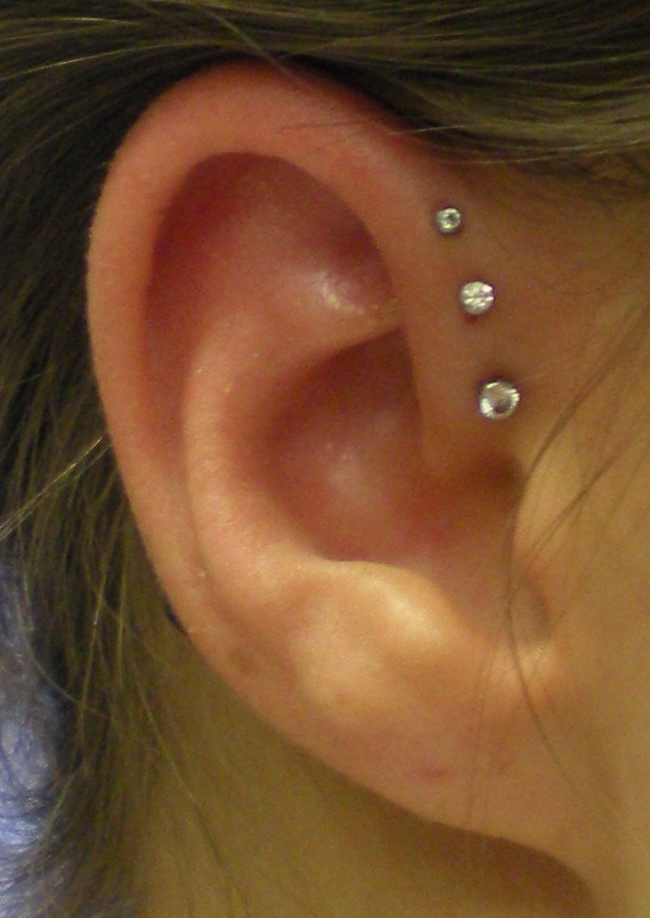
Something we didn’t touch on is a ‘quantity limitation’ (is that a phrase? It is now!) and the number one piercing that has this is the hallowed ‘triple forward helix’. This beauty of a trio got SUPER famous in the early 2010s from an absolute queen in the piercing world – Chrissy Shull at Integrity Piercing
(this is the original photo – and credit for the pic and piercings is Chrissy Shull)
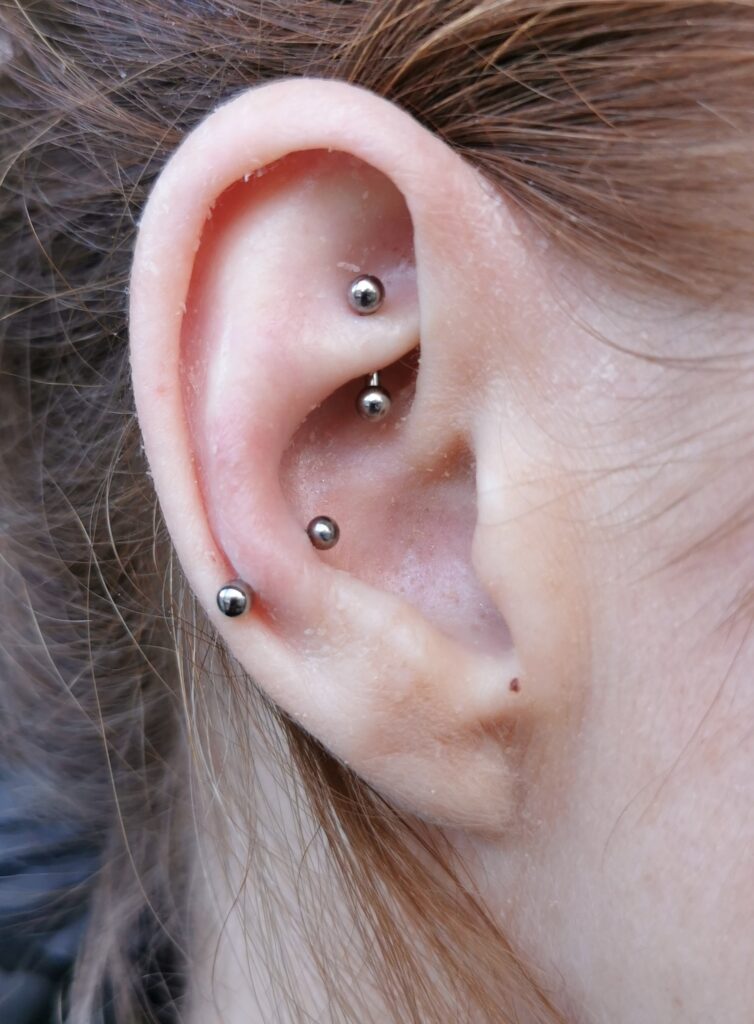
I’d say that easily 90% of people can get ONE forward helix piercing. Probably about 50% of people can get two. And around 10% have enough room for 3.
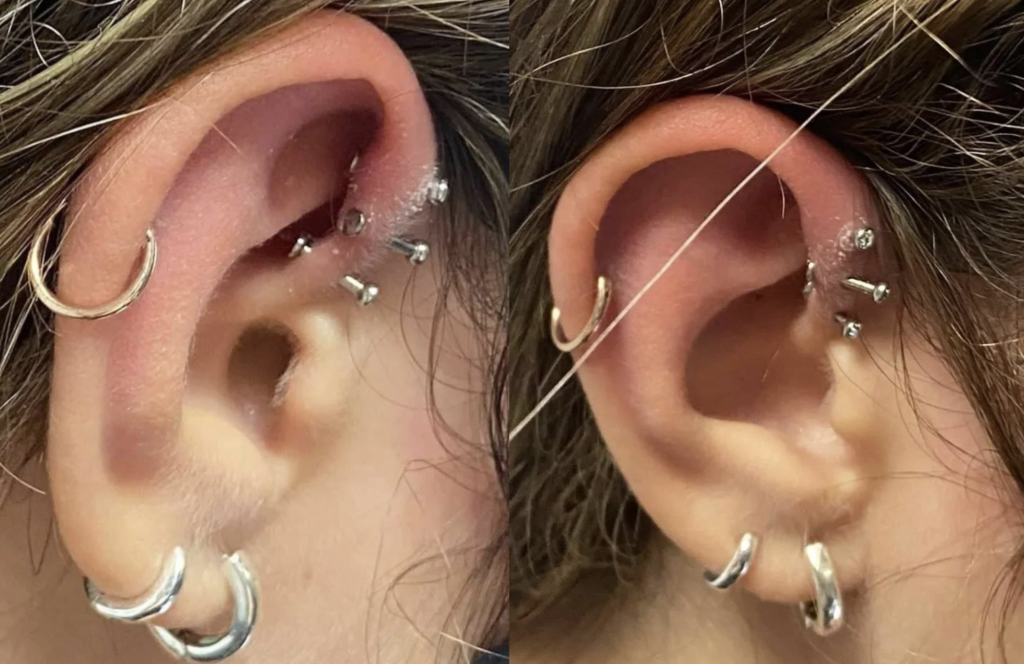
Using cluster jewellery (multiple stones attached together and worn through a single piercing) can give a similar look (obviously the stones are touching, not separate) but often these are attempted without enough space and this can often mean that the heavy scarring left could prevent any chance of a repierce.
This ear has enough space for 2 – one above and one below the rook – but that centre piercing (even if done at a better angle) would be pushed at an angle by the rook and would potentially heal at that angle, meaning the spacing would be off, and the jewellery would not be perpendicular to the tissue.
It’s hard to tell if this ear would be suitable for a forward helix, as the tissue folds in a concave way above the rook, so a lower piercing MIGHT be possible, but from what I can tell from this photo, I wouldn’t want to pierce level with or above the rook. The lower piercing shown isn’t at a great angle and is quite shallow – and this kind of placement would probably not look good with a ring in there, so jewellery options would be limited to a stud only.
I hope I’ve managed to be clear and concise with this one, and that it has answered a lot of questions that people have, please contact me if you have any queries <3
**For clients looking for a copy of the aftercare instructions – see the bottom of this blog!**
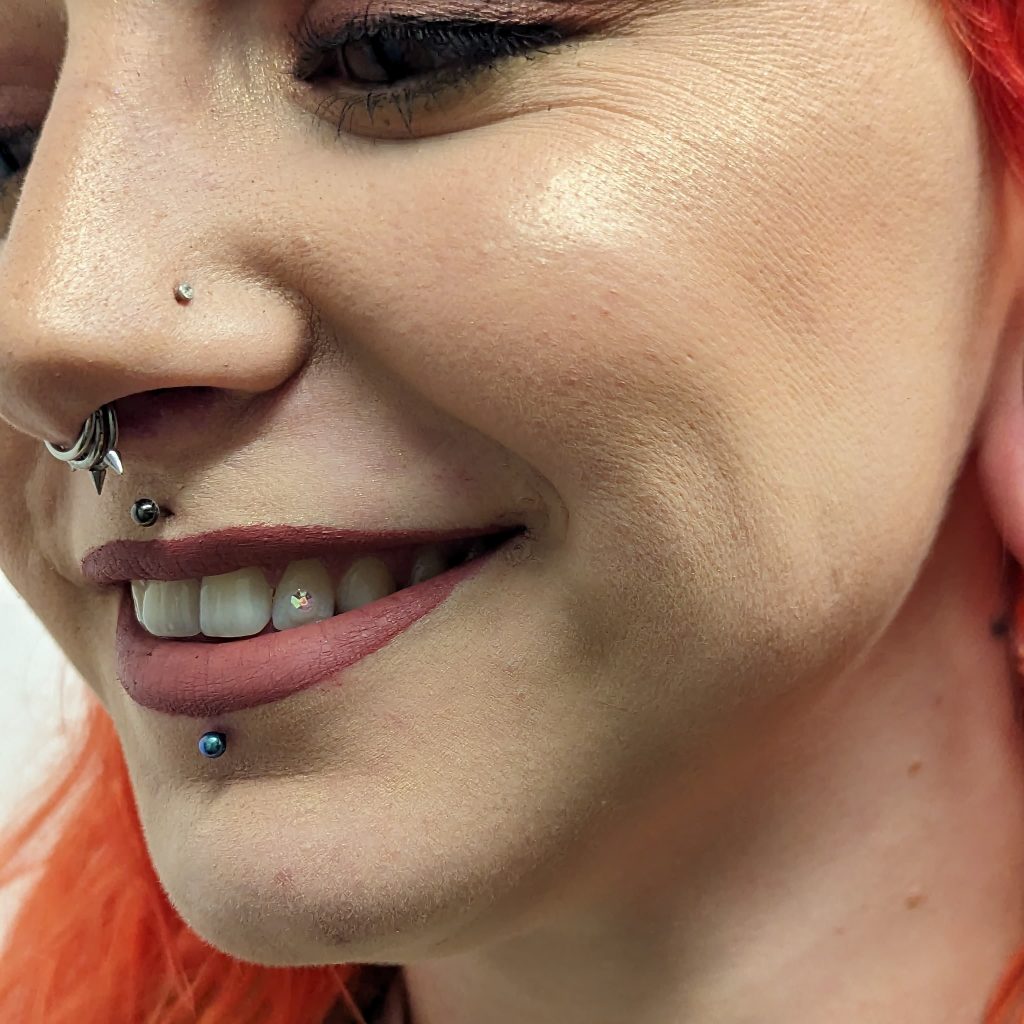
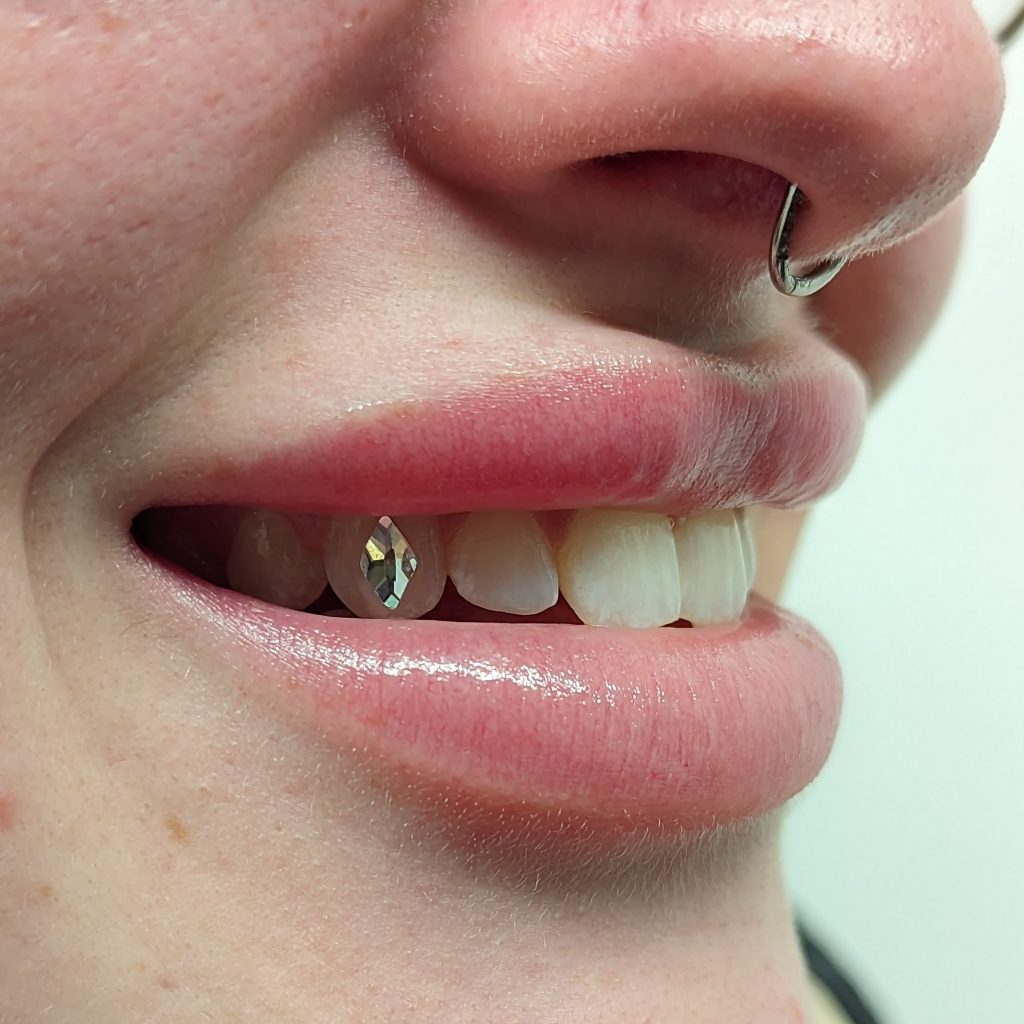
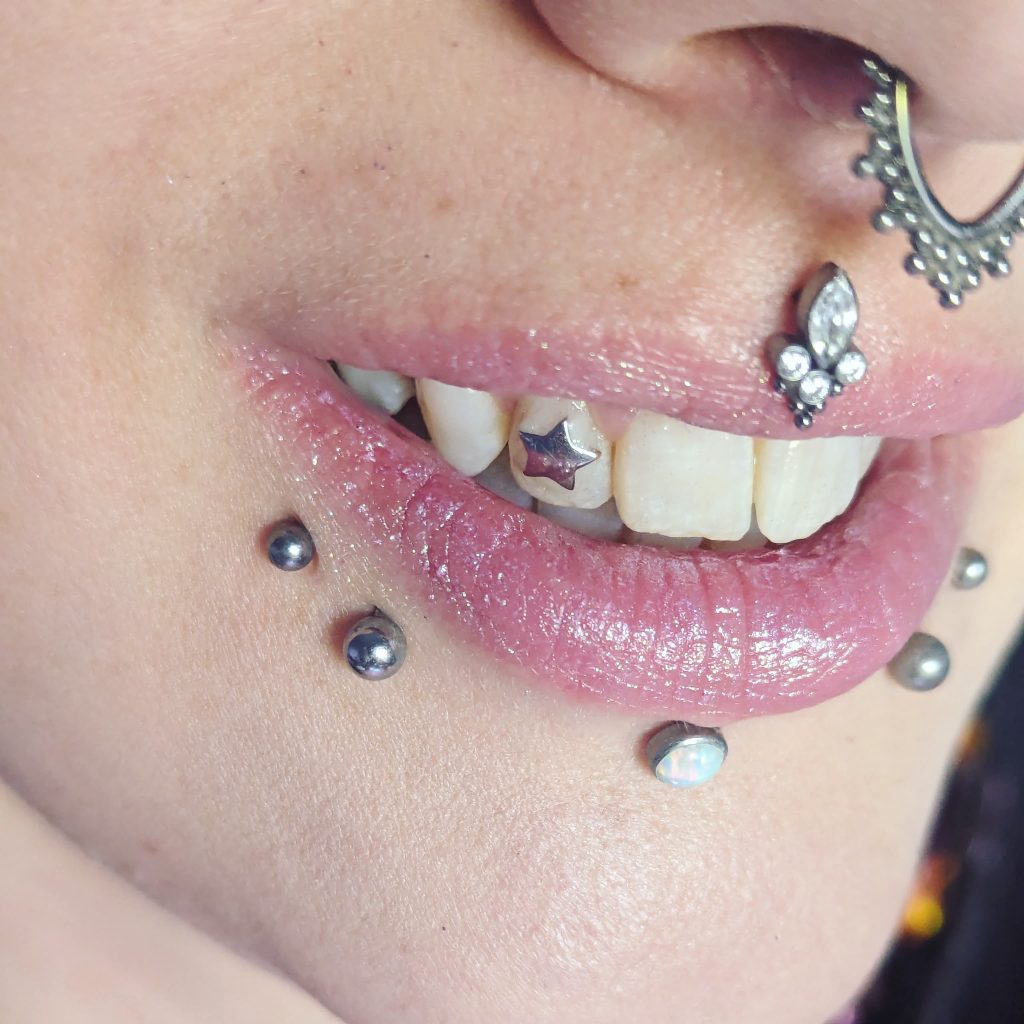
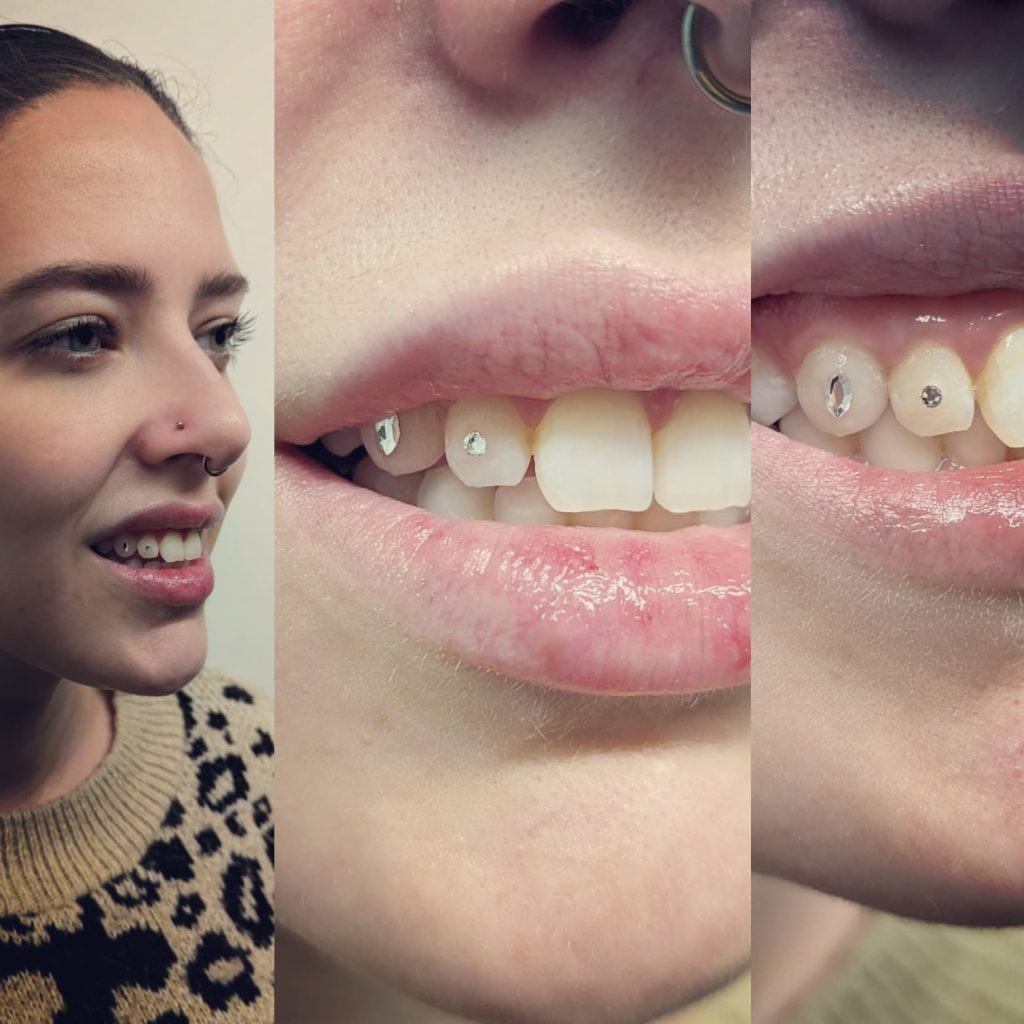
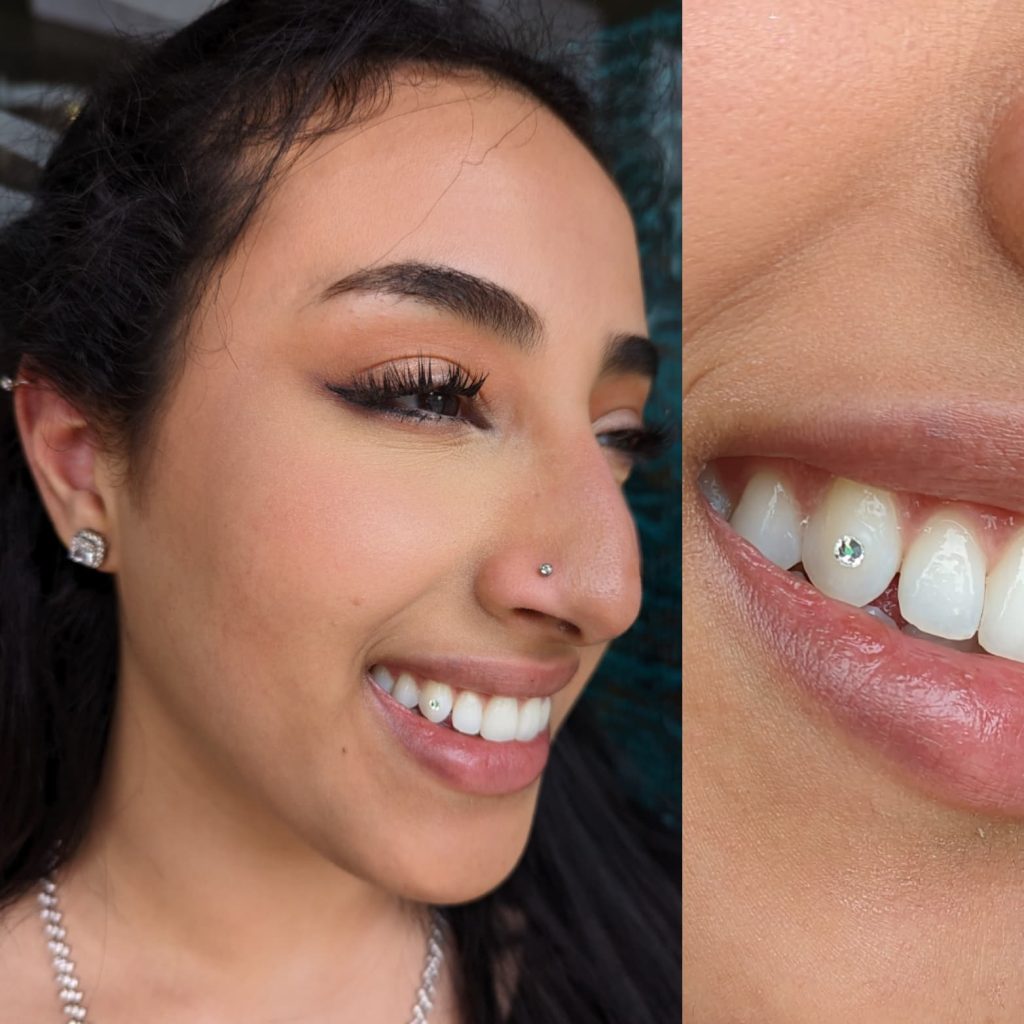
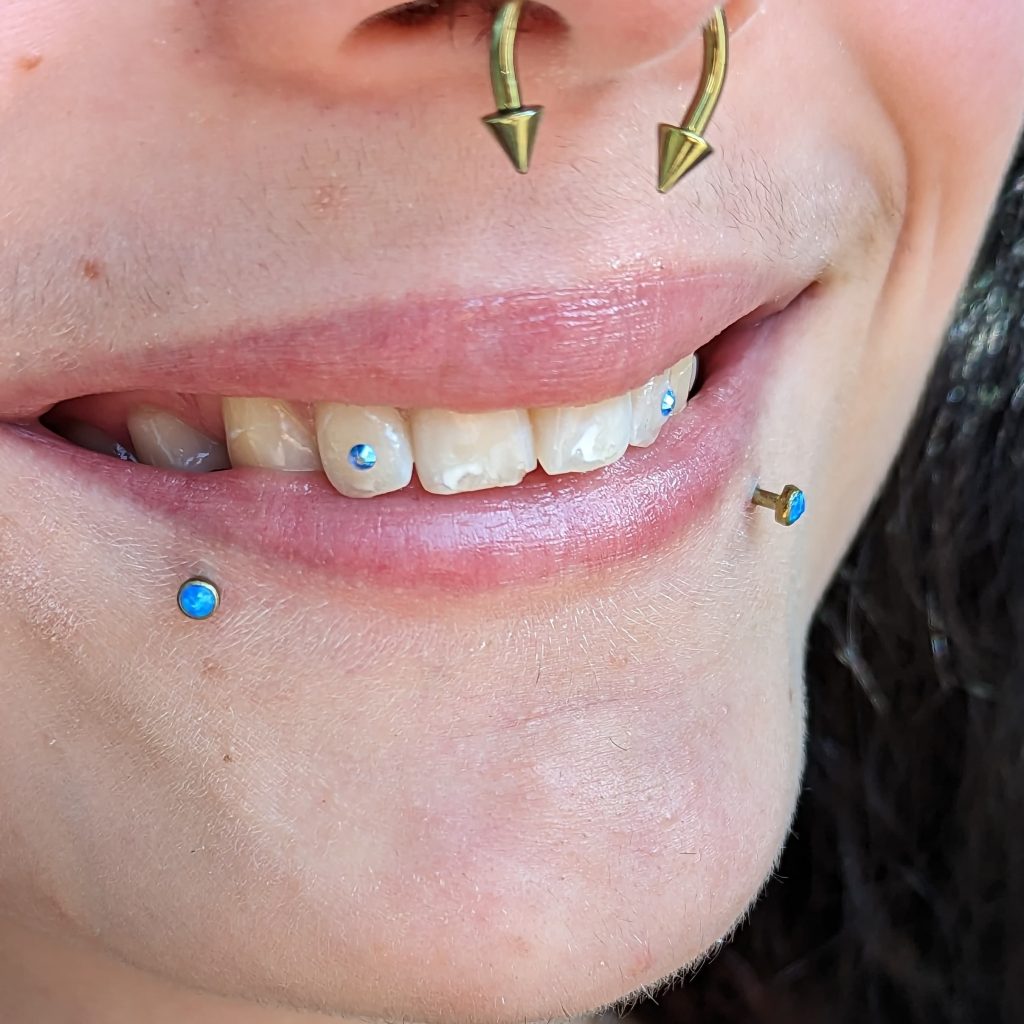
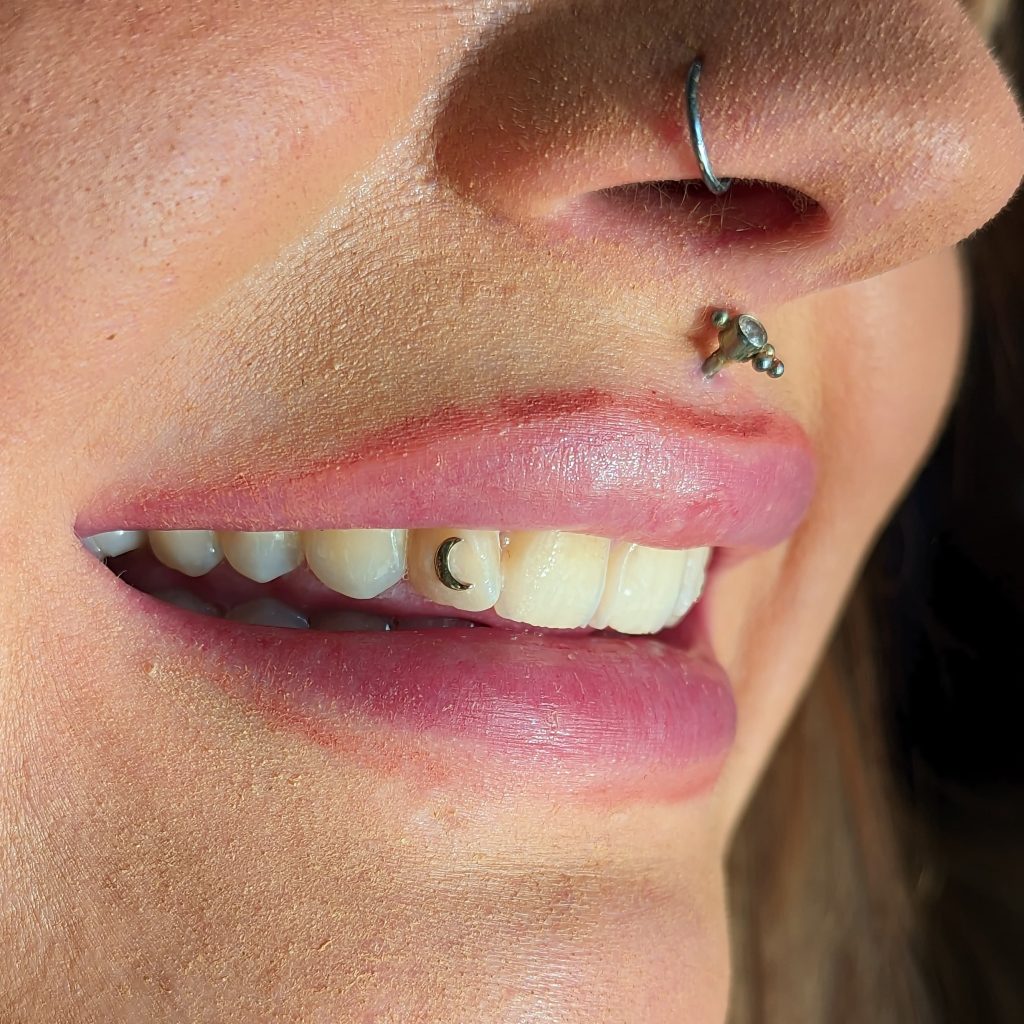
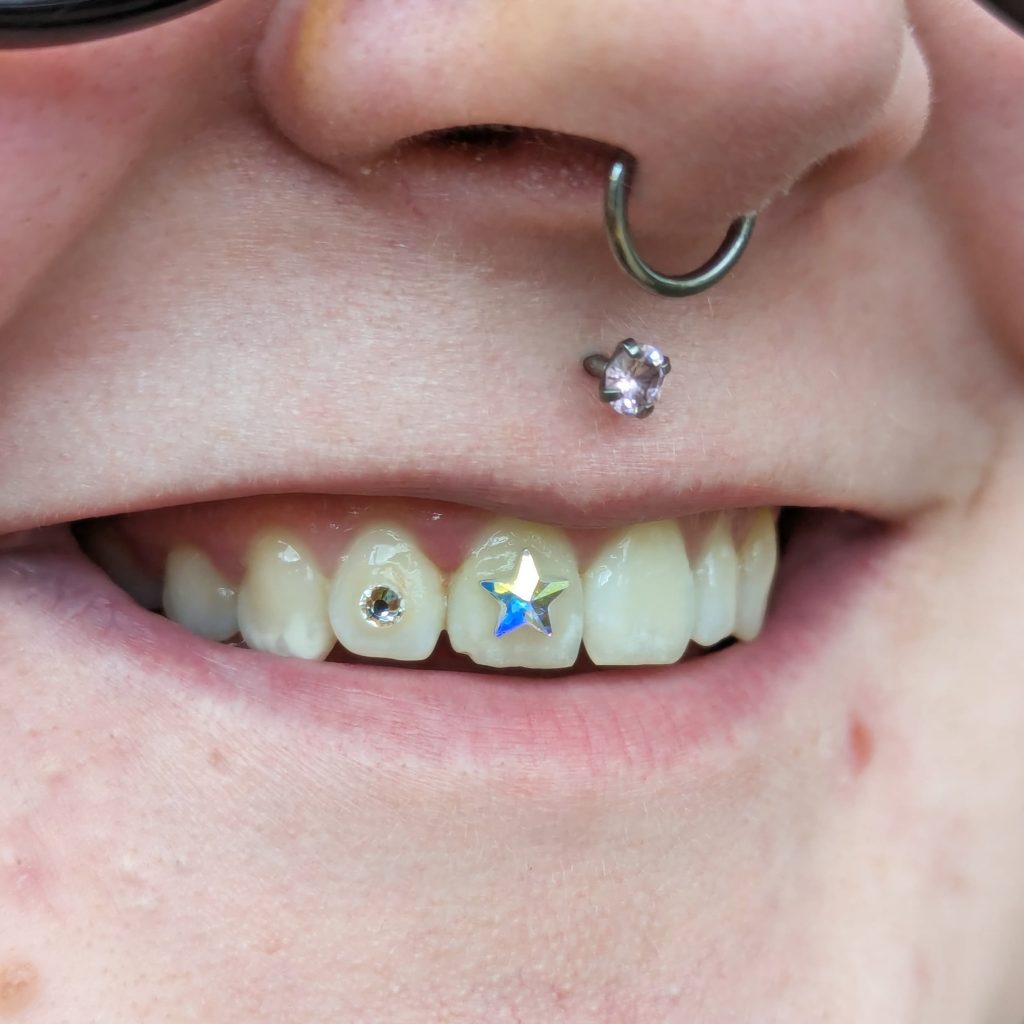
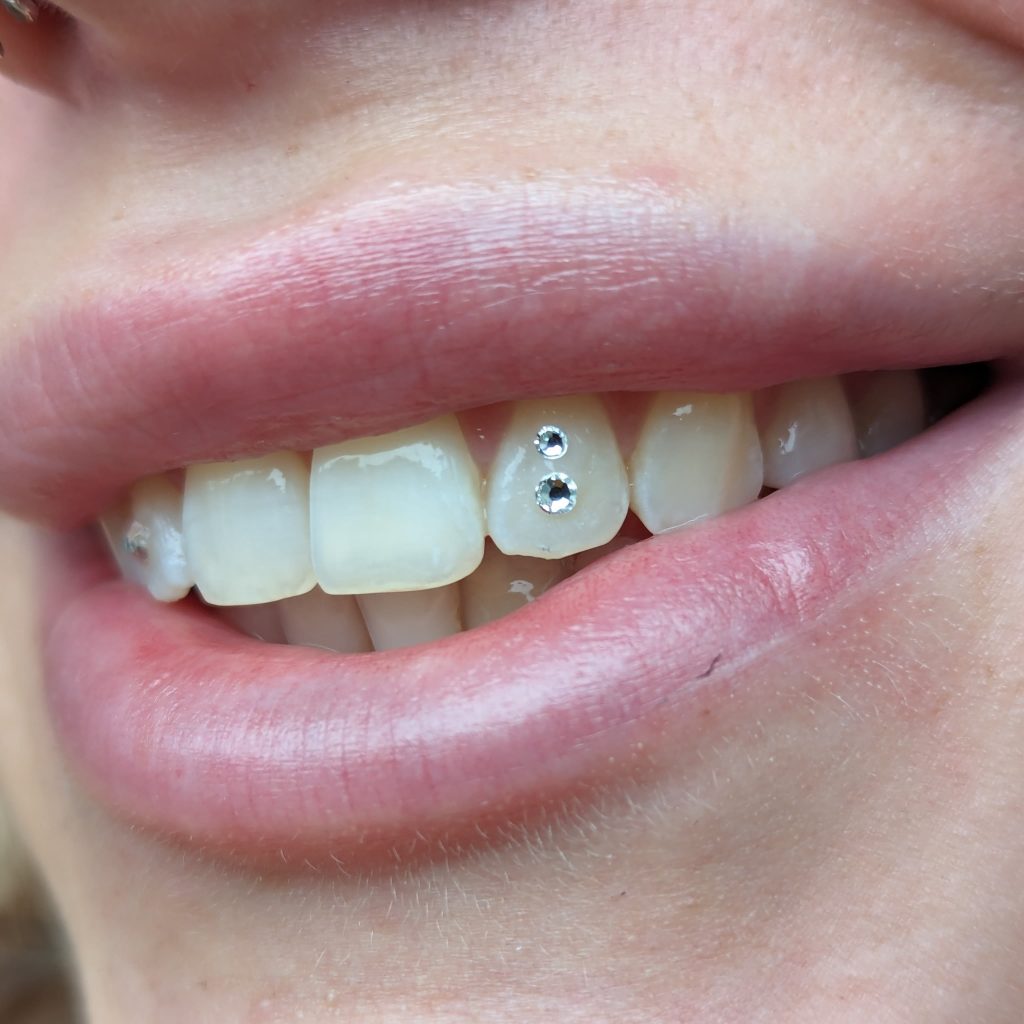
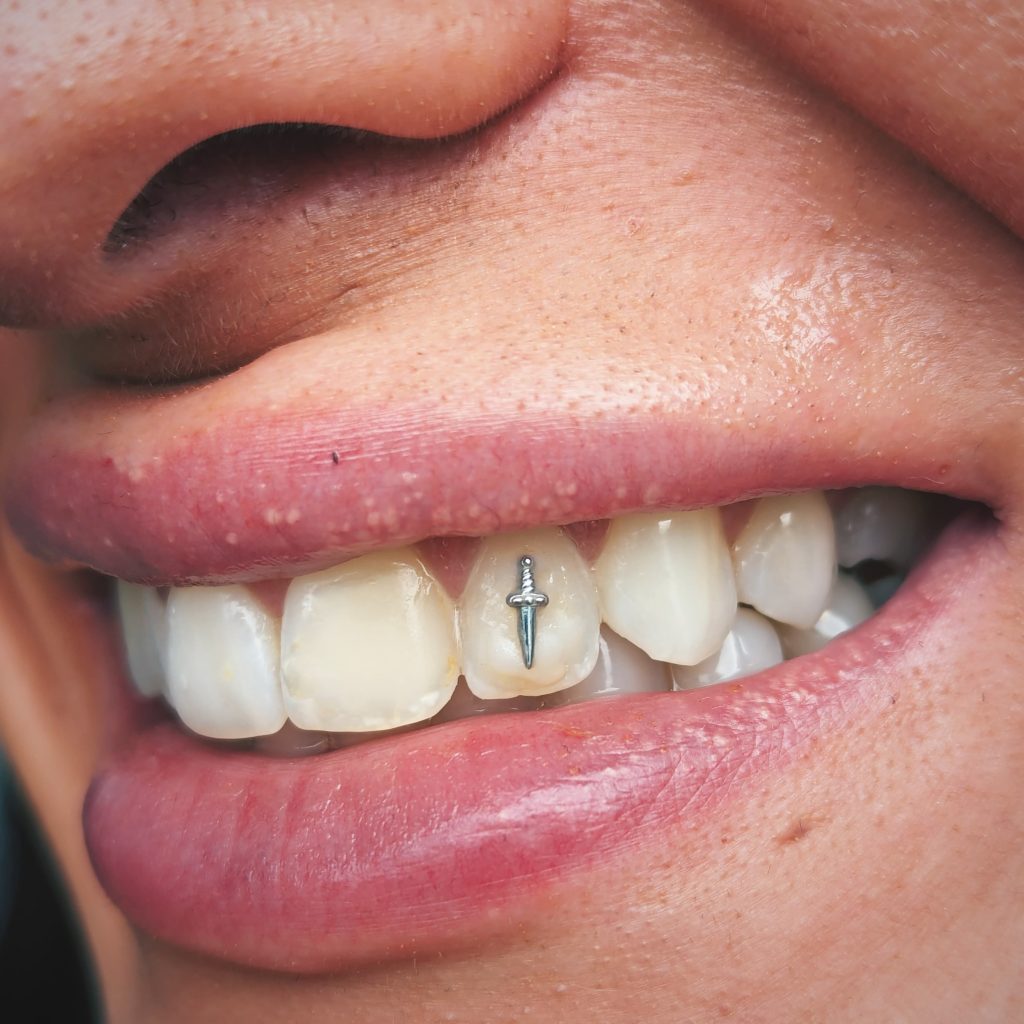
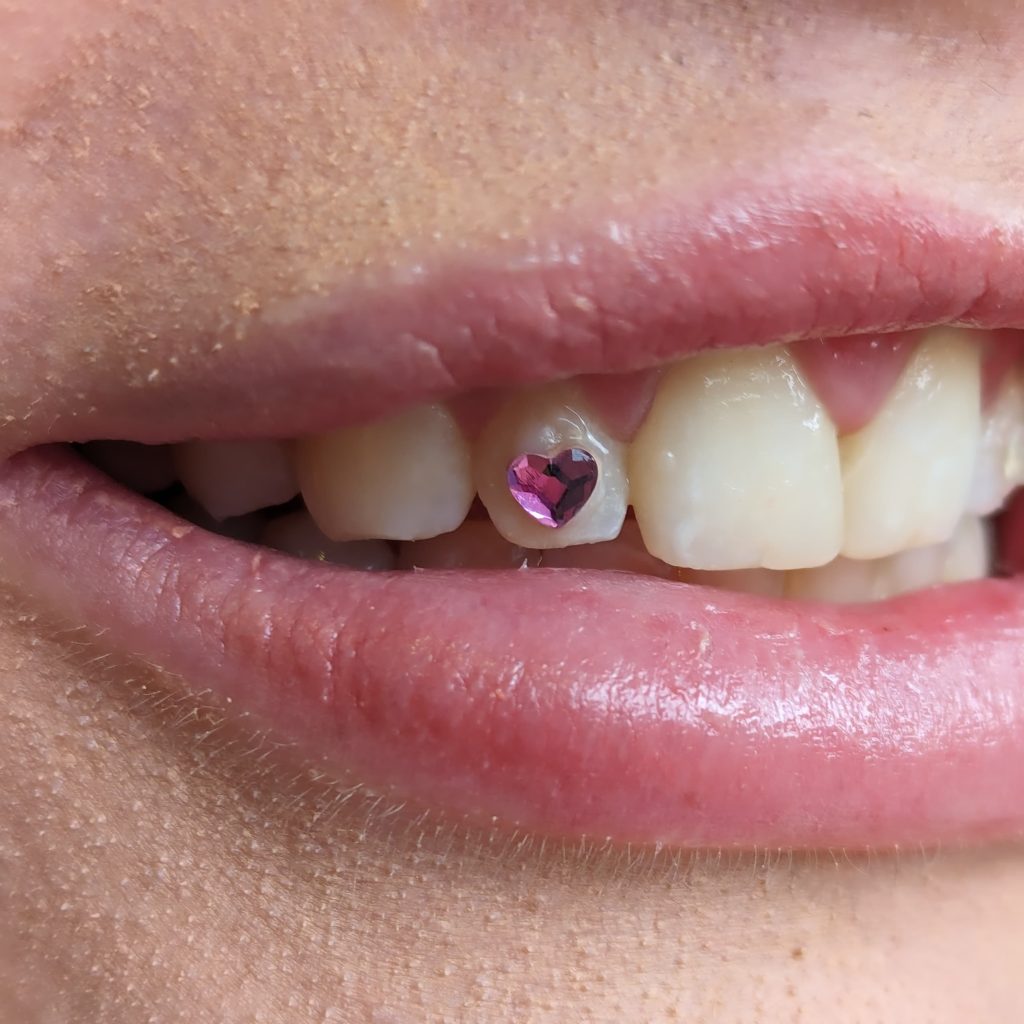
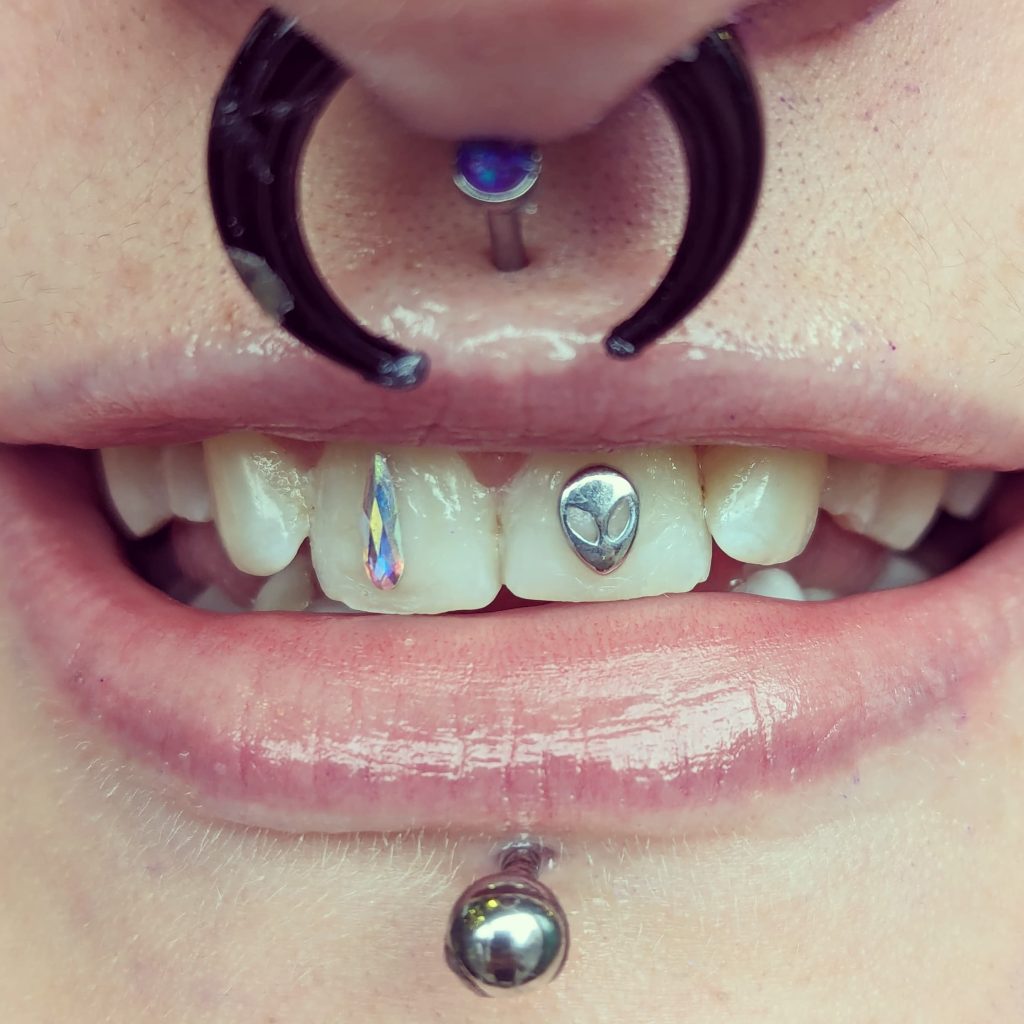
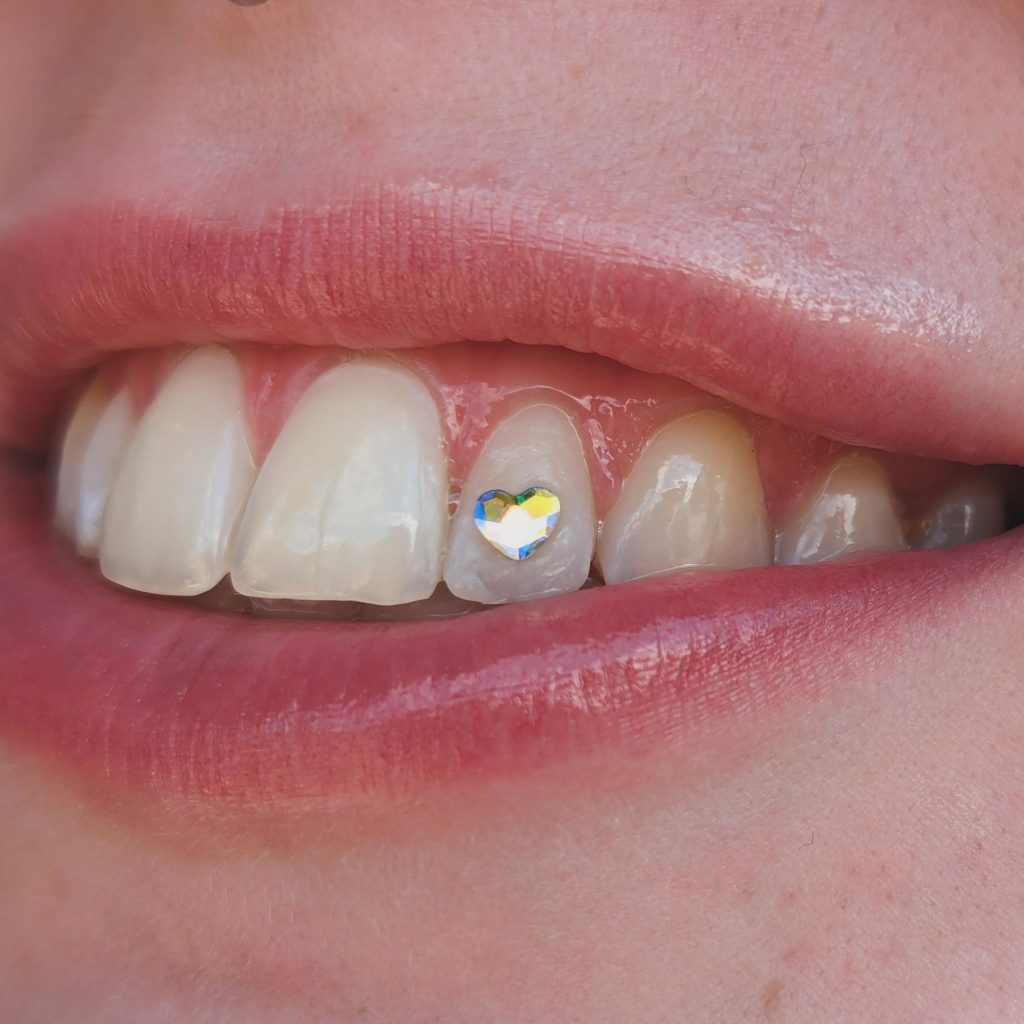
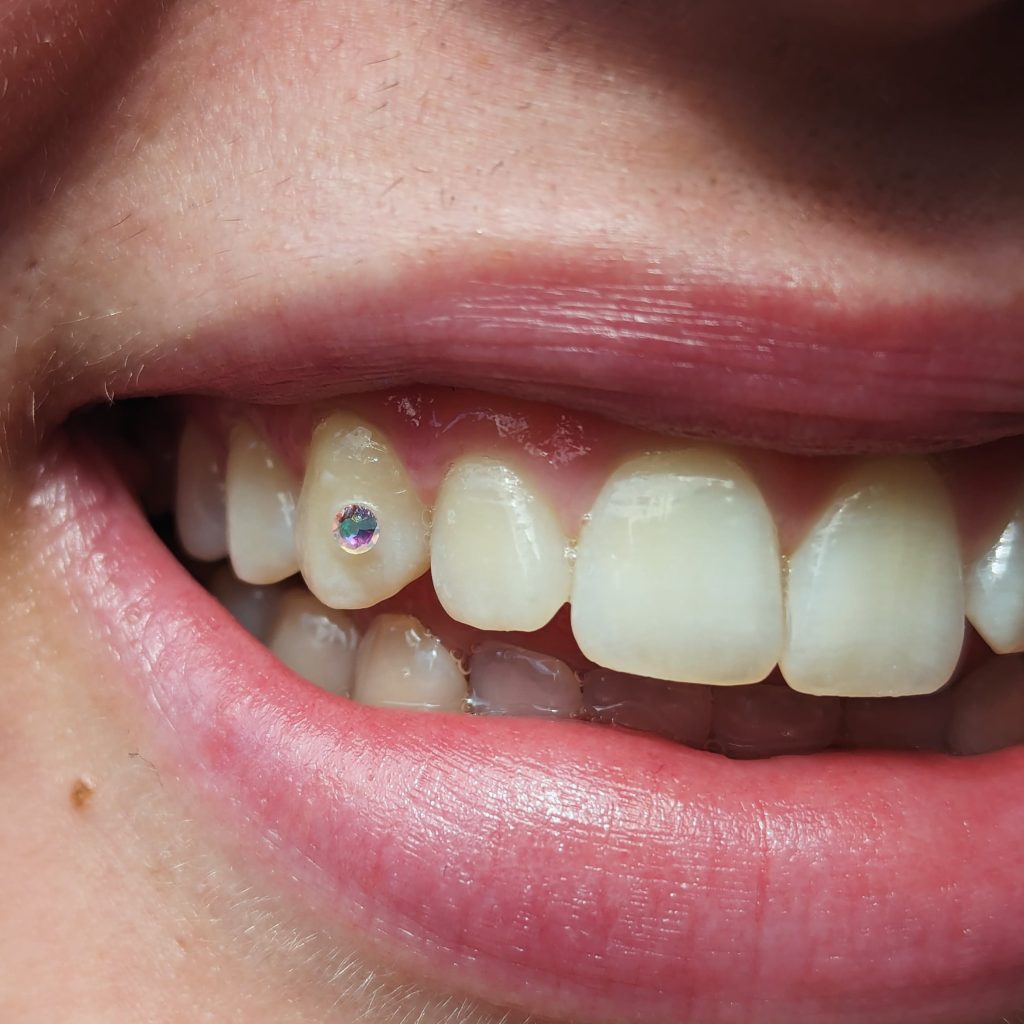
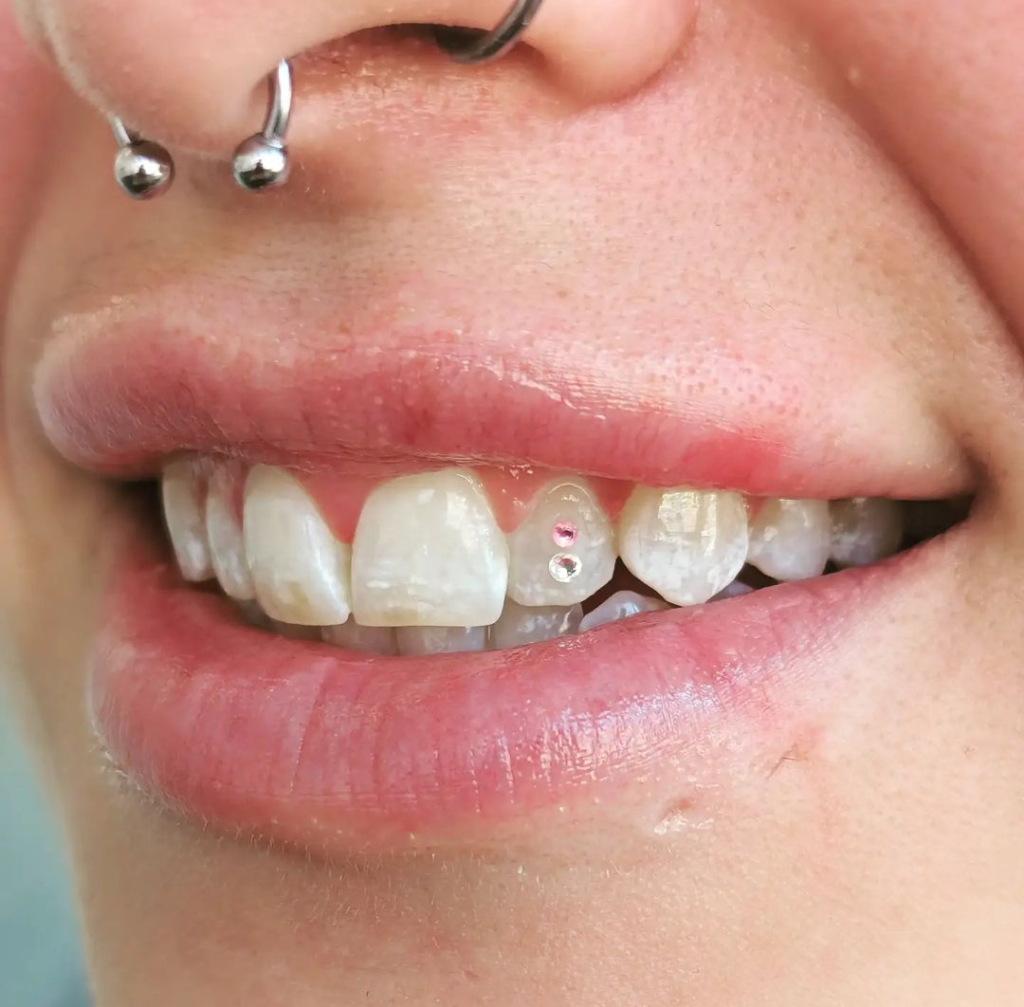
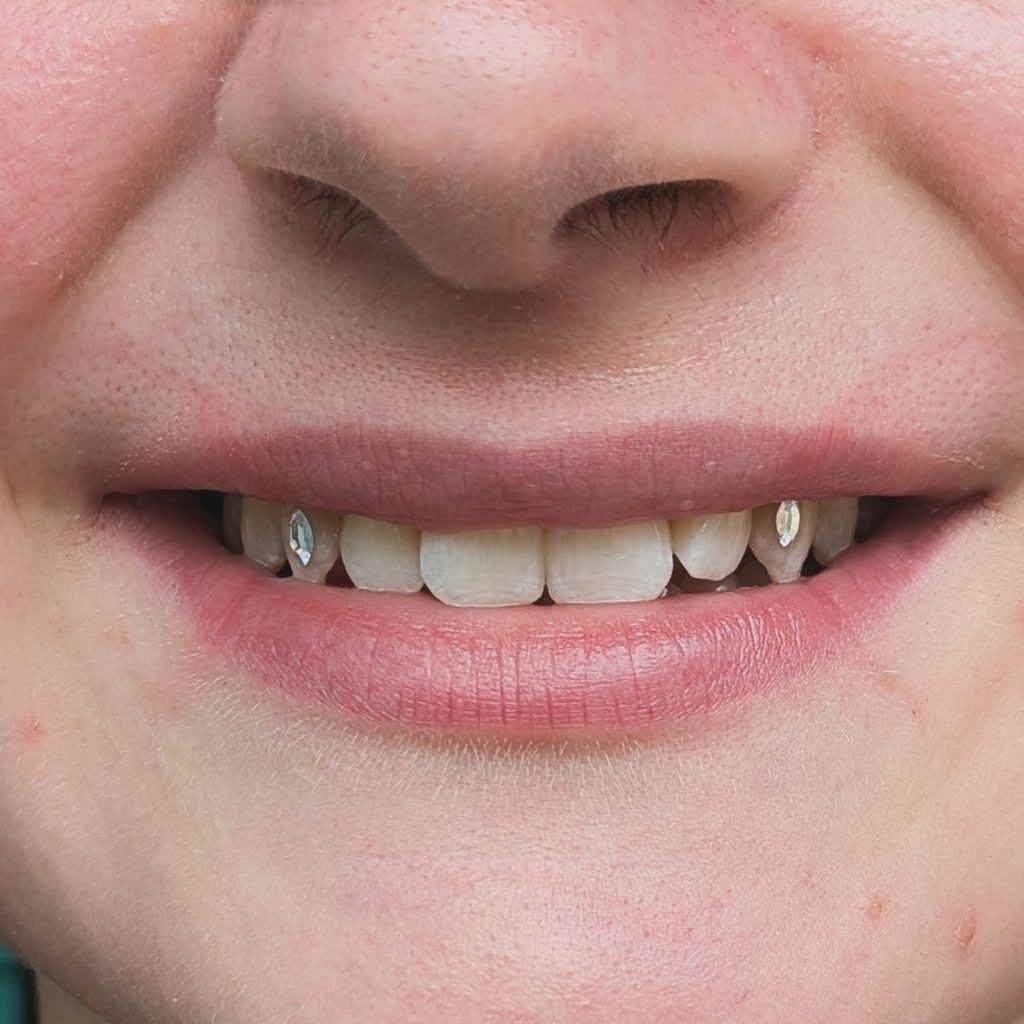
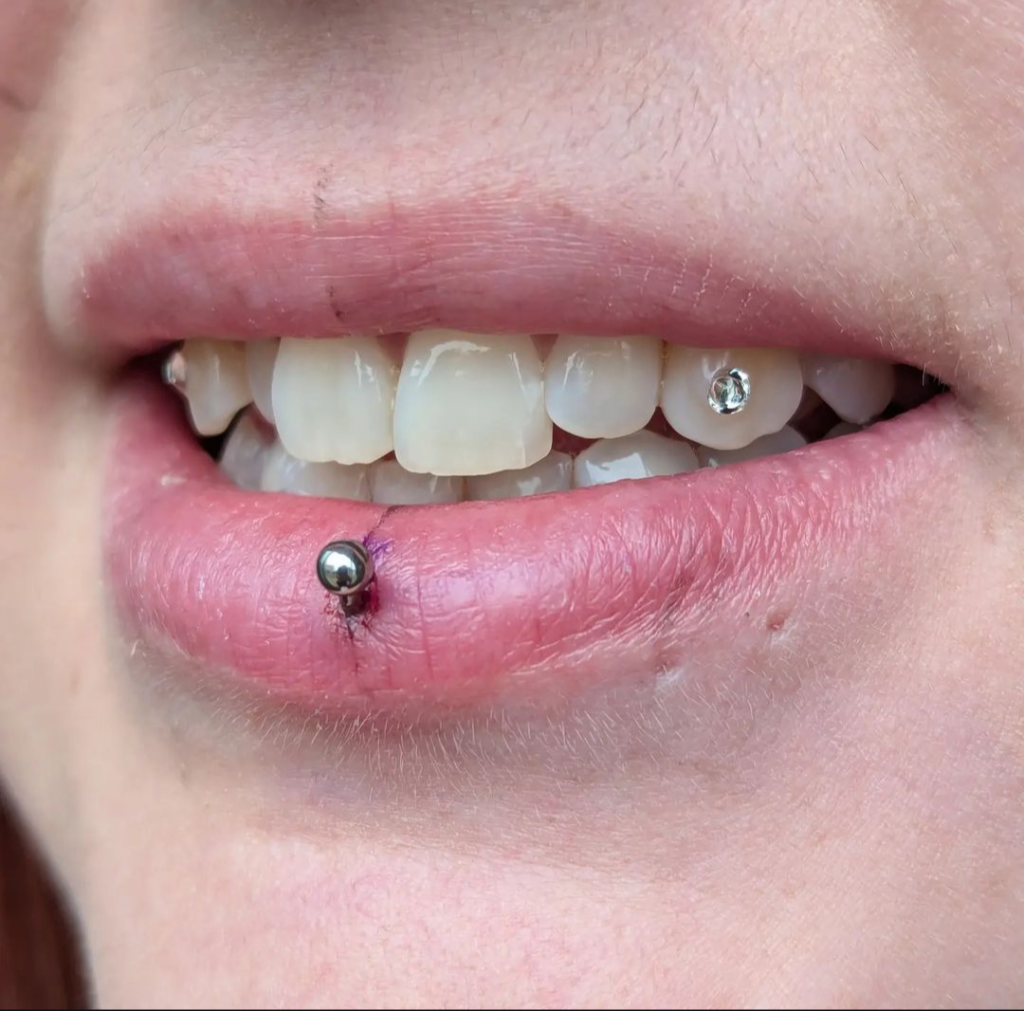
I am so excited to be offering tooth gems alongside my usual piercing services! They are available on a walk-in basis, so just call in when you’re ready to style your smile! Intricate multi-gem designs and full-coverage crystal work must be discussed in advance and is appointment only, but 99% of my tooth gem options are a walk-in! See below for examples of my work!
Many of us – of an *ahem* “certain age” – will remember tooth gems from back in the 1990s. This was in the form of a DIY ‘kit’ that you could buy from makeup counters, accessories shops and (more recently) from online retainers. The kits consist(s/ed) of a few gems, an adhesive (similar to nail/eyelash glue) and some cotton pads to keep your lip away from your teeth while the adhesive dried. Some also had plastic tweezers to hold the gem while you applied it. They weren’t/aren’t particularly good quality, and if you managed to get the gem on (I stuck my finger to my tooth when trying one!) it would usually last less than a month.
Oh, how times have changed! While the kits are still available, the quality is low, the products are unsafe, the results are very short-term and the options are veeeery limited. Practitioners can now offer a better service – both in terms of choice: simple, round crystals, shaped crystals, 18ct/22ct gold shapes/decals, and a much longer lasting (and therefore a much better value for money) product. In this blog I will answer some of the most common questions about the service, and show examples of my work – all images in this blog are of my work. I aim to show a range of applications, but it’s best to look at other practitioners’ portfolio and search online to truly get an idea of what can be achieved!
Throughout the blog, I’ll be referring to ‘tooth gems’, ‘crystals’, ‘designs’, and ‘gold pieces/shapes’ – these terms all just mean the ‘pretty thing’ that is adhered to your tooth. So, whichever term I use – this means the crystals AND the gold shapes as well.
If you have other questions which aren’t answered here, please get in touch!
A Brief History… (taken from an Instagram post by Lana at @crystalcanine)
“Tooth decoration has been around for centuries, across hundreds of countries and cultures. The first recorded instances were Italy, way back in 800BC. Women had a lot more rights than in other countries at the time, they could own property and businesses, and they had gold teeth installed as a symbol of their wealth and proof of their equality with men. About 1000 years later, the Mayans drilled holes in their teeth and placed precious gems in there, and around the same time in Japan, women dyed their teeth black as a sign of beauty. So “wearing your wealth in your mouth” is nothing new. Paupers in the Victorian era would ‘grave rob’ in the hope of finding gold teeth, and during WW2, many Jewish people had gold teeth installed, so that their ‘wealth’ couldn’t easily be taken from them when they entered concentration camps. Moving into modern history, there is a huge cultural significance of tooth decoration in modern black history, coming from the 50s and 60s and extending into the 90s and beyond. In the west indies, specifically Jamaica, an economic crisis meant that people couldn’t afford dental care, and it was actually cheaper to have gold teeth installed (gold wouldn’t rot or wear away like teeth/enamel can). This evolved into a ‘fashion’ when newer generations saw their parents and grandparents with gold teeth, and wanted to emulate this for themselves and honour their background.“
There is also a myth surrounding pirates that they had a gold tooth installed so that if they lost their life away from their families, that it would pay for a burial for them.
So, while it’s easy to see tooth decoration as a ‘new fad’, it has its roots (excuse the pun!) in ancient history!
What Can I Get?
There is a HUGE range of yellow and white gold designs/shapes/pictures and crystal colours/shapes/sizes available (rose gold cannot be used – explained later), and the only limit is your imagination! From a simple, single clear crystal to multi-gem patterns, ornate 18ct gold designs, full coverage designs. You can choose a big, bold statement or a delicate subtle sparkle for your smile. Call in to see what’s available in person, or use Instagram/pintrest/google to see what is out there – take a screenshot and save anything you like, and we can build your own design and layout (this WILL depend on your own personal oral anatomy). You don’t have to stop at just one tooth, you can do multiple designs on different teeth. While I carry an impressive range of pieces, I can order in anything requested, but as with body jewellery orders, the item(s) must be paid for in advance. The gold pieces I stock are all 18ct, but I can get most styles in 22ct on request.
I can help you figure out which tooth/teeth to have the designs on, and will advise if something isn’t possible. The most popular placement is the upper lateral incisor (the ones either side of your 2 ‘main’ front teeth), and I can advise you on what will give a more subtle look, or if you want something big and bold – we can work with that too!
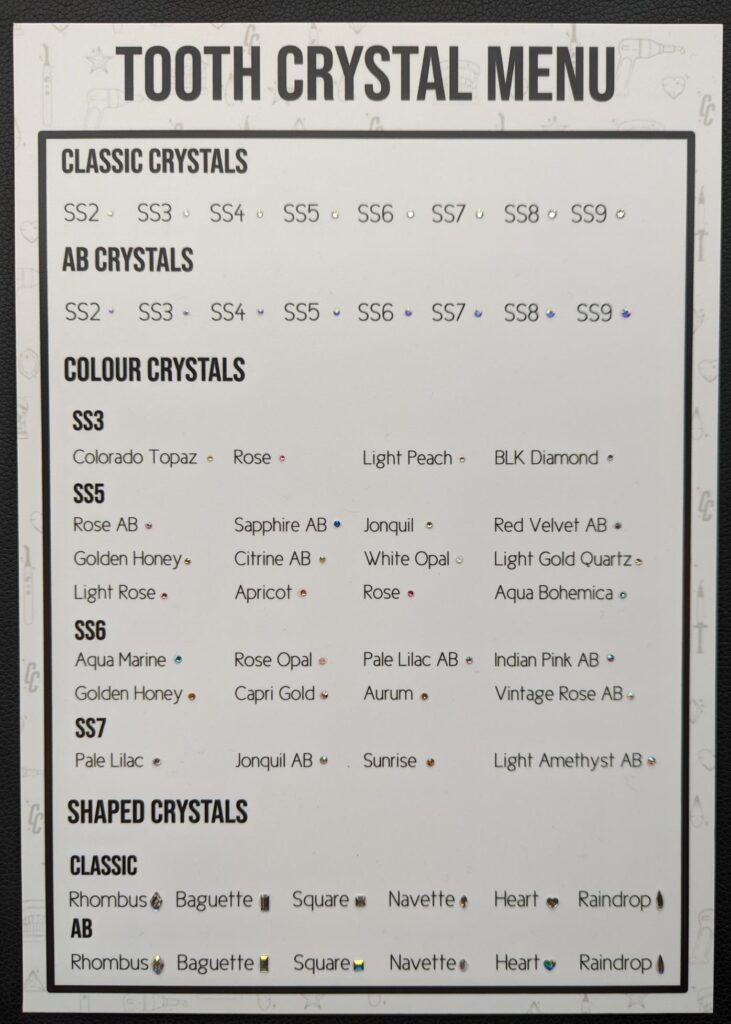
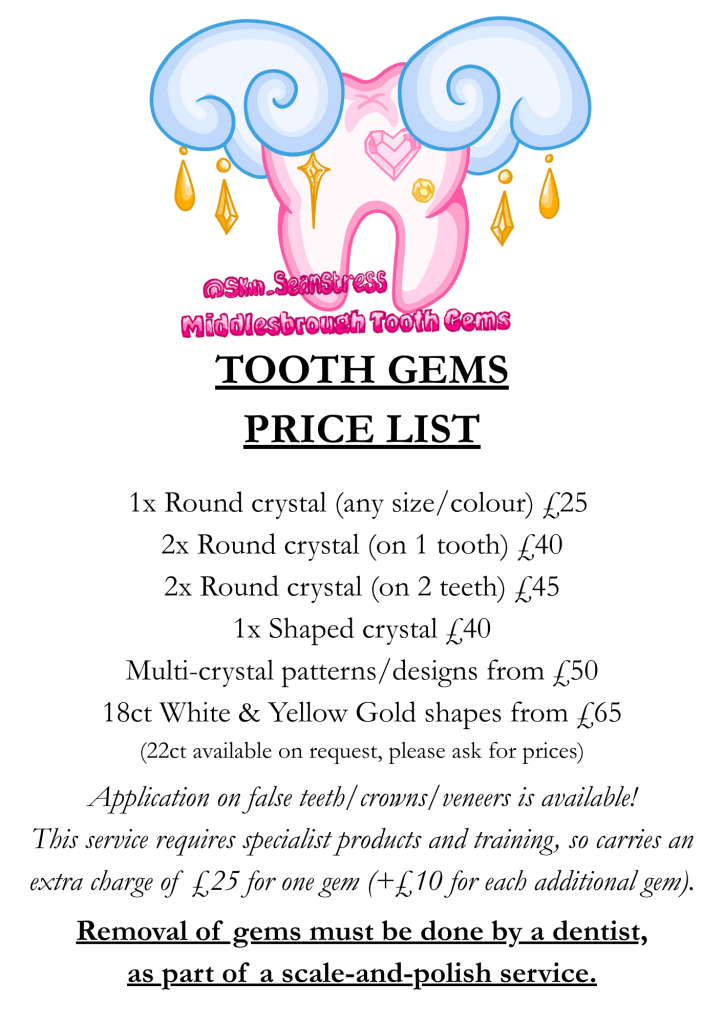
Below is a pic of my current ‘Menu’. As the gems are so small (SS1 is just over 1mm across!) it’s hard to see by just looking at this board on here, but of course you can look at it in person in the studio before choosing your gem. For a single gem on a tooth, SS5 is the smallest I would reccomend. But you can get a feel for this when you see the gem in person. I do have other crystals available and am building my stock – so it’s always best to call in to see what is available.
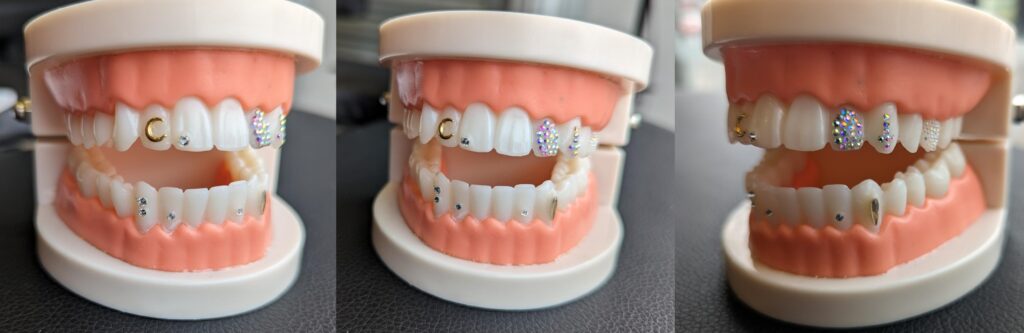
I have a tooth model (Jamal the Jaw) in the studio which will help give you an idea of how gems of a certain size will look when fitted. Again, it’s hard to tell from a photo, but you can get a good look at this in the studio.
But ultimately, what you get is up to you! Style Your Smile!
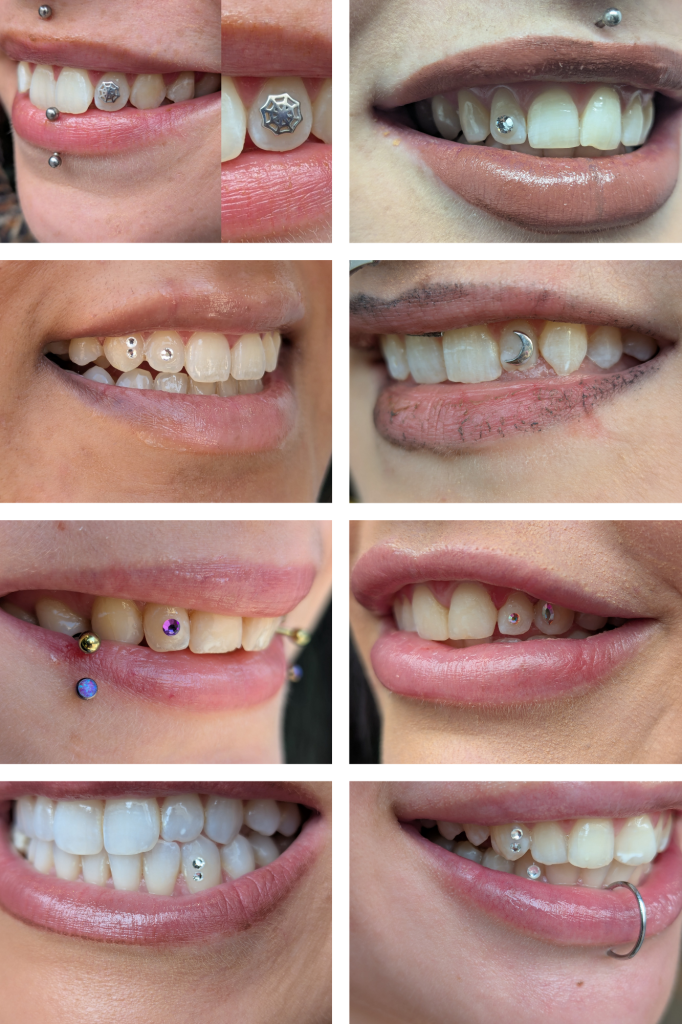
Below are some examples of my work.
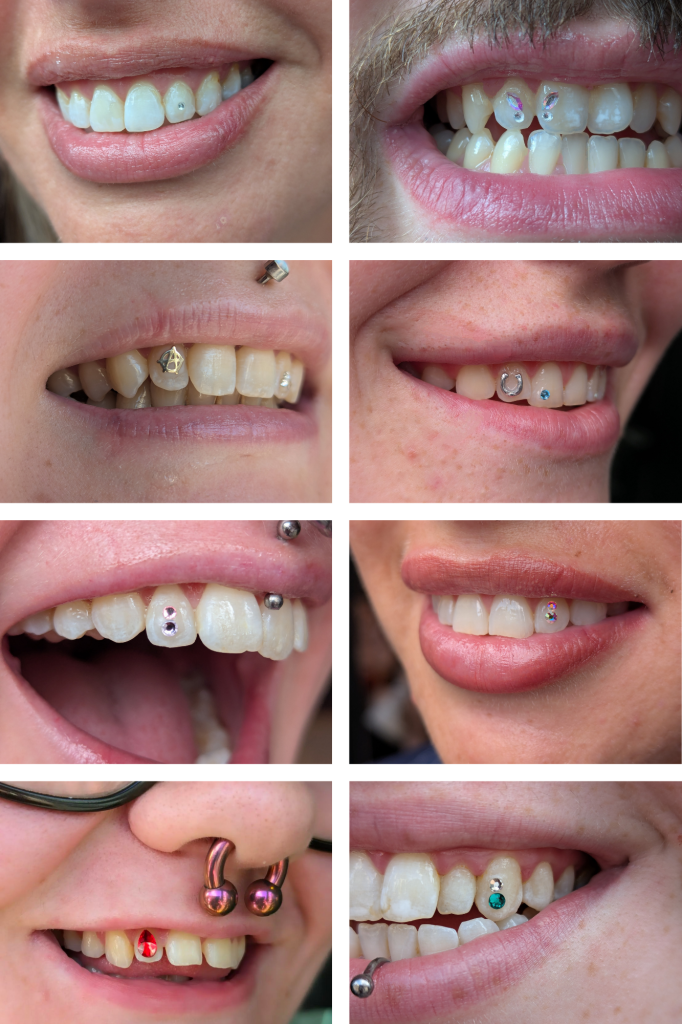
AB Crystal
Classic crystal rhombus
18ct white gold star (on myself)
classic navette and round crystal
‘The Classic’ single clear crystal
AB Sapphire
18ct Yellow Gold Moon
AB Rhombus shape
AB crystal and AB star
AB Rhombus shape
Classic Crystal double
18ct White Gold Dagger
Pink Heart
AB raindrop and 18ct white gold alien
AB Heart
AB Crystal
Double crystal stack with classic and pink!
Double classic navette (Hi, baby vampire!)
This client called in for an inverse vertical labret piercing, and showed me her crystals which were one of the first pairs I ever did back in March 2023, this pic was taken in October 2024, and they are still going strong!
To keep the flow of the blog, I will add more examples of my work at the bottom of the text, so scroll down for more!
How Much Does It Cost?
As with most things, it depends entirely on what you choose. A single crystal is priced at £25, with gold shapes being priced from £65. The price quoted will include your choice of gem/shape(s), all the materials and equipment to install it, as well as my time and skill.
I’ve seen DIY kits online cost the same as a single gem application – and even using all the crystals you are given (usually 5-10 in a kit), you will still run out before an appropriately sized/positioned and professionally done tooth gem will fall off.
As stated on the price list, there is an extra charge for applying to false teeth, so a single round gem would be £50, two round gems on 1 tooth would be £75, and so on.
How Long Do They Last?
Unlike the DIY kits, which last for maybe a couple of weeks, these can be expected to last between a month and a year or more (but can be removed at any time – details on this later). How long your tooth gem lasts depends on how well you take care of it (see aftercare section at the end of the blog).
This echoes many other beauty and aesthetics treatments, like acrylic nails, eyelash extensions, hair extensions, botox, filler, etc – while they can be long lasting, poor aftercare will reduce the time you have it, and as much as we want to keep them as long as possible, they must not be viewed as permanent – but people are often surprised with how long these can last when compared to the DIY kits.
A well-placed and appropriately applied tooth gem can be expected to last from an absolute minimum of a month to years (yep, not a typo – YEARS!)
For tooth gems on false teeth (this includes dentures, veneers and crowns), a much shorter lifespan is to be expected (see later in the blog for more info on this!)
I guarantee any tooth gem on a natural tooth for 2 weeks. If it becomes detached in this time, I will re-apply it free of charge, as the likelihood is that this is due to an application error. Do contact me ASAP if this happens so I can offer the 2 week guarantee. I cannot offer this guarantee on tooth gems applied to false teeth.
At the time of this edit, I have been offering tooth gems for nearly 3 years. In this time I have had only THREE crystals come off natural teeth before the 2 weeks, and seeing clients return months later, I am confident that my application process is solid.
How Are They Done?
While the procedure is relatively quick (around 15-20mins for a single application), there are a lot of individual steps. Once you have selected a gem/design and which tooth to place it on, you will need to fill in a consent form (just like a tattoo of piercing – though I have completely separate consent forms for tooth gems, as I need additional info from you) and shown to the procedure area. You’ll be sat slightly reclined, and given a pair of glasses to protect your eyes (the curing light is very bright, so the glasses are important to wear for your safety). I use a cheek retractor (yes…. I know) to hold your lips away from the teeth – if any saliva gets on the tooth while working, the gem won’t stick and we have to start over. To keep your month still, you will lightly bite onto a roll of cotton. Once you’re ready, the tooth is cleaned with water and dried using a mini hairdryer, and the process begins.
(The following is an application on natural teeth, on false teeth, there are additional steps, and different products used).
First, a product to dehydrate your tooth is applied – not all over it, just on the area we’re working on. It’s left on for 30 seconds and will give a strong bond with the adhesive. Tooth is wiped down with water again, and dried. Next, a sealant is painted onto the same area, and set in place using a special light. This sealant protects your tooth. Now the exciting part – a composite (like a dental adhesive) is put onto your tooth, shaped and neatened up. Your gem is gently pressed into the composite, and again, the light is used to set it. The tooth is wiped down to ensure no residues, cotton rolls and cheek retractor removed…. And you’re done!
It IS a short time, and painless, but it can be uncomfortable (especially with full coverage applications, as they take longer), but if at any point you need to stop, I ask clients to raise their arm, and we’ll abandon the procedure for a few minutes and come back to it when you’re ready – your comfort comes first.
Is There Anything I Should Do (Or Not Do) Before I Come And Get It Done?
Like we all do before the dentist appointment, a thorough brush and freshen up is a good idea.
As you can’t eat for 2 hours after the procedure (see aftercare), eating before you come in is a good idea too – but not essential.
I’d recommend not wearing any lipstick, as it will just get smudged. Lip balm is absolutely fine, and I would recommend bringing some with you as having your mouth open and being unable to wet your lips can cause dryness.
It’s not essential to have any whitening done, but if this is something you do regularly, that is fine (and after your procedure, you can have your teeth whitened as usual).
If you have any planned dental appointments/work (such as a filling), it is sensible to wait until afterwards (give it a month to be settled) before getting a tooth gem, as your dentist may need to remove it before they can work.
If you have cold sores or ulcers around or in your mouth, wait for them to be healed completely before getting a tooth gem.
Can They Be Done On Veneers, Crowns Or False Teeth?
YES! When doing my 2023 training, we were unable to offer this service on any artificial surfaces. In late 2025, the company I trained with (Crystal Canine) launched an additional training session for applications on false teeth. I will use the term ‘false teeth’ to refer to any porcelain or composite teeth/crowns/veneers.
There are more ‘steps’ in the process, and 3 extra products to prep the tooth, this means that there is an additional charge for applications on false teeth. Please contact me to verify any pricing if you have false teeth, and refer to the pricelist shown above as a guide.
False teeth do not behave like natural enamel, meaning results will vary from person to person and longevity cannot ever be guaranteed on veneers, crowns or dentures. Some porcelain and composite materials hold better than others and this is completely out of both myself and the client’s control.
As many false teeth are much ‘whiter’ than natural enamel, a different composite (adhesive) is used to match this.
To ensure the best possible results, I will need to know if you have procelain or composite veneers, as the processes for each are slightly different. If unsure, ask your dentist!
Ironically, if you already have a ‘gold tooth’, you cannot add a tooth gem to it, as the gem will not stick to the gold.
Can They Be Done While Wearing Braces, Or A Retainer/Mouth Guard/Gum Shield?
With braces – you must wait until they are off for good BEFORE you get a tooth gem – this includes the ‘invisalign’ style retainer/brace. Braces are there to move your teeth, so if you get a tooth gem the day before you get braces, it will look in a completely different position/angle when you get your braces off (though to be realistic, if you rock up to get your braces with a tooth gem, your dentist will take it off). As a teenage ‘brace-face’ myself, I know how frustrating braces and aligners are (no chewing gum for 2 years… are you KIDDING ME??) maybe this can be a treat to yourself when they are off. I’d be happy to have a consultation with you, figure out what you want and if it was a specific gold piece you want it, get it ordered, and then come brace-off day, we can treat you to something super special.
For retainers, it depends on the type.
FIXED – The ‘fixed’ retainer, which is a metal strip which is placed behind your teeth (so, not visible at the front) is not an issue for tooth gem application. As long as you wait a month or so after having it fixed, no problem.
HAWLEY – Hawley retainers are not so common in the UK, they are a single wire (running IN FRONT of the teeth) with a plastic plate that sits on the roof or base of the mouth holding the wire in place. While tooth gems CAN be fitted on someone that wears these, you’d need to bring it to your appointment and it WILL limit what you can get, as nothing must sit behind the wire.
ESSIX – Essix retainers are the clear plastic moulds that fit over your teeth. As these are relatively inexpensive (and should be replaced from time to time) it may be worth getting a new retainer after your tooth gem, so it can accommodate for it. You can also ‘doctor’ your current retainer by cutting a small section out to leave space for the gem. This is something you would have to do yourself and bear in mind, it COULD affect your retainer’s performance and effectiveness. Sometimes they are worn only on the top OR bottom set, if you wear only one retainer, then the OTHER set of teeth is ok to work on.
MOUTH GUARDS & GUM SHIELDS – bring whatever you wear to your appointment so we can see if there are any teeth that are not in contact with it, but as with the Essix retainer, it may be worth getting a new one. Please remember that these are safety devices, so do NOT cut sections out, as this may stop it working.
With Hawley and Essix retainers and mouth guards/gum shields – it’s important to understand that the retainer being in contact with and moving over your tooth will absolutely affect how long it lasts. You will see a shorter lifespan of your gem, and its possible in the case of the Essix retainer, that the retainer itself could be damaged. I would reccomend calling in with your retainer/gumshield and we can plan out the best way to do this, then you will have more info on your specific anatomy and dental device. Consultations are free of charge.
What About Fillings?
Generally fillings are in your molars and pre-molars, so a tooth gem on there wouldn’t be visible (so no real point in getting it, though it IS possible!) but as long as the filling is a month old, and the ‘entrance’ of the filling isn’t on the side of the tooth that the gem is on. Fillings are usually made on the top of your tooth in the grooves there, so its likely to be absolutely fine.
Any Other Restrictions On Who Can Get Them?
It is not recommended to have a tooth gem done shortly after a dental procedure, lip fillers or other cosmetic treatments in and around the mouth (wait for 1 month after any procedures/treatments) and not while suffering from a cold sore or an ulcer on your lips/inside of mouth. Wait for your cold sore/ulcer to heal fully before getting a tooth gem – if you get one AFTER your tooth gem, you can use your creams/patches as normal.
If you have a cold or blocked nose, you may find the procedure difficult, as you will need to breathe through your nose – your mouth won’t be blocked, you can still breathe through it, but you will find it much easier to breathe through your nose. Colds are temporary – you can come back to have this done when you’re back up to 100%.
During pregnancy/breast feeding, it is recommended that you do NOT get a tooth gem. Right now, your body has enough going on without an additional procedure. Rest, relax and allow your body to recover from such a big change. If you aren’t currently pregnant or breast feeding, you can have a tooth gem procedure, as it is not invasive – so you don’t need to wait for any recovery time.
If you have lip piercings that exit in the mouth, or cheek piercings, it’s best to get the gem on a tooth which is not near a piercing/jewellery – your lip jewellery may cause friction on the gem (and as we know by now, this can shorten the lifespan of the gem).
Your ‘Bite Type’ – which is how your teeth sit naturally/at rest – will determine a lot of what will be possible and visible when it comes to your chosen design. As this blog is ALREADY super long, I won’t go into too much detail, as everyone is different, but there will be a discussion during your consultation (while you’re in the studio before the procedure) as to what your options are.
A damaged or decayed tooth must NOT have a gem applied – only a dentist can help you with this one!
I’m Worried About Damage To My Teeth – Can This Procedure Cause Oral Health Problems?
The procedure doesn’t put holes in your teeth (no drills or wires) or cause any permanent damage. It is completely reversible (see below) if you decide it is not for you, tooth enamel is strong stuff – the gem will come off before your enamel would. The gems can feel uncomfortable for a few days, but have no sharp edges or points that could cut or graze the inside of your lip.
When talking about tooth damage, it’s appropriate to mention that the crystals used are lead-free, and that the gold (or white gold) is 18ct or 22ct. Rose gold CANNOT be used, it contains copper which can permanently stain your teeth a murky green colour. Silver is not appropriate either (so white gold is used if a silver colour is desired).
The products used in the application do not touch any of your gum/lips/soft tissue until they are cured (set), so the risk of an allergy is absolutely minimal – but if you have ever had an allergic reaction during a dental appointment, tooth gems may not be for you (though an allergy to an anaesthetic is the most common, as there are no anaesthetics used during a tooth gem procedure, I feel it’s safe to say that this procedure is extremely low-risk).
What Will My Dentist Say!?
I sheepishly went into my dentist’s less than a week after fitting my own gem. I expected a telling off, but he was more curious about it than anything else! He asked how it was attached (dental grade composite) and seemed relieved that I hadn’t just coated my tooth in superglue. I was in for a check-up and he gave me a scale and polish working around my gem (though I told him that if it was too hard to work around, taking it off was fine).
My crystal lasted until my next dental appointment (6 months later) and as I was hoping to change it for something different, asked my dentist to remove. It was a different dentist to the first time, but she was happy to take it off.
Does It Hurt?
This is a non-invasive procedure; no skin or tissue is broken (no blood) and no sharp implements are used. It can be uncomfortable having your mouth open for so long, and having someone poking at your tooth but it is not painful, just mildly uncomfortable for a short time. The cotton rolls and cheek retractor used to prop your lip away from the tooth are probably the most uncomfortable part of it.
When the procedure is finished and your lip is back into contact with the front of your teeth you WILL feel the gem there. Our mouths are sensitive and we notice any changes very quickly (if you have ever had an ulcer that you can’t stop poking with your tongue, or something stuck in your teeth, you will know what I mean). But you WILL get used to this ‘new thing’ within a few days. Anyone with an oral piercing (lip piercing, tongue, smiley, etc) will know that while it’s a super strange feeling at first, after a few weeks, it feels weirder when it’s taken out! Give yourself time to get used to the gem being there, and you’ll find that you adapt to it quickly.
How Long Does It Take?
As with pricing, it depends on what you choose – a single gem takes around 15-20 minutes, a double on 2 teeth would be around half an hour, but more elaborate designs/multiple tooth applications can take upwards of an hour – I would give a rough idea of time when you have selected your design(s) if you needed to know.
Do I Need An Appointment?
NO APPOINTMENT NEEDED! I’m offering tooth gems on any working day, at any time, without an appointment! I’ve started using ‘prep packs’ with my required items all picked out and ready to go, so my set-up time is massively reduced and this means that I can offer this as a walk in procedure, alongside all my other services! For full coverage and intricate designs, I would need to arrange an appointment with you – as this would take much longer, so would get you in at the end of the day and stay back to do this, so that neither of us feel rushed. However, 95% of the clients I see are done as a walk-in. Contact me, or call into the studio for a chat if you want to make sure you’ll be seen as a walk-in.
Is There An Age Restriction?
Currently I am only offering the service to people aged 18 and up – photo ID must be shown to prove your age.
Can They Be Removed?
They can ONLY be removed by a dentist – I cannot remove them for you, (see below about the gems coming off by themselves).
To have them removed, you would need a dentist appointment for a scale and polish, which will remove the composite completely, your tooth will look exactly as it did before you had the gem. You could request this as a stand-alone appointment with your dentist, or you can ask for it as an extra service at your next 6-month check-up. If considering a tooth gem, it may be worthwhile contacting your dentist and asking for availability and costs for a scale and polish, so you know what to expect should you want/need to have the gem removed. Once the gem has been removed, you can have the procedure done again if desired (but crystals/gold pieces cannot be re-used).
Bear in mind that while tooth gems are relatively discreet, I cannot offer any refunds if a school/workplace deems them to be unsuitable for whatever reason, nor can I offer any reimbursement for any charges from a dentist.
Some people have reported resistance from dentists and even a refusal to touch the tooth in question. This is NOT cool. I have drafted a response to any reluctance from your dentist below, please feel free to use it!
“Attaching ‘tooth jewellery’ does NOT come within the practice of dentistry as defined in Section 37(1) of the Dentists Act 1984. This is not a dental treatment or medical procedure and no dental tools are used.
All gold is 18ct or 22ct yellow or white gold, crystals are lead free with no solvent or adhesive. Gems (crystals and gold pieces) are applied using PA etch, sealant, and a flowable composite (specifically herculite A2). No instruments or drills are used at any point and this client was made aware (before and after the procedure) that removal cannot be done by the technician performing the application, only by a dentist or dental hygenist.”
What Happens If/When The Gem Comes Off By Itself?
On a natural enamel tooth, if this happens within 2 weeks of having the tooth gem, I will re-do it free of charge if desired, but cannot refund the cost. Looking after your tooth gem and following aftercare (see below) will give your tooth gem the longest possible life. But like many beauty treatments, these can and do come off over time (like losing an acrylic nail, eyelash extensions coming off).
Due to the varying materials used in false teeth/veneers, I cannot offer any guarantee with applications on false teeth.
When the gem has been removed (either purposely or accidental), the gem (crystal/gold) cannot be re-used but you could absolutely have the procedure done again to that tooth if you wanted to, but only after any remaining composite (adhesive) is removed.
If the tooth gem comes off completely, taking the composite with it (your tooth will feel smooth if you run your tongue over it), no further action is needed. This is just the tooth gem’s life cycle!
If the gem comes off but leaves the composite (adhesive), your tooth will feel rough. While this will not do any damage, there will be a visible ‘blob’ on your tooth. As mentioned above with removing the gem, you could see a dentist and have a scale and polish to remove the adhesive. Do NOT try to remove it yourself with a file or tweezers/blade – you could damage your tooth and really hurt yourself!
If the gem comes off but the foiled base remains on the adhesive on your tooth, there will be a metallic layer in the shape of your gem (this can only happen with crystals, not with gold pieces) which you will be able to see easily. You can try and get the foil off using a wooden toothpick, but the adhesive will still need to be removed by a dentist (and if you can’t get the foil off, the dentist will have to do it for you – but again, this is a very quick procedure, and you get to treat all your teeth to a nice deep-clean!)
Have You Had Thorough & Appropriate Training?
I attended an intensive 3-day course in London in February 2023 with Lana at Crystal Canine – you can view her website at www.crystal-canine.co.uk the course covered all elements of the procedure, from cross contamination and safety (which I already had a good working knowledge of) to styling, application and advice/aftercare/troubleshooting.
I invested in additional training with Crystal Canine in late 2025 to be able to offer this service to people with false teeth/crowns/veneers. At the time of writing, I am the only tooth gem tech in the area offering this service on false teeth.
As tooth gems are not an invasive procedure and the application method is virtually identical from person to person (and working on exactly the same body part – tooth enamel is the same from person to person), I feel that the training received has given me the appropriate level of knowledge and competency to offer the procedure safely. My insurance covers the procedure and my council registration covers this as part of my cosmetic piercing registration. Lana’s course is widely recognised as the most thorough in the UK, and by training with her I have access to the highest quality tools and materials, as well as ongoing support and guidance. You can see my certificate below and I am listed on www.crystal-canine.co.uk as a certified practitioner.
Questions or queries not answered here? Get in touch!
Thanks for reading – below is the recommended aftercare, you will be given a copy of this after your procedure too, but if you need to refer back to it, it will be in this blog permanently.
***TOOTH GEM AFTERCARE***
Your procedure was carried out using the highest quality equipment/materials, and its longevity depends largely on how well you look after it. Tooth gems are not permanent, but can last a long time with the right care. The closer and longer you follow the advice given here, the longer your gem will last! Like other beauty procedures involving attaching something to your body (acrylic nails, eyelash extensions, etc) tooth gems can detach and fall off, so aftercare is key to making it last. For clarity, any reference to a ‘tooth gem’ or ‘design/shape’ is referring to the piece attached to your tooth – all styles and types require the same aftercare. For clarity, I use the term ‘adhesive’ when referring to the composite which holds the gem in place.
Your tooth gem will feel strange and uncomfortable in your mouth at first – but you will get used to it being there within the next few days, so do not worry if it feels a little odd at first!
Tooth gems are not permanent, and can be removed by a dentist at any point.
I cannot remove them for you, and trying to remove it yourself can be dangerous!
When removed, your tooth will look and feel exactly the same as before.
It is recommended that any ‘full coverage’ dental retainers, mouth guards or gum shields are replaced for a re-moulded version to accommodate your tooth gem, but any pushing, rubbing or contact with the gem WILL shorten its lifespan. If you decide to modify your existing retainer/mouth guard/gum shield, it is important to remember that its effectiveness may not be as high.
Immediately After Your Procedure
You can kiss/drink/smoke immediately after your procedure do not poke at the gem with your tongue/fingers.
DO NOT eat for 2 hours after your fitting. Eat soft food only between 2 and 12 hours after your fitting. Wait for at least 2hrs before having chewing gum. Eat on the opposite side of your mouth for the first 2-12 hours – but continue to do this as much as possible after that to help your gem last as long as possible, especially with hard/crunchy food.
Do not brush your teeth for 12 hours after application (you can use mouthwash though).
12 Hours Onwards
Try not to rub or poke at your tooth gem with your tongue or fingers. Contact/friction on the gem will reduce its lifespan. Biting and chewing on the opposite side of your mouth to your gem will mean less contact with it and a longer life span. Hard/crunchy food could dislodge the gem, so break up food instead of biting it. Foods/consumed items that stain your teeth (saffron-rich food, red wine, cigarettes/nicotine) can stain dental adhesive too – so ensure you keep on top of your oral hygiene.
Switching to a soft-bristle toothbrush will prolong the life of your tooth gem. Charcoal toothpaste is abrasive, so avoid this type, but any non-abrasive toothpaste is absolutely fine. Tooth whitening procedures are fine with a tooth gem, as are MRI scans – the crystals and 18/22ct gold are not magnetic.
What Should I Do If/When My Tooth Gem Falls Off
The adhesive used is the same which is used to apply braces – it is durable and strong, but should not be viewed as permanent. If your tooth gem (on a natural tooth) becomes detached within 14 days of the procedure, it can be re-applied free of charge, just get in touch – details above. While I understand that this is an inconvenience, it is something which should be expected at any point in the lifespan of the tooth gem. I cannot offer any guarantee or replacement for tooth gems on false teeth.
Most commonly, if you lose a gem, it will take the adhesive with it – if this is the case, your tooth will feel smooth. If the whole thing comes off, no further action is needed.
If you lose a gem and can feel the adhesive on your tooth (it will feel rough if you run your tongue over it), ask your dentist to remove it (again, this cannot be done by me, and must be done by a dentist). Ask for a scale and polish, this will quickly and efficiently remove the adhesive, and your tooth will feel and look like it did before you had the gem. This can be done as part of your regular check-up, or as a separate appointment.
If you lose a gem and want to get that tooth done a second time, the original piece cannot be re-used, but you can have another piece put on after the adhesive has been removed by a dentist if needed. We cannot put a new gem on existing adhesive.
Lumps and bumps are the most common problems we see with healing piercings – they can cause alarm, as they do show up very quickly, and can take a while to go down. In this blog we’ll talk about what they are (and what they are not), what causes them, and most importantly – how we can prevent them or treat them. There’s a LOT to go through – I’ve put a TL;DR at the bottom of the blog, but for a more extensive look at the problems associated, see the bulk of this blog (sorry, it’s super-wordy but I can’t seem to be brief!) ALL photos in this blog were found on google – please email me on skinseamstress@hotmail.co.uk if one of the photos is yours and you would like to be credited, I will of course add this in.
Before we start, here are some examples of irritation bumps.
Most people with piercings will experience these ‘bumps’ at some point. One of my nose piercings – which I have had since 2010 – will kick off and look like this if I catch it with a towel.
WHAT ARE THEY? (And what are they NOT?)
What are they? The fistula (fancy name for the tube of scar tissue, which is what a piercing is!) if this scar tissue gets irritated (‘irritation’ is a broad term, we’ll look at the ways this happens next), it swells/increases in size a little due to the irritation, and this swelling/increase in size will pop out at one (or both) ends of the piercing. They are usually on one side of the hole, but they can sit all the way around it (like a donut). Lumps and bumps are most commonly seen on healing piercings but they can appear at any time in a piercing’s life if this ‘tube’ of scar tissue gets irritated. Sod’s law means that it is usually the visible side of the piercing that this happens at!
The lumps/bumps can grow, and shrink, and come and go – this is normal for them. It is rarely (if ever) a sign of infection. Side note: as a piercer, I’m not allowed to diagnose an infection – the only way to diagnose this is with a swab test at the doctors. Signs of infection include a bright red ring around the piercing, a burning pain, heat from the area, a constant discharge (dark yellow-green) from the piercing.
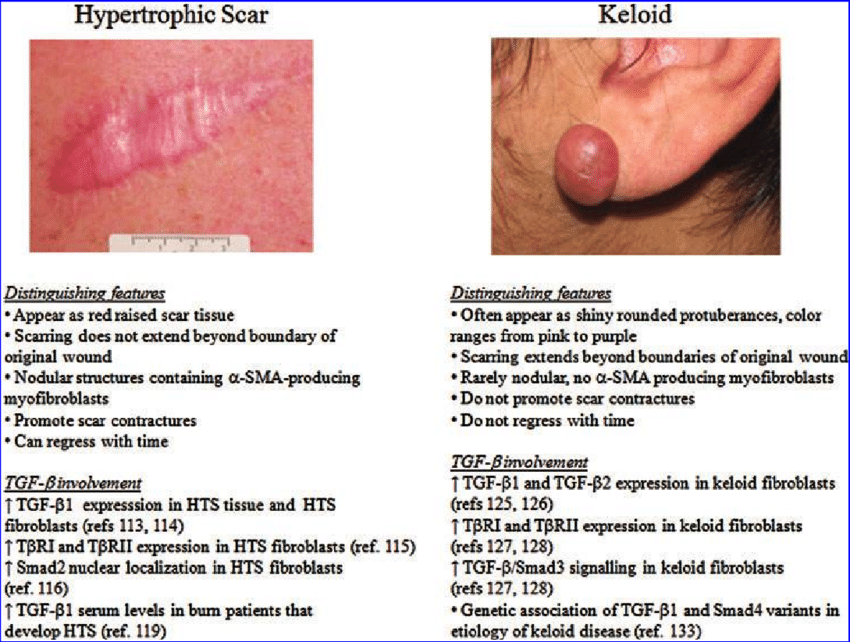
What are they NOT? A word I hear a lot when people are talking about lumps and bumps is ‘Keloid’ – it’s important to look at the differences between the two. Keloid scarring is quite rare, and people who suffer from it are often told about it as children, when a cut, graze or surgery causes a keloid scar to form. I’m not a doctor or dermatologist, so I can NEVER diagnose a keloid (or say something ISN’T a keloid) – if you’re concerned about this, you would need to speak to a doctor or dermatologist. Be aware that if you go to a doctor with a piercing problem, they will usually tell you to remove the piercing completely. Doctors need to provide their patients with the fastest, easiest, and most effective and efficient treatment – this means if they see an irritated piercing, they know that the fastest way to get rid of the irritation and the symptoms/problem is to remove the jewellery and let the piercing heal up. Because I’m not a doctor, I CANNOT advise anyone to go against what they have been told by a medical professional. Most of the time, removing the jewellery will get rid of the lump/bump, but this will mean you lose the piercing as well – however, re-piercing is always an option.
Something I hear a lot from clients is “Oh, I had a keloid on there, but it went” – this means it’s very unlikely that this was a keloid, as keloids do not go without medical intervention (surgical removal and steroid injections are 2 ways in which they are treated). Keloid scarring extends beyond the wound and is usually quite bulbous – a scar being raised is NOT a keloid.
I don’t want to focus on a discussion of keloids, as they are something best discussed with a doctor or dermatologist, but it’s important to understand that in almost all cases I see of lumps and bumps on piercings (irritation bumps), they are NOT keloids and they WILL go with the proper care.
Visible scarring is not necessarily a keloid – keloids are most commonly bulbous and extend beyond the parameters of the wound, example below with info on the different types of scar.
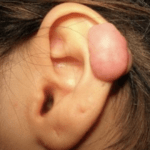
This Picture shows a doctor-diagnosed keloid.
WHAT CAUSES THEM?
The cause of lumps/bumps on piercings is ‘irritation’. This is a really broad term, because there are a lot of things that can cause them – sometimes it only one of the following, sometimes it’s more than one – so it’s important to make sure you’re considering ALL the following. We’ll look at each point in depth below.
Movement of the jewellery (intentional or not).
Touching the piercing/jewellery (linked to the above, but worth its own section).
Not drying the piercing thoroughly after cleaning.
Sleeping on the piercing.
Make Up/hairspray/fake tan/skin products/other foreign bodies getting into the piercing channel.
Poor health – being ill, run down, recovering from illness/injury, dehydration, pregnancy.
Movement of the jewellery (intentional or not).
This is by far the most common cause. The jewellery moving through the piercing causes the channel to become inflamed. Many people get told to ‘twist the jewellery’ when having their ears pierced with a gun – and of course you will follow the instructions given. So, this is often something people continue to do, and it is a hard habit to break, but moving the jewellery (twisting, pushing, pulling, sliding back and forth) is like pulling the scab off a wound – your body is trying to heal around the jewellery, so if its constantly being moved, it simply can’t do this. Another risk with playing with the jewellery, you could unscrew part of it, lose the jewellery completely and potentially have the piercing close up (meaning you need to get it re-pierced). And in the case of oral piercings, playing with/moving the jewellery can also cause damage to your teeth/gums.
Accidental knocks and snags can have the same affect – your body unfortunately can’t tell that you didn’t mean to snag it on your jumper, or that your dog just got too excited and caught it with their paw, or that toddlers move with ninja-like precision and will grab at anything they take a liking to. So, if you get a lump or bump after snagging it, this is likely the cause – just leave it alone as much as you can, even if it is a fully healed piercing, go back to your cleaning routine and let your body recover itself (it will, I promise).
How to fix it: Be mindful of when you touch your piercing – tell friends and family that if they see you doing it, they should tell you to stop. If you do find your hand drifting towards your piercing, ask yourself “am I cleaning it?” (This is the only time your hands should be anywhere near it!) and if the answer is “No”, then stop and leave it alone. This IS a really hard habit to break, but if you can manage to stop, it will REALLY help your piercing.
Touching the piercing/jewellery
This is kinda linked to the above, because even touching the jewellery lightly will move it. But the main reason this needs its own section is because bacteria and germs are very easily spread onto your piercing/jewellery – AND in reverse, bacteria or blood (if your piercing has been bleeding) getting on your fingers and then being spread around (onto door handles, mobile phones, etc). This is why piercers will always ask you not to touch your piercing or handle previously-worn jewellery when in the studio. Washing your hands BEFORE and AFTER touching your piercing (i.e., cleaning it, or changing the jewellery if it has healed) reduces the risk of any cross contamination.
How to fix it: (As above) Be mindful of when you touch your piercing – tell friends and family that if they see you doing it, they should tell you to stop. If you do find your hand drifting towards your piercing, ask yourself “am I cleaning it?” (This is the only time your hands should be anywhere near it!) and if the answer is “no”, then stop and leave it alone. This IS a really hard habit to break, but if you can manage to stop, it will REALLY help your piercing.
Not cleaning enough or over-cleaning.
There is a very fine line between ‘not enough’ and ‘too much’ and that line will vary from person to person. I always recommend twice a day for most piercing types/placements, with one of those daily ‘cleans’ being after a bath or shower, ideally. Then once the piercing is about halfway through the expected healing time (usually around the time you would get the jewellery downsized), dropping cleaning down to once a day until fully healed, and then just washing it as part of your bath/shower routine with a fragrance-free soap (and rinsing/drying thoroughly – we’ll cover the importance of drying later in the blog). Cleaning involves both touching the piercing and the area around it, and when using a cotton bud, it can mean the jewellery moves (see above). This means – if you’re cleaning 4, 5, 6 times a day – it can have a reverse effect to what you expect. On the other hand, not cleaning enough can mean you get a build-up of ‘crusties’ – this is especially true with ornate jewellery, which is why we usually stick to simpler pieces for healing (see later in the blog for jewellery discussion!) if bacteria and foreign bodies (makeup, hairspray, etc) isn’t cleaned away, your body has to ‘fight’ this, which causes MORE ‘crusties’ building up.
It can be hard to get a good look at your piercing, especially if it isn’t somewhere easy to see in a mirror (behind your ear for example), so ask someone to help you until you get the hang of it.
How to fix it: It certainly seems counter-productive to clean your piercing LESS if it is playing up, but if the piercing is more than a couple of months old (and is no longer an ‘open’ wound), it’s worth a try to drop the cleaning down to one a day. If it flares up after dropping down to once a day, step it back up to twice a day. If you’re cleaning it less than twice a day, try stepping up to twice a day and see if you see an improvement – always make sure you’re using the right product to do this (see below). Giving your piercing a good ‘swoosh’ when in the shower will help – especially in those hard-to-reach areas – so use this to your advantage, just remember to work around it gently with a cotton bud to get rid of any build-up. I always find it easier to build ‘piercing cleaning’ into my daily routine – I brush my teeth twice a day, so when I brush my teeth, I clean my piercing.
Using the wrong product to clean the piercing.
Probably the 2nd most common cause (after moving the jewellery) of lumps. The only things I recommend to use on a piercing are saline solution and clean, warm water. The exception to this is the inside of an oral piercing/a piercing which is entirely within your mouth (alcohol free mouthwash) and intimate piercings (a fragrance-free intimate wash, such as ‘femfresh’). Anything other than these things should NOT be used. Swooshing your piercing with the shower head while you’re in there, or rinsing with CLEAN water just before you hop out of the bath is also a good idea (dry thoroughly afterwards – see later in the blog).
Twice a day (ideally one of these two daily ‘cleans’ should be after a bath/shower, rinse your piercing as above before getting out to make sure any shampoo, shower gel, etc is removed), either spray saline onto your piercing OR onto cotton buds (2 cotton buds for each piercing). Use the wet end of the cotton bud to clean around one side of your piercing, use the OTHER wet side to clean the other. If you sprayed your piercing with saline, use one end on either side to clean any build up/crusties off. Then use the final ‘dry end’ of each cotton bud to dry the piercing. There’s more to say about drying later in the blog.
So, saline, it IS ‘salt water’ (sodium chloride and water) … BUT! Do NOT be tempted to make up your own. Saline is a very specific ratio (0.9%) which means for every 100g of water, you need 0.9g of salt. No more, no less. Saline is easy to find, cheap and perfectly safe to use AND you don’t have to spend 10mins twice a day boiling the kettle, mixing it up with salt, allowing it to cool, cleaning, then dumping the rest of it down the sink. With ready-made saline, just spray, clean, dry, done! Saline is used to irrigate wounds in hospitals, store contact lenses, rinse chemicals out of eyes…. If it is safe enough to squirt in your eye, it is safe enough to clean your piercing with!
Harsh chemicals, antiseptics, ointments, creams, etc will irritate the piercing (even if diluted) and if they aren’t rinsed away, they can cause chemical burns. Surgical spirit in prolonged contact with skin can cause callouses, not something you want on an already-poorly piercing.
The logic process with using salt water is always to put MORE salt in than needed, but this can be very drying on your skin, and if salt crystals form when the solution dries, they can be dragged into the piercing and have a sandpaper effect (ouch!)
How to fix it: Saline. Saline. Saline. You can get it from your piercer (usually) and even on amazon (Stericlens or Neilmed are both available on there). Other than this – clean, warm water is the only other thing that should touch your piercing. Your body will do 90% of the healing, the other 10% is up to you and saline/warm water. Strong chemical-based antiseptics (TCP, surgical spirit and tea tree, lavender oil, etc should NOT be used).
Metal allergies aside (some people are allergic to some metals, which are perfectly safe to pierce with if you AREN’T allergic) the surface finish/polish, metal grade and thread type of jewellery all contribute to the ‘quality’ of the jewellery. Jewellery quality could be a whole other blog, so I’ll keep this section as brief as I can. See my blog on jewellery materials here: http://skinseamstress.com/wp/2021/04/09/jewellery-materials/
If the jewellery surface isn’t smooth and polished, it can have a sandpaper effect on the piercing channel, bacteria can also hide in those little scratches. A textured surface has a much higher surface area and is harder to keep clean. So, rough/textured surface = bad.
Not all metals are equal – implant grade titanium/niobium and 14kt gold (or higher) are the most commonly used metals in initial piercing. ‘Surgical’ Steel is also often used, however in Europe, we aren’t allowed to use anything that has a nickel content over a certain level (most surgical steel jewellery has a nickel content – so we save it for use in healed piercings ONLY for simplicity).
I have seen clients who tell me they have an allergy to titanium, but when we look at jewellery they have worn, its possibly the surface finish that caused the problem, or a low grade of titanium (which is TECHNICALLY titanium, but it isn’t suitable for use in body jewellery). When we have switched to an appropriate grade, with a smooth finish, there’s no allergy symptoms and the piercing recovers well.
As for size… When piercing, the jewellery fitted is of a longer length (in studs – straight or curved bars) or a larger diameter (in rings/’round ones’) to allow for the anticipated swelling. Any time you break the skin, it will swell (think of something superficial, like a papercut or cat scratch – the skin will puff up a little around it, but it will go down quickly). In a piercing situation, the swelling can stay there a bit longer (quite a bit longer) because your body has to heal around the jewellery, which takes more effort/time. If we pierced with perfectly sized jewellery for un-pierced anatomy, the swelling caused by piercing will mean the jewellery is too tight and could embed (where the balls or ring sink/cut into your body) – this can be super painful and cause a lot of damage. So, we use slightly larger jewellery to stop this happening (side note: sometimes, more swelling than expected is present, so an even longer/larger diameter piece of jewellery may need to be fitted). Once the swelling has gone down, the jewellery can be ‘downsized’ – meaning a shorter/smaller diameter piece is fitted. This is usually done between 1 week and 3 months (depending on the piercing). The piercing may not be fully healed at this point (return to your piercer for this – it’s so much easier than trying yourself).
I know I am getting away from the point.
SO! When the swelling goes, the jewellery is now ‘too long’ or ‘too big’ and this extra length/diameter WILL cause movement, which equals irritation, which equals lumps/bumps (see above). This is why downsizing your jewellery is so important.
Jewellery type can play a part too. Some piercings heal a LOT faster when certain jewellery is used. Nose piercing is one of the best examples of this – rings are best kept for healed nose piercings. It’s not that no one has EVER healed a nose piercing with a ring, but generally they cause more problems and result in a longer healing time – the rings move a lot more than studs (movement again…) and can be harder to keep clean. Your piercer can advise you on this – but remember, body jewellery can be changed. If you want to wear a certain piece, it will be possible when it heals, you aren’t stuck with the same piece forever, but getting the piercing healed and happy is our (piercers) priority! Larger/more ornate jewellery (attachments, rings, etc) is much harder to keep clean, and more likely to snag on clothing etc (yes, movement again). Things like ornate jewellery and clusters are perfectly safe to use in new piercings BUT they can get caught more easily – so if you’re having trouble healing it, maybe try switching to a smaller/simpler attachment and then pop the cluster back on once downsized/healed. The general rule is that the simpler and least fussy jewellery styles do well in fresh/healing piercings, and fancier, more ornate pieces are best kept for healed ones.
How to fix it: This one is a tricky one, as there are a lot of factors with body jewellery. Jewellery quality – ask your piercer to switch it for a good quality titanium or 14k gold or niobium piece, with a smooth finish (these materials mean a lower chance of an allergy). Size… The movement of the larger jewellery irritates the piercing, which causes a lump to form (and/or the area around the piercing to swell) MEANING that the jewellery is NOW the correct size, to allow for this extra swelling. The jewellery stops moving, so the bump/swelling go, but now the jewellery is too long again and this causes movement again, which causes irri…. Ok, you get the idea. Getting stuck in this cycle can be hard to break, wait until the piercing is on a ‘good day’ and return to your piercer to ensure the right size jewellery is used – usually halfway through the piercing – a ‘downsize’. Sometimes more than one downsize is required, this isn’t unusual. Style – try something a little simpler, which will be easier to keep clean. Keep your beautiful, fancy piece safe, and it can be re-fitted in its rightful place once you’re all healed.
Not drying the piercing thoroughly after cleaning.
This is another really common one. Moisture on a wound rarely results in anything good. If a deep cut is left wet, scabbing can go soggy, and the wound can reopen. If stitches get wet, the skin can soften and the stitches can pull through, re-opening the wound. It would be impossible to never get a piercing wet while healing, but if (when) it gets wet, you MUST dry it. Drying the area and keeping it dry as much as possible will really help your piercing heal.
Your piercing should be dried as soon as possible after it gets wet – so this means drying it after all the following: cleaning it with saline, after baths/showers/hair washing and things like swimming, hot tubs, steam rooms, face washing, etc. (side note – swimming in chlorinated water is best avoided while healing a piercing, as this can also cause problems with healing).
Intimate and oral piercings (and the inside of nose piercing) simply cannot be kept dry, but wiping/rinsing away anything you’re using to clean it (saline/intimate wash/mouthwash) and patting the area dry with a clean tissue will help.
How to fix it: It’s hard to get a good look at some piercings, meaning you can’t tell how dry they are. Using cotton buds is good, as they absorb a lot of water, and you can get into nooks and crannies with them, but they can sometimes mean that the jewellery is poked and prodded (back to that movement problem). Scrunching up a clean tissue/piece of toilet roll/kitchen paper (anything clean and absorbent – avoid using a bath towel, etc. as they can hold bacteria) and pressing it onto the area (you don’t need to rub or scrub, the tissue will wick the water away, just press gently, then repeat until the tissue is coming away completely dry) is a great way to minimise movement while ensuring the area is thoroughly dry. Another great way to dry piercings – especially in hard-to-reach places – is using a hairdryer on the lowest setting. The heat is good for your piercing, just be super careful not to burn yourself (remember, metal will heat up!) it’s a no-contact way to dry your piercing and you can use it after using cotton buds/tissue to finish it off. Be aware that if you have wet hair which is then put/combed over the piercing, you’ll need to dry again. Personally, I use either cotton buds or tissue and then finish off with a hairdryer.
Sleeping on the piercing.
This one is hard, because you can’t control what goes on when you’re asleep. So, it’s 100% not your fault! I look like I am break-dancing in my sleep (just ask my other half to show you the bruises all down his side from me wriggling and thrashing around in my sleep!) If it was only possible to heal piercings on the side you DON’T sleep on, people would only have piercings on one side of their body. The issues raised with sleeping on piercings is mainly true of ear piercings, but also noses, lips and nipples too! And people like me – who act like a demon has possessed them – would heal nothing! But there are ways to work around this! Sleeping on a piercing can cause the jewellery to be pushed up/down at one side (instead of sitting perpendicular to the tissue). If this is done on a fresh piercing (when the wound is unstable) this can mean it heals at an angle. While this isn’t the worst thing in the world, it can mean that larger attachments (clusters, etc) will not sit flat, and rings may also look a bit skewed, and lumps/bumps can form. When the piercing has healed, or at least been downsized (see above) sleeping on it usually causes no problems – and once the piercing has fully healed (wound is stable) sleeping on it is fine. But when a fresh/healing piercing is slept on and the jewellery is pushed up/down, lumps/bumps can form – teeeechnically this comes under ‘jewellery being moved/played with’ but this is a very specific thing, and you’re asleep, so this deserves its own section.
How to fix it?: Travel pillows are absolutely ideal for this! Sleeping with your ear in the centre of the pillow (see my poorly drawn diagram below) will vastly reduce the risk of the piercing being slept on – it will also give you the most comfortable nights sleep you have EVER had!
Sleeping on your elbow, with the piercing in the gap, between pillows (again, piercing in the gap) and on your cupped hand will give the same result. I have done all of these, but the travel pillow was by FAR the best thing. Putting the travel pillow inside your pillowcase will mean it doesn’t move around too! (Tip brought to you by the colour purple and Lola at Forest Piercing in Glasgow). Once you downsize your jewellery you can sleep on that side again, personally I find the travel pillow is more comfortable than a standard pillow in general – it keeps my ear cool (no hot side of the pillow), protects my piercings and stops me thrashing around like a shark attack victim.
Make Up/hairspray/fake tan/skin products/other foreign bodies getting into the piercing channel.
It is SO hard to keep all foreign bodies out of your piercing. If it were possible, keeping the piercing in a sterile bubble would eliminate this factor – but as we know, it isn’t possible. Anything ‘getting in there’ can upset a piercing. As mentioned above in the ‘Touching your piercing’ section, bacteria or foreign bodies getting into your piercing means that your body’s immune system has to work so much harder to ‘fix’/’fight’ it. You need to keep any makeup/hair/skin products off the piercing – it doesn’t count if you apply the product and clean it away (sorry!).
How to fix it?: Create a barrier when applying makeup/hairspray – use your hand to cover the piercing when applying either. If using something like powder makeup, wrap your finger in a clean tissue and place over the piercing, apply powder, allow a few seconds for everything to settle, then remove your finger. When using foundation/concealer/fake tan, just start blending a bit sooner than usual to keep it off your piercing (you’re gonna get SO good at blending!) For scrubs, face masks, strong washes, serums, etc. – just avoid that area and rinse well after use (when your piercing is fully healed you can resume your usual routine, but if you get any irritation, just work around the piercing site). With fake tan (this is a side note) it can discolour your jewellery so do take care when applying, or remove the jewellery – if fully healed – before applying and put the jewellery back in when you’re done.
Poor health – being ill, run down, recovering from illness/injury, dehydration, pregnancy.
It’s something we often dismiss (*puts hand up* “Guiltyyyy!”), but your body’s ‘healing power’ depends entirely on your health. Your immune system is an army and if those soldiers aren’t fuelled, rested and hydrated… it can mean that your piercing will not heal in a timely manner. As with an army, your immune system has a finite number of soldiers, and piercings are often waaaaaay down their list of priorities. Repairing your body after an injury or recovery from an illness will take priority over healing your piercing. Side note – health issues (such as diabetes) can mean a slower healing time – not necessarily lumps and bumps, but any long-term health issues can impact it.
Staying hydrated, resting appropriately and having the right nutrition will put rocket boosters on your immune system (she says, having eaten a vegetable earlier this week, and drinking a glass of water yesterday and wondering why she still has a snotty nose). Healthy body = healthy piercing!
Recovering from an injury/illness (I’m looking at you, Covid!) can mean a longer healing time too. Your immune system is AMAZING and will prioritize things like ‘repairing broken leg’ and ‘dealing with throat infection’ over ‘healing little hole in my nose’. Again, your immune system has a limit and if it reaches that it will prioritise more urgent things (recouperation after being ill, recovering an injury, healing a larger wound, etc.) over a small puncture wound (i.e., a piercing). That’s how it is. Sorry. Its worth noting that if you’re put on antibiotics for an unrelated (to your piercing) issue, you will see an improvement, but when the course finishes, it backs up on the healing and needs more time to heal. More side note: (this blog has more words than my university coursework) you should ALWAYS finish any course of antibiotics given, ‘winning over’ an infection can take time, and just because it feels like it’s better, it doesn’t mean it’s done!
Pregnancy is another huge thing your body can go through, and as we all know (or should know) we don’t just get an email when this happens… “Hey Gurl! Congrats, you’re pregnant! Here’s 10% off at Mothercare” (is Mothercare still a thing?) it can be 4-8 weeks before we even have a clue. I have had clients contact me in a panic because they got pierced a week ago and have just found out they’re 8 weeks pregnant. I have a separate blog on pregnancy here: http://skinseamstress.com/wp/2021/05/11/pregnancy-body-modification/ but aside from that, your body is building a tiny human and DEFINITLEY has more important things to do that dealing with your ear piercing. This doesn’t mean you need to remove the piercing but it does mean you’re gonna need to deal with it kicking off until the little one is here, and your body can re-prioritise it. Keeping baby safe is your priority right now.
EXAMS (the devil’s pastime as Mama Seamstress calls them – she is a school counsellor in a secondary school) – you will not believe the number of people I see April to July with piercings that have previously been fine and have suddenly started being sore, getting lumps/bumps, etc. This situation will apply to any stressful situation (moving house, planning a wedding, and simply ‘going through some shit’). I will never tell someone to just “try and be less stressed”, it isn’t that easy, but when the ‘major life event’ goes, the issue with your piercing will too. Just work through it as best you can, and know that red bull and crisps is not an appropriate diet.
How to fix it?: Self-care. Allow your body to rest (get plenty of sleep), drink plenty of water (staying hydrated) and make sure your body has enough ‘fuel for this ‘army’ – eating well, taking multivitamins (zinc is essential for a healthy immune system). It’s very easy for someone to tell you to de-stress and relax, but when you are ‘in the mix’ it is hard – temporary stress, such as a house move, job change, exam season… you’ll find that your piercing recovers when that temporary stressful period is over. Just ride it out, but know that this is your body’s way of asking for some help. Listen to it, take a multivitamin, have an early night, drink some water, eat a vegetable.
How can I tell if these changes have helped?
Lumps and bumps can take a while to go (weeks or months usually), yet they come up overnight! When a lump appears, I usually recommend clients take a really clear pic of the piercing (lump/bump included), then implement the changes they need to make (see above, and figure out which applies to you), and take another pic after a week-10 days of looking after it as above. It’s hard to tell if it has improved just by looking at it every day (a bit like when you get a puppy and your friend sees them after a couple of months and will comment how big they are getting, but you see them every day, so haven’t noticed – until you see an older photo of them, and realise they have grown!) When you see an improvement (piercing looks less red, bump has shrunk, area looks drier) you KNOW whatever you’re doing is working – and this will give you the encouragement you need to keep doing it.
As with any piercing related issue, return to your piercer for advice/a check up if you’re concerned – leave your jewellery in, and always be prepared for a temporary change in jewellery (remember, you can switch back once healed) and always be honest – we’re not gonna shout at you if you have a bad habit of twiddling with it, we just need to know what’s happening so we can help.
SO, I SAW THESE NO-PULL DISCS..?
They can help SHORT TERM but they treat a symptom, not a cause.
For those of you not in-the-know – No-Pull discs are flat silicone discs with a hole in the middle, they fit onto bars/labret studs (I’ve never seen them working on rings!) and compress the ‘bump’ (meaning they fit onto the bar/stud that is in there at an appropriate length due to the stud – see jewellery size above – being a longer size for a swollen/lumpy piercing).
Compressing the lump/bump will encourage your body to re-absorb the collagen (scar tissue), meaning the lump/bump will go down BUT if you don’t treat the source of ‘irritation’ (all the above), then when the no-pull disc is removed, the lump/bump will re-emerge. I have seen success with the no-pull discs, but ONLY when the jewellery is downsized and switched for an appropriate quality. They are not a magic wand, simply a helping hand!
Anything I Should NOT Do?
Don’t believe everything you read online. Much of the advice is questionable at best, dangerous at worst! Home remedies like essential oils, strong astringents and one that many people know of, making an ‘aspirin paste’ and applying it to the area are NOT reccomended. You can cause a lot of damage, and using a medication in a way that it is not designed for can be very dangerous.
Removing the jewellery is a way to get the bump to go – but it also means your piercing goes with it. This is absolutely an option (and your piercer can help you remove the jewellery), but this isn’t the only option.
**TL;DR**
It’s almost definitely not a keloid.
Stop touching it and moving it (this is a hard habit to break).
If you caught it on something, it will settle back down, just keep it clean and dry.
Clean your piercing no more than twice daily, dropping down to once a day after a couple of months.
Use ONLY saline or clean warm water to clean it.
Make sure your jewellery is appropriate (downsizing is important!)
If it’s a nose piercing and you’re wearing a ring, you need to switch it to a stud TEMPORARILY.
Dry it THOROUGHLY any time it gets wet.
Use a travel pillow to prevent sleeping on it.
Make sure you are keeping makeup and hair products away from it
Stay hydrated, eat well (food = fuel for your body’s immune system) and get plenty of sleep.
DO NOT use any products, oils, pastes, creams or ointments on it. While this may provide short-term results, it can damage your skin and the piercing.
Return to your piercer if you’re worried or want a check-up, and monitor the piercing by taking a photo once a week to see how it improves with the above.
Further Reading
I’m including links to other blogs on the subject because many piercers can put things FAR more eloquently than I can!
Surface piercings are rising in popularity, and are often grouped with Microdermals and Skin Divers (see my other blog) as they are a similar aesthetic, and have similar advantages and disadvantages. This note is to explain what they are, how they are done and the problems associated. See my blog on microdermals/skin divers for info specific to them: http://skinseamstress.com/wp/2021/05/21/microdermals-skin-divers/
While I always encourage people to try things out, and to get the piercings they want, I don’t recommend a surface piercing as your first piercing. I tell every client getting a surface piercing to see it as a temporary thing, as they often have issues healing and if they don’t heal, they will have to be removed or they can ‘grow out’ on their own. Not something I want to bestow upon someone for their first piercing experience!
I hate having to crush people’s dreams of a beautiful new piercing with this info, but I also don’t want to sell someone something that doesn’t live up to their expectations. This will be discussed later in the blog, but I feel I need to mention it before getting into the subject, as it is a very important consideration. Going into this with the knowledge of all possibilities is absolutely the best way. Forewarned is forearmed. In short, if you will be absolutely devastated at having to retire a piercing (take it out permanently) then surface piercing is probably not the one for you.
Of course, as with any piercing, I encourage clients to come back and see me if there are any problems with it, and I will always offer help and guidance. Returning to me (or your piercer) at the first sign of trouble with this kind of piercing is essential, as the scarring left by surface piercings can be minimalized by removing the piercing in the early stages of migration (‘growing out’). Any assistance needed with a piercing I performed is free of charge.
What Are Surface Piercings?
Most people have seen these types of piercings before, they are very popular, despite their [relatively] low success rate. They can be done virtually anywhere on the body – common places include wrists, back of the neck (nape), hips, collarbones (clavicle), cleavage/sternum and high on the cheekbone (often referred to as an anti-eyebrow). Some placements have a better chance of healing than others, which will be discussed later in this blog.
The piercing is done with a 3-part piece of titanium jewellery, which consists of a bar with two 90-degree bends in it, and a screw-in ball or disk on either end – both ends can be removed and changed once the piercing is settled. The bar-part is not removed from your body unless the piercing is to be taken out permanently; the balls/disks are the only things that are changed on the piercing. I HAVE seen 100% healed surface piercings be able to be removed completely and replaced (for scans, surgery, etc) and survive, but it is not something I would recommend other than as a last resort.
Let’s take a better look at the jewellery, the bars are often returned to as ‘Staple Bars’ (so-called because they look a bit like office staples) but are sometimes referred to as ‘surface barbells’ or ‘jazz bars’.
This shows the 2 types of surface bar I use; the top piece is a ‘flat surface bar’ and the lower one is a ‘standard surface bar’. You can see one end has been removed on each, but both ends can be removed. They are available in different lengths – the longest part of the bar is different, and the posts can be different heights – the little stumps where the ends attach can be longer/shorter. I usually show clients the lengths that are available for their chosen placement and allow them to select their preferred length.
When fitted, only the balls/disks are visible, and they look like this (these were done by me):
Hip piercing was a very popular thing back in the mid ‘00s (showing my age here!) when high-waisted jeans were unheard of! The hip piercings are with standard surface bars, the tragus surface piercing is with a flat surface bar (opal disks).
Here’s a cross section showing how they sit:
How Are They Done?
Surface piercings are usually done at 1.6mm/14g, but I have used 1.2mm/16g staple bars in the past, on areas with much thinner skin – but with the availability of the flat surface bar (pictured above), I use these now instead. All the surface work I do is now at 1.6mm/14g with internal threads (the same as microdermals).
The procedure is the same as most other piercings, the area is cleaned, checked, marks are made, checked again and then checked by the client. The client is asked to lie down (I can’t think of any surface piercing placement that I’d do sitting up). A needle is passed under the skin at one of the marks, then out on the other. The jewellery is inserted while attached to an insertion pin which is slid partially into the needle. Because of the irregular shape of the bar, it can feel a little uncomfortable getting it into place – like a tight/pulling feeling. I use a packet of sterile water-based lubricant to help the jewellery slide through more easily.
The pain is not as much as people imagine; these are usually done on soft, pliable tissue which is generally less painful. You feel 2 separate ‘stings’ with a short gap in between. There are other methods of doing these (such as a ‘punch and taper’ method, but I find a wound shaping technique works best for me, and is more comfortable for my clients).
Usually there is a little blood – as with any piercing – and they can sometimes bruise as well. I don’t usually put a plaster/dressing on the piercing if it’s not covered by clothing (back of neck/face) but for torso placements, I usually would. (Side note – if you have an allergy to adhesives/dressings, always tell your piercer!)
How Do I Look After It?
Taking care of this type of piercing is quite simple, be gentle with it and clean it gently once a day, using saline, and make sure it is dried THOROUGHLY after baths/showers and cleaning. Other than that, leave it well alone. Using some gauze or kitchen roll, you can ‘floss’ around the bars to help keep them clean, and I have seen unfragranced dental floss used too, which works well to get any ‘crusties’ off the jewellery. I don’t recommend any soaking for at least the first 2 weeks, and avoid swimming/chlorinated/shared water for a minimum of 1 month. It can get quite sore for the 1st few days, and swelling/bruising is very common, but usually settles within a week.
Changing the balls/disks on the piercing is best done when the piercing has settled, as touching/moving the bar can irritate the piercing further. These piercings can take up to a year to heal fully, but like Microdermals and Skin Divers they are usually settled (not healed) after a month or 2, I would always recommend returning to your piercer for them to be changed as they can be difficult.
What Jewellery Options Are Available?
Lots! Any internally threaded attachments for 1.6mm/14g posts will fit. However, it is best to keep the attachments small and neat (no big/fancy clusters) to avoid snagging/pulling.
Something I try to explain to clients when they are selecting their jewellery with these is to avoid anything with a defined ‘top’ to the design. Meaning a shaped attachment like a heart or lightning bolt (which looks best when sitting at a certain angle with the ’top’ of the piece orientated at the ‘top’) would not be ideal, as once it is screwed into place and tightened, it may not sit the ‘right way up’. This isn’t an issue with ear piercing, tongue piercing, lip piercing, etc as the piece can just be turned (with the stud) to sit correctly, but as the bar under your skin cannot be moved or orientated differently, this isn’t possible, and if the attachment is not tightened fully, it could fall out easily. A solution to this in other piercings (rooks, navels, eyebrows, VCH) where the bar has to sit a certain way, is to use threadless (‘push fit’) jewellery, which can be turned in the post to sit the desired way. But surface bars (and microdermals) are not available as threadless, as their posts are not long enough to accommodate the pin. So, this is another consideration for you – microdermals can be pierced with a specific end sitting a specific way (they MUST be pierced with this end to be sure it sits correctly) but as surface bars have to be along a certain plane of your body, the long part of the bar can’t be placed at an angle, so it’s not always possible. Sticking to gem/opal disks or things like stars/flowers (that don’t have a defined ‘top’, they can sit any which way up) is best. This is a really hard concept to explain, if you want to have a chat about it in person, please call in!
So How Long Do They Last?
This is the question everyone wants the answer to! As mentioned briefly, surface piercings are notorious for being problematic and having a (relstively) short lifespan compared to other piercings. The piercing sits along the same plane of the skin with 2 ‘puncture wounds’ that the jewellery leaves through. The piercing is quite shallow (2-4mm under the surface – you can usually feel the jewellery under the skin). Your body sees this as something it could push out – which is what bodies do when there is a foreign object in there. This is why depth and placement are so important. While the healing process is in the early stages, your body makes the decision on whether to try and hold the piercing in place and heal around it – which is what we want it to do, or whether it would be less hassle/trauma to push it out.
As mentioned earlier, certain placements work better than others (or rather, have a higher success rate). For surface piercing, the nape of the neck and on the sternum tend to have a higher success rate. Placements like the top of the wrist or hips very rarely heal fully.
If your piercer suggests a placement or position that you don’t like, discuss it with them, but do understand that we need to place this kind of piercing in a way that has the best chance of staying put. For example, I don’t offer surface piercing on hands and feet, and legs/arms would only be an option if the client had previously healed a surface piercing elsewhere, but I would always advise against getting one on legs/arms, and suggest microdermal(s) instead.
Personally, I have had 3 surface piercings done, the shortest I had one was 2 weeks and the longest was just over 3 years. I normally expect surface piercings to last for a minimum of 6 months, but this is entirely dependent on how well the client looks after the piercing. I do see a lot of people in early summer who want to get a surface piercing to show off over the summer, but are aware that come Christmas, it may not still be there.
If a surface piercing is still there after a year, with no redness/irritation, I’d class it as a success.
What Are The Common Problems With Surface Piercing?
Surface piercings can do one of three things; ‘grow out’ (as mentioned above, the most common problem with surface piercing), point blank refuse to heal (but not grow out) meaning they have to be removed, or they can heal.
Healing – This is obviously what we want to happen – a healed surface piercing would be the same as any other healed piercing. No pain/discomfort/redness/discharge, jewellery can move freely, and the ‘holes’ of the piercing are concave – meaning the area around the hole looks like it’s pulled into the hole.
Not Healing – If a surface piercing hasn’t healed after about 18 months (ie. Does not look like described above) I would definitely discuss removing it with my client. We could try a different approach to aftercare, or possibly smaller/neater attachments before deciding to remove, but if we tried everything and the piercing won’t settle, removal is usually the best option. This would heal and leave 2 small ‘dots’ as scars – these would eventually sit flat and turn white.
Growing Out – This is the most common issue we see with surface piercing, this is where the skin between the 2 posts coming out of the skin starts to recede – meaning you can see the corners of the bar, and then the longer part more and more, until eventually there is nothing holding the bar in, and it falls out. I would never recommend letting a surface piercing to get to this stage, and would remove it before it gets to that point. Sometimes your body will do this completely by itself, and sometimes a piercing that has been healing well (or even fully healed) can be knocked, pulled, or snagged and this can set in motion the ‘growing out’. The first sign of the piercing growing out is dry/dead skin around the posts, and the skin between them turning red, it should be monitored closely if this happens. Sometimes taking photos of the piercing every week or so will help you see where it is headed with regard to growing out. Any piercing that grows out will leave a scar, and unfortunately, surface piercings leave a larger scar, often a ‘line’ between the 2 holes. This will heal, and shrink and turn white – but will be present/visible permanently. Do factor this into your decision to get a surface piercing, especially one on your face.
In some cases, the piercing will grow out partially, and then heal, meaning the ‘corners’ of the bar are visible, but the skin between them is healthy and in-tact. In this instance, it’s best to remove the bar and replace it with a shorter one, but in turn, this can irritate the piercing and cause it to grow out further. That’s the risk you take with doing that, unfortunately. However, I have seen this happen, and the piercing recover and be better than ever…. As Status Quo said “you pay your money, you take your choice”.
In any situation where a piercing is removed, a scar will be left. In the case of surface piercing, this is no different, but the scarring is definitely more prominent.
It is impossible to tell what will happen from person to person, or placement to placement. And as with a lot of piercings, experience is key, if you usually find piercings tricky to heal, or if you have had surface piercings done before which have caused problems, then there’s a higher possibility that you’ll struggle with healing them.
Proper jewellery choice and size is very important. As mentioned, I had one done under my navel and the piercer used a bar with posts (coming up through the skin) that were much too short, the balls embedded and 2 weeks later, that was the end of that. I had the piercing re-done with an appropriately sized bar a few years later, and I think it lasted about 18 months.
When the jewellery isn’t sized properly, or the wrong type of jewellery is used, embedding is common, and this absolutely means the piercing needs to be removed.
This piercing has been carried out using a straight barbell. (Pic from Google). Missed marks aside, notice how raised and tight the skin across the barbell is, the swelling that comes with that will cause the balls to embed, coming up around the balls causing them to press onto the tissue under them even more. There will be a lot of pressure on the area and where the balls are resting on the skin, it will eventually cut off the blood supply to the area and the skin under the balls will turn white and ‘die’. It will be painful to touch and it is highly unlikely that this will heal – it looks like it has just been done due to the blood around it.
Straight barbells (or flexible plastic barbells) should NOT be used in surface piercings. As with any piercing, check your piercer’s portfolio, ask to see fresh and healed surface piercing. Not every piercer offers surface piercing, so do speak to your piercer about it before making the decision to get it done.
The second (and most common) type of inappropriate jewellery is the curved barbell (like an eyebrow or navel bar).
Eyebrow and navel piercings are both types of surface piercings, although I would class a ‘true’ surface piercing as one where both ends of the piercing are along the same plane. I have seen curved barbell surface piercings heal, so it’s not unheard of. However, it’s not a practice I would follow, nor recommend.
This is a photo I took of a surface piercing which had been carried out with a curved barbell. This was NOT done by me; the client came to me for advice. It was removed and cleaned thoroughly, and the client requested it to be removed permanently.
This shows how the piercing wasn’t properly measured to make sure the ‘holes’ were the correct distance apart. Remember I mentioned that the skin under the screw-on balls of the barbell can ‘die’? Take a close look at the left hole; you can see that the skin around the hole has started to turn white. Both holes show signs that the balls have been ‘sucked into’ the piercing.
The barbell was placed back in the piercing, notice how much the piercing has swollen and you cannot even see one end of the barbell, and the other end is sunken in.
The diagram below shows how different types of barbells behave in surface piercing. Obviously, there will always be exceptions, but as a general rule, this is why we use 90-degree staple bars.
Can A Surface Piercing Be Re-Pierced If It Is Removed?
In short – no. It can be placed NEAR the old site, but re-piercing the exact same position usually results in the piercing growing out even faster than before. Scar tissue doesn’t have as much circulation/blood flow as unscarred tissue. This means a piercing in the same place will not heal easily – and it will mean that the existing scar gets thicker/denser if re-pierced. Using the scar as a ‘marker’ and sticking self-adhesive gems on there is always an option too – sure, it isn’t a piercing, but I won’t tell if you won’t!
I will not pretend that surface piercings will heal as easily as, say, a lobe piercing. But with proper aftercare, and a little bit of luck, they can heal and look amazing. They are prone to migrating (growing out) and will leave a scar, so this is something to consider BEFORE committing to the piercing. Knocks and bumps, over-cleaning/not cleaning enough and fiddling with/touching the jewellery can all make it difficult to heal, and increase the risk of your body rejecting the piercing out. Due to the problematic nature of surface piercing, I only offer it to people 18+.
I’m not posting this blog to scare people out of getting surface piercings, or to illustrate that I don’t offer them, far from it. I love performing surface piercings and I love clients coming back to me at 6 months to proudly prove that surface piercings CAN and WILL heal. I posted it so that all the information is out there, and you can be fully informed of the risks and associated problems if you choose to get a surface piercing. Knowledge is power, as they say!
I get asked a lot about getting a lip piercing while having lip fillers (or in preparation for getting fillers), so put this together to answer some questions about it. I would love to hear from people who have had both fillers and lip piercings to get a personal account, as it’s not something I have had done. For the TL;DR version, scroll to the bottom. But for a more in-depth look, have a read of the information below.
What Are Lip Fillers?
Lip fillers are a popular beauty treatment where hyaluronic acid is injected into the lips and the area surrounding them to give a plumper, fuller look. Hyaluronic acid is a water-binding carbohydrate – meaning it holds water to the outer edges of its molecules, kinda like a magnet, meaning the lips have more ‘stuff’ in them, and are filled out. The effects last from 6-12 months and top ups are offered at this point. You can keep a natural look, or go for a fuller look. The choice is down to the client, but the practitioner will always advise what is safe. Usually, 0.5ml to 1ml is used, but as your lips get larger, more can be used.
Lip fillers (before and after) by Sam Grierson at SG Beauty & Laser
What other options are there for fillers?
It’s much rarer to see, but silicone implants can be used to give a more long-lasting effect. The risks are much higher, and they are much harder to have removed (meaning it’s a more permanent change to your body). Silicone implants are put into the lips – the same way a ‘boob job’ works – via an incision on the lip line. The implant is solid silicone, not a liquid implant in a ‘bag’. This means it can’t ‘pop’ in your lip. Lip augmentation (fancy name) is not as widely seen, and is more costly than filler injections – you may also need to travel to get it done, as it is a plastic surgery procedure rather than an aesthetic procedure. I will mention lip augmentation later in the blog, but the main purpose of the blog is for fillers.
Shape and placement of lip implants
What are lip piercings?
Lip piercings are any piercing that sits just above/below the lip line, or that pass through the fatty tissue of the lip (the darker area, often called the ‘vermillion’). Lip piercings are through soft tissue, so usually less painful than other placements. They can swell more than cartilage piercings, and the healing time is usually 2-3 months. Lip piercing (any oral piercing) does carry a risk of tooth and gum damage, but this can be minimised by keeping the jewellery an appropriate length and not getting into the habit of playing with/biting on the jewellery.
Jewellery used for standard lip piercing (above/below the lip line and exiting perpendicular to the face) is usually a stud as initial jewellery (‘labret studs’) which have a fixed flat disc on the inside of the mouth, the straight bar passes through the lip and then the attachment (ball/disk/gem/etc) is visible on the outside of the lip. Personally, and in my experience as a piercer, rings are not a great idea for initial jewellery in lips. The initial swelling means a larger ring has to be used and these are often uncomfortable and move around a lot (movement = irritation to the piercing) and they can make healing take longer than necessary. Though these can be fitted once healed.
Labret stud
Lip piercings (traditional placements)
Vertical lip piercings and ‘inverse’ vertical lip piercings pass through the fatty tissue of the lip (the vermillion) are usually done with a curved bar. Vertical labret/vertical ‘medusa’ piercings are usually a curve with a ball either end – sometimes a flat disc is used on the end that exits on the vermillion. Inverse vertical labret/inverse medusa piercings are usually done with a flat disk on the end that sits inside the mouth (curved labret stud), as its more comfortable for the client. Vertical and inverse piercings are not really suited to rings, so these are rarely seen.
Curved barbell
Curved labret stud
Vertical labret
Inverse vertical labret (exit is inside the mouth)
So how are lip piercings and fillers/implants affected by each other?
Lip piercing that passes through the skin around the lip and sit flat against the gums are usually not affected by fillers as much – though you will often need to put a longer bar in for your filler appointment, so that the swelling experienced won’t result in a bar that is too tight (this hurts!) The size you usually wear can be put back in after 3-7 days when the initial swelling is down. This type of piercing is not commonly affected by fillers but they can sometimes sit at an angle, or off-centred slightly if the filler isn’t distributed evenly. This type of piercing wouldn’t be affected by lip implants (lip augmentation) but the initial swelling may cause them to sit off centre – and a longer bar would definitely be needed for potentially a few weeks.
For vertical or inverted vertical lip piercings (where one end of the piercing exits through the vermillion of the lip) are much more affected by fillers because the jewellery is passing through the area which contains/will contain filler. Its not like your filler will drain out through the piercing hole, because filler is placed at several points around the lips (not all in one place) but the likelihood of the piercing looking off centre or at an angle is much higher (though it would return to its original placement after the filler has dissipated). With implants, they occupy the same placement that a piercing would inside the fatty tissue of your lip, so careful consideration must be taken if getting both the piercing and an implant. The jewellery could damage the implant, and the implant could put pressure on the piercing and cause irritation, or for it to look crooked/off centre.
OK, which should I do first – piercings or fillers/implants?
If you wanted both (fillers & piercing – either traditional or as a vertical/inverted placement) but don’t already have either – I’d say it’s best to get the piercing first, and get it fully healed so your natural lips are used to get the piercing straight/centred. Then once healed, speak to your aesthetician about getting fillers – you won’t be the first person to approach them about this. As mentioned, get a longer bar for your piercings (the one you were pierced with would be ideal) fitted before your filler appointment. You could then get regular top ups as needed. Your piercing may look off centre or crooked temporarily, but will return to its original placement when your lips settle.
If you have had fillers done and want the piercing – I’d highly recommend waiting until the filler has dissipated (I don’t like to do them if someone has had fillers in the past 12 months) or have it dissolved – your aesthetician can help you with this, heal the piercing, then get your filler done again – and then regular top ups as needed. As mentioned, the piercing may look off centre or crooked straight after the filler procedure, and will need a longer bar, but it would return to normal as your lips settle.
If you have got the piercing and want fillers – This is fine, just get your filler done, but be prepared for the piercing to need a longer bar and possibly look off centre or crooked temporarily.
As for implants, getting pierced around your lips (traditional placements) AFTER having the implant fitted should also be ok, as the piercing would not go near the implant. This is still something your piercer would need to know about to give you the best placement option. Having the traditional placement done before the implant should be ok, but the piercings may need longer jewellery for a few weeks until the swelling from the procedure goes down.
Implants are NOT recommended if you have a vertical or inverted lip piercing, as the piercing would occupy the same space in the fatty tissue of your lip as the implant, which could damage it, and the implant could knock the piercing off centre/crooked and this would be a permanent change to the piercing’s position – as the implant won’t change. To work around this, you could remove the piercing and allow it to heal and THEN get the implant done.
If you already had the implant, I would not recommend getting a vertical/inverse piercing after it, as it could damage the implant – it may be possible to work around it, but this is something that could result in a shallower piercing, and the potential for it growing out would be much higher.
TL;DR
Getting lip fillers and lip piercings is perfectly safe. Getting piercings done BEFORE fillers is definitely the most sensible way to do it (allowing the piercing to heal fully before getting fillers), but if you have already had fillers, wait for them to dissipate (or have them dissolved) and then get pierced. Fillers can cause localised swelling, so it’s best to get a longer stud (no rings!) – ideally the one you were pierced with – in the piercing before you go for your filler appointment (switching to the shorter bar once the swelling has subsided). Lip piercings can sometimes be knocked off centre or at a slight angle due to fillers, but will return to their usual angle once the fillers have dissipated. Never get pierced on fresh filler, or filler on fresh piercings. Your piercer/aesthetics practitioner can give you more info on your specific needs, so always ask plenty of questions. Both piercings and lip fillers are a temporary thing (piercings can be removed, fillers will dissipate) so if you are unhappy with the combination, it’s not the end of the world.
As we are in the midst of pride month (June 2021) I felt it was a perfect time to post about the history of modern body piercing, and share some information about how closely linked piercing and the LGBTQ+ community are!
There are many scholars out there who have studied our history and have written more extensively and coherently on the subject than I could hope to, and I’d like to share their work for all to see, giving all credit to the respective authors. (If you know a source for anything here, please contact me so it can be credited appropriately!)
As a cis woman in a straight relationship, I feel that this blog should NOT be my words, so I’m handing it over to the credited authors/presenters/creators to amplify their voices. That being said, my piercing room is a safe space, and as an ally I strive to ALWAYS be able to do as much as I can to be inclusive and respectful.
I would like to add to this blog as new articles and online resources become available, so consider this blog a work in progress!
This is a fabulously well written and easy to understand covering of the piercing industry’s roots within the emerging ‘gay scene’.
Dr Matt Lodder (University of Essex) – Lecture on ‘Operation Spanner’
I have had the immense pleasure of seeing Dr Lodder speak a few times on the roots of body piercing, and its impact on the laws of the land. This is a 1hr long lecture on the subject, so get the kettle on and prepare to be enthralled! You can find Matt on Twitter – @mattlodder
A really interesting look at one of the methods people had to use to give a coded message – back when being gay was something that could land you in hot water.
Here’s an awesome article explaining the roots of the ‘gay ear’ piercing, and why it no longer holds any meaning and we’re – luckily – free to express ourselves however we want – and whatever our gender or sexuality!
Lynn Loheide has an amazing blog, with some fantastically written and concise information on many aspects of piercing, the following are some pertaining to piercing and the LGBTQ+ community, and below the link, there are some infographs from their Instagram, which you can find at @lynnloheide
(Lynn’s Blog can be accessed via this page, just hit ‘Blog’ in the top right of the page).
On 28th June, every year we celebrate International Piercing Day… What’s so special about June 28th??? Well, it’s Jim Ward’s birthday – Jim is hailed as the father of modern body piercing. His methods and practices and equipment prototypes are still used today in piercing. You can see more about Jim here: https://www.runningthegauntlet-book.com/ and here: https://en.wikipedia.org/wiki/Jim_Ward_(body_piercer)
Here’s a whistle-stop tour of why Jim’s work is so important, presented by my good buddy David Angeles, and you can see more from him here: https://www.facebook.com/angelespiercing/
I have posted previously about the subject on social media, but this is a reminder that trans/homo’phobia’* is NOT welcome nor should it be tolerated in the piercing/tattoo industry. The thing you profess to enjoy, that you use as a personal expression, that (if you are a piercer or tattooist) has given you a career to keep a roof over your head, food in your fridge and the wolf from your door ONLY EXISTS because a group of gay men started to do this ‘for kicks’. If you are at all discriminatory about someone’s sexual orientation or where on the spectrum of gender they fall – you are a hypocrite.
*I cannot abide the term, as it implies that homosexuality or a person’s gender transition is something to be afraid of. It isn’t. And the idea that it IS should not be given airtime – you are either 100% chill with other people’s life choices, none of which affect you, or you are bigoted!
I aim to keep my work environment as inclusive as possible, and ask for pronouns on my paperwork (as well as a preferred name, if your name has not yet legally been changed or your ID name doesn’t match), as well as attending training on equality and additional considerations when piercing bodies at various stages of a transition.
I am proud to be a founding business of the Transfriendly online directory, which you can view more info about on here: http:// https://transfriend.ly/
I also give 100% of profits from the sale of selected rainbow jewellery to a local LGBTQ+ charity, Hart Gables, to help them continue their essential services for support and guidance to anyone who needs it in the north east of England. See more about their fantastic work here: www.hartgables.org.uk
I hope you have enjoyed exploring the LGBTQ+ roots of piercing, all that is left to say now is… HAPPY PRIDE, EVERYBODY!
Subdermal implants (subdermal literally means “under skin”) are silicone shapes/designs placed under the top 2 layers of skin to change the contours of the body.
An incision is made near to (an inch or so away from) the site the implant is to sit at, and the layers of skin are separated to create a pocket, which the silicone piece is inserted into, the incision is then closed with sutures (stitches).
Lots of different shapes and styles are available, and prices depend on which size/style is chosen.
What are they made from? Isn’t Teflon the best material?
Silicone is used because it is softer and more flexible than the previously used Teflon pieces. If they are knocked or bumped, they will bend and flex and not cause as much trauma to the area. The silicone implants most widely used are silicone pieces made by Steve Haworth. These pieces are implant grade and carry the lowest possible risk of rejection. The implants are NOT the same as used in breast enlargement, they are solid silicone and are not filled with any liquids.
Can they reject?
While rejection (your body pushing the implant out) is extremely rare, it is something that could happen. The causes are usually from trauma to the area (mentioned earlier – constant knocks and bumps or pressure and injury to the area). Should an implant start to reject, removing it as soon as is possible would minimise scarring and cause the least amount of pain and unnecessary danger.
Where on the body can you get them?
The implants can be placed more-or-less anywhere on the body. Some placements are more popular than others (most popular: back of hands, side of neck, chest) and it is not advised that they are placed anywhere with a high amount of movement or pressure from clothes (joints, feet, under waistbands of clothes etc).
How long does it take to do? And what are they like to heal?
The procedure time will vary with the size of the implant, but expect an hour for smaller pieces, and up to 3 hours for large ones.
For the first week, you have to avoid getting the area wet, which can be awkward, but getting the sutures (stitches) wet can cause them to open up (not good!). You can cover the area with a dressing to minimise trauma/splashes of water on there. After 10 days, the sutures are removed (you will return to your artist for this). Once the stitches are out, the incision will start to heal nicely. As with any wound, a scar will be left, but over time, it will fade and turn white. Avoid picking at any scabbing/dry skin to help it heal as best it can. The swelling from the procedure can be present for a couple of weeks, and even then, your body will have to heal (internally) around the implant to make it stand out and the shape of it be ’obvious’. If the implant has a ‘hollow’ middle, taping a cotton wool ball in there can help it gain its shape, and it is recommended that in any situation where the piece is placed centrally or has a defined ‘top’ and ‘bottom’ that it is taped in place for the first 2 weeks or so to prevent it tilting or moving.
While healing the implants is quite laborious on ‘what to do/what not to do’ they will heal relatively quickly – initial healing (until the pain/swelling stops) is about a month, and after about 3 months, the area should be settled and happy. However, it can take up to a year before the implant is showing its shape fully.
What if I decide I don’t want it anymore? Are they permanent?
The implants can be removed, in a similar way to the way they are done. The area would need suturing once more, and these would, again, have to be removed after 10 days.
Any restrictions on who can get them? And how would I go about getting one?
Subdermals are available to people over the age of 18 (Photo ID may be required) And body mod artists will insist on a face-to-face consultation to discuss the design and placement of the implant. A non-refundable deposit is usually required for your artist to order in the silicone piece when the appointment is made. Consultations are usually no-obligation and free of charge.
At time of writing, this procedure is no longer available from any artist in the UK. (Google Mac McCarthy to see the proceedings which led to this, a man fully competent and capable, turning out excellent work, was prosecuted for offering body modification procedures. Meaning a precedent was set, and this is now not permitted in the UK). I forward anyone asking me about this kind of thing to Chai at CALM in Sweden – there are other body mod artists worldwide, but please explore portfolios before committing to an artist.
Earlobe Reconstruction is the process of returning a stretched or split earlobe to ‘normal’. It is most commonly people who have stretched their earlobes and want them but back to ‘normal’, but split earlobes, or lobes which have been stretched due to heavy earrings can also be repaired with the same method.
After the area has been suitably prepped and marked, the ‘hole’ or split is removed (incision usually made either side) and the two sides are sutured (stitched) back together. A row of sutures on either side (front and back) of the ear will hold it in place as it heals, then they are removed after 7-10 days. Some scarring is to be expected. Once fully healed, the area can be re-pierced. Many people getting it done need a way to minimise the look of their lobes, for job prospects or simply because they don’t want stretched ears any more – you are allowed to change your mind for any reason!
How long does it take to do? And what is the healing process like?
The procedure itself can take anything from 30-90mins per earlobe. For the first week after the procedure, you have to avoid getting the area wet, which can be awkward, but getting the sutures (stitches) wet can cause them to open up (not good!). You can cover the area with a dressing to minimise trauma/splashes of water on there. After 10 days, the sutures are removed (you would have to return to your artist for this). Once the stitches are out, the lobe will look pink but will start to heal nicely. As with any wound, a scar will be left, but over time, it will fade and turn white, the earlobe may be shaped slightly differently once healed, but this is to be expected. Avoid picking at any scabbing/dry skin to help it heal as best it can. The swelling from the procedure can be present for a couple of weeks, but the majority of the swelling will go once the sutures are removed.
After a month or so, you can use a vitamin E cream to help the scar tissue soften, and the area plump up once more, massaging twice daily will help circulation and ultimately aid healing. Scarring can take up to a year to settle fully, but in most cases the area can be re-pierced after about 6 months.
Any restrictions on who can have it done? And how would I go about getting it done?
Earlobe reconstruction is available to people over the age of 18 (Photo ID may be required). And your artist will insist on a face to face consultation to discuss the procedure, and to be sure that they will be able to give you the results you want. Consultations are usually no-obligation and free of charge.
While body modification artists may offer this service, there is also the option of speaking to a plastic surgeon about it – though it will have to be done privately (not on the NHS) and can be quite costly – though plastic surgeons may be more willing to work on someone under 18 if this was required. Side note – this is why I will not stretch piercings for anyone under the age of 18.
This photo shows the progress of a reconstruction.
At time of writing, this procedure is no longer available in the UK by anyone other than a plastic surgeon. (Google Mac McCarthy to see the proceedings which led to this, a man fully competent and capable, turning out excellent work, was prosecuted for offering body modification procedures. Meaning a precedent was set, and this is now not permitted in the UK). I forward anyone asking me about this kind of thing to Chai at CALM in Sweden – there are other body mod artists worldwide, but please explore portfolios before committing to an artist.
Scarification is a form of body modification which is gaining popularity, it is subtle (once healed) and is 100% ‘organic’ – meaning there are no foreign bodies in your skin – ink, jewellery, silicone, etc. I have used a lot of photos found online for this blog, as they give a wide spectrum of designs and techniques, but couldn’t find who to credit for some pieces – if anyone can tell me the artist behind the fantastic pieces I feature in this blog, drop me a line and I’ll give them the credit they deserve!
I’ll try to cover the main points in this blog, but if there’s something I don’t explain clearly enough, or something I miss out completely, get in touch via a comment and I’ll answer it to the best of my ability!
So, without further ado…
This is your skin! You can see the layers, which are what we deal with in scarification procedures.
WHAT IS SCARIFICATION?
It is exactly what it looks like.
It’s the process of cutting the skin with a blade (A scalpel handle with a disposable blade, a fully disposable scalpel and varying sizes of disposable dermal punches) in a pattern or design, and when the skin knits back together and ‘heals’ the white scar is left in the shape of the design. There is no ink used – I’ll come to that in a sec – and it is your body that makes the scar, no foreign objects in your skin. The pieces usually scab up after a week or so and may look a bit ‘fuzzy’ until it heals completely, when it will be much sharper (excuse the pun). Thicker ‘lines’ on pieces can be achieved by double lining (making 2 parallel cuts and removing the skin between them). See below for more info on skin removal.
Basic Scarification (fresh)
Healed (1 year) scarification piece
Ink CAN be used immediately after cutting to give a slightly darker scar, this is known as ink rubbing. Most people mistake ink rubbing for a tattoo, it’s less popular than scarification but gives more defined results. It is still used in many tribes as a marking, often using ashes. In modern body modification circles, tattoo ink is used.
Ink Rubbing by Leah Stanmore
www.facebook.com/leahstanmorescarifiaction
Another area of scarification is skin removal. This is where the top layer of the skin is removed completely, this usually leaves a slightly more raised scar which will turn white eventually, but can take much longer than scarification to heal. A scalpel (or dermal punch) is used to cut around the ‘shape’ of skin to be removed, it is then lifted away from the second layer of the skin and a scalpel is used to remove it. It is very common to see scarification pieces which also incorporate skin removal.
Fresh Skin Removal Piece
Healed Skin Removal Piece
As mentioned, another process for scarification is the use of dermal punches. As some of you won’t know about dermal punches, they’re like little (very sharp) cookie cutters (only round ones are available). They are often referred to as Biopsy Punches, O-Needles or chamfer needles.
They look like this:
They come in different sizes, 1mm, 1.5mm, 2mm, 4mm, 6mm, 8mm, the size is the diameter of the ‘circle’ of skin they cut.
They can be used in 2 ways:
To give a perfect circle of scarification.
To remove a perfect circle of skin.
This was a piece done to incorporate some scars from microdermals as well as existing microdermals – it’s shown here at 2 weeks old. Some areas were removed, some just left as a ‘circle’
HOW CAN I GET ONE?
Scarification is available to people over the age of 18. It is a permanent alteration and irreversible process. However, tattooing over the scar will make it less noticeable, but remember – the differing texture and contours of the scar will still be there.
People who suffer from Keloid scaring, haemophilia or any other skin conditions (eczema, numerous allergies, etc.) should avoid scarification, as should pregnant or breastfeeding women. If a medical condition means that scarification can be a problem, getting a tattoo done using white ink only can give a very similar effect (though pregnant or breastfeeding women should avoid tattoos and all body modification until 6 weeks after the birth/finishing breastfeeding). White ink tattoos will give a similar effect, but over time, white ink can gain a slightly yellow tinge.
Most practitioners don’t like doing scarification pieces on people who have not had other modifications done (extensive tattoos/piercings, etc.), as scarification gives such different results from person to person, you need to be prepared for it to heal differently to what you’d expect. It’s something that should NOT be taken on a whim and you need to think very carefully before getting scarification done. A lot of people will judge you more on a scarification piece than on a tattoo. It’s usually pure ignorance, but there is a huge taboo on scars and self-harming (even though getting a professional scarification piece is not SELF harming), and people will have reservations about you if you have a scarification piece. If your artist does not feel comfortable working on someone, they will not work on them. Most artists will insist on a consultation before every piece and will tell you in this consultation if they will be happy to work on you. A lot of people will get the desired effect by having a white tattoo (being tattooed using only white ink). White tattoos can give much finer detail than scars and they heal faster and flatter than scarification, which can heal differently from person to person. Tattoos tend to heal more-or-less identically on everyone (depending on how good your tattooist is).
As far as the process goes, the initial consultation will be carried out, and when it’s time for the ‘big event’, you will be asked to fill in a consent form, just like a tattoo, and you can choose from an [almost] infinite amount of designs. With scarification pieces, the simpler designs often give the biggest impact. With scarification, there are 2 options “scarred” or “not scarred”. It’s like body modification in binary. You can’t have ‘shading’ like on a tattoo, though I have seen beautiful pieces with cross-hatching (criss-crossed lines) to give the impression of shading, these are usually larger pieces. As with tattoos, the bigger the design, the more detail that can be packed into it! It’s best to discuss your piece with an experienced professional before undergoing it, and take on board any points they make about changes to the design.
WHY IS IT SO POPULAR?
Personally, it’s the idea that no foreign materials are in my skin (sure, I have tattoos and piercings too, but my scarification pieces are all ‘me’). The idea that my body can create such beautiful patterns all by itself, especially from something as “negative” (for want of a better word) as a cut or wound is appealing. A lot of people who self-harm wear their scars with pride, like a soldier proudly showing off war-wounds, and I suppose scarification can also fall into this category. It is much less ‘obvious’ than a tattoo (once healed), and this appeals to people too. Everyone has their own reason for getting scarification – please share your thoughts or experiences in a comment.
HOW IS IT DONE?
This is the most commonly asked question with scarification, and it is exactly as it looks – cutting the skin with a blade. Obviously, there’s the usual routine, choosing a design, discussing it with your scarification artist and finalizing it. Then filling in the consent form, etc. It is recommended that you have something to eat and drink before starting, and your artist will constantly check that you’re feeling OK and make sure there’s a glass of water and an open window nearby!
This shows a piece in progress. The transfer is made and used in the same was as a tattoo transfer.
As you can see, there’s some blood. Scarification bleeds more than being tattooed, this is because tattoo needles perforate the epidermis, the ink particles are held in the collagen between the epidermis and the dermis. The scalpel cuts through the top layer of the epidermis, with no breaks, so there are more of the tiny blood vessels that come to the surface of your skin (capillaries) that are severed.
Once the skin has been cut, any pieces to be removed are taken off, using a scalpel and a pair of tweezers, the top layer of the skin is separated, and the connecting tissue is severed.
This is the same piece as shown above, you can see the skin being removed (held up for the camera).
The skin is removed completely
Then the area is cleaned thoroughly and checked to make sure depth is even.
Finished pic of the last 3 pics – you can see the removal done with a dermal punch too – this one is a great example of all the applications of scarification (except ink rubbing)
Once thoroughly cleaned, the piece is covered (usually with cling film) this can be removed once the bleeding has completely stopped (usually takes about 30mins, it is recommended to leave the cling film on until you’re home). More aftercare advice below….
HOW DO I LOOK AFTER IT?
Once you remove the cling film, wash the skin with warm soapy water and pat dry GENTLY with a clean towel, try and avoid anything ‘fluffy’ as the fibers could get stuck in the wound and potentially cause an infection (using clean kitchen roll is ideal). Allow air to the area as much as possible and wear loose clothing over it. Picking or irritating the area can give a raised effect, however skin removal usually raises on its own and scarification lines could be made uneven by picking at the scabs. Irritation is usually reserved for brands (see other blog). Once the scabs have formed, there’s no need to cover the piece with a dressing unless working in a dusty or dirty environment, and make sure you keep tight clothing off the piece until all scabbing has gone. Using a small amount of vitamin E cream on scarification while healing, but after the scabs have gone will soothe it and minimise any itching.
Aah, the million-dollar question! Everyone heals differently from cuts and scrapes, and scarification is no different. With basic scarification, most people end up with a white scar in their desired design (almost the same effect as a white tattoo) though sometimes the scars will be slightly raised. With thicker lines or skin removal, the scar will more than likely be raised and can look pink for a long time after the initial procedure; it will usually turn though. Aftercare and peoples’ genetics are the biggest determining factors in healing scarification. Different skin tones can give different results too. It is best to research the varying healing possibilities before getting anything done. Also, I recommend getting a small piece (or something which can be incorporated into a bigger piece at a later date) to start with to see how you go. It can take up to a year before a scarification or removal piece is fully healed (by ‘fully healed’ I mean that the scar is white and hasn’t changed colour/shape or caused any irritation in at least 6 months)
DOES IT HURT?
Yes.
But I found it easier than getting tattooed. As with a tattoo, twitches and jumps will knock the scalpel and result in an uneven piece. It’s much easier to put right a tattoo than a scar.
OTHER USES/INFO:
It’s worth noting that scarification dates back a long way, and a lot of South American and African tribes still use scarring as a rite of passage and status indicator. It was done to scare off enemies and as a form of spiritual protection, often done on babies and very young children.
Facial Scarification (this is concave, it’s much more common to see convex or raised scarring)…
…Like this!
Another use is ‘cover up’. A lot of people use tattoos to cover scars or stretch marks. Below is a well-known piece which was used to cover some self-harm scars.
Scarification cover ups work best on thinner existing scars, or larger ones that could be incorporated into the piece. Bear in mind that it’s not likely you would mask or hide any scars perfectly, its likely they will always be visible, and the added-in scars may heal differently to the original scars.
I think that pretty much covers it!
Any more questions or queries, or experiences – post a comment!
Branding is a form of body modification that – in a nutshell – is burning the skin in a desired pattern/shape/design to leave a scar. Where scarification/skin removal is a ‘cut’, branding is a ‘burn’. Once the burn heals, a scar is left in its place (usually a wider scar than the initial burn). It is subtle (once healed) and is 100% ‘organic’ – meaning there are no foreign bodies in your skin – ink, silicone, etc. You can see examples of branding, scarification and skin removal pieces in this and other blogs on the subject, as well as photos of the varying stages of healing.
HOW IS IT DONE?
There are many methods that would burn skin and leave a scar, from a body modification practitioner, you would expect it to be done with a disposable thermocautery pen. This is the type used in hospitals and during surgery.
They look like this:
And when the cap is removed, and the pen is being used, the end will glow red like this (gloved hands during a procedure though!):
You can get non-disposable equipment, which would have a similar set up appearance to a tattoo machine (power supply, wires, etc.) but despite the high temperatures meaning that any bacteria or BBPs (blood borne pathogens) would not survive on the equipment, most practitioners use disposable pens in the interest of hygiene. The ‘nib’ of the pen is pressed onto the skin gently, leaving a small burn. To build up a design, the nib is touched onto the skin over and over (think like drawing a line of dots very close together) – the nib is not dragged over the skin, as this could result in uneven brands and therefore uneven scars. The set up your practitioner would use would be very similar to piercing – clean surfaces, gloves, etc. The pens are not an infinite power and will ‘run out’ – usually around 10-15mins use from each one, so multiple pens may be required for larger designs.
As you would expect burning skin (and the fine hair that grows all over your body) can create a bit of a smell. Studios offering branding should be well ventilated to keep this to a minimum. After having mine done, my dog followed me around the house for the rest of the day sniffing at me because he thought I must have something tasty for him to eat!
Because the skin is burnt, not broken, there is usually very little bleeding (though a small amount may be seen), and the burn is NOT an open wound, so it’s much easier to care for – aftercare is discussed later in this blog!
Many people think of ‘cattle branding’ or so-called ‘strike brands’ when they think of branding – but strike brands are not as precise as a thermocautery pen brand. The branding done by hot irons does not allow for contours of the skin, meaning that the brand will be uneven, inaccurate and would hurt much more.
This is a brand in process
WHAT DESIGNS CAN BE DONE?
As with tattooing and scarification, the design can be anything you wish! Scarification and branding is like binary tattooing – you don’t get colours or shading, only ‘scarred’ or ‘not scarred’ so super-fine detail pieces are not advised. While scarification gives a very fine scar finish, brands will spread slightly, meaning that any detail is lost. It is best to stick to bolder, simpler and bigger designs of opting for a brand, and smaller, finer, more detailed designs for scarification
HOW CAN I GET ONE?
Branding is available to people over the age of 18. It is a permanent alteration and irreversible process. However, tattooing over the scar will make it less noticeable, but remember – the differing texture and contours of the scar will still be there, and the scars left from brands are much wider than from a scarification piece.
People who suffer from keloid scaring or any other skin conditions (eczema, numerous allergies, etc.) should avoid getting branded, as should pregnant or breastfeeding women.
If a medical condition means that branding can be a problem, getting a tattoo done using white ink only can give a very similar effect (though pregnant or breastfeeding women should avoid tattoos and all body modification until 6 weeks after the birth/finishing breastfeeding). White ink tattoos will give a similar effect, but over time, white ink can gain a slightly yellow tinge. Branding scars tend to be slightly raised too, whereas tattoos generally heal flat.
Most practitioners will state that they don’t like branding people who have not had other modifications done (extensive tattoos/piercings, etc.), as any type of brand or scarification gives such different results from person to person, you need to be prepared for it to heal differently to what you’d expect. It’s something that should NOT be taken on a whim and you need to think very carefully before getting this done. A lot of people will judge you more on a brand/scarification piece than on a tattoo. It’s usually pure ignorance, but there is a huge taboo on scars and self-harming (even though getting a professional brand or scarification piece is not SELF harming), and people will have reservations about you if you have a scarred/branded design. If the artist does not feel comfortable working on someone, they will politely decline to work on them. As with tattoos, artist carrying out branding will likely insist on a face-to-face consultation before every piece where designs and limitations will be discussed – listen to your artist! If you cannot get the exact thing you want, do not get a brand. Your artist will use their knowledge to make a design or idea ‘work’ but if you aren’t happy with the compromise, it may be worth seeking out other avenues A lot of people will get the desired effect by having a white tattoo (being tattooed using only white ink). White tattoos can give much finer detail than scars and they heal faster and flatter than branding, which can heal differently from person to person. Tattoos tend to heal more-or-less identically on everyone (depending on how good your tattooist is).
As far as the process goes, the initial consultation will be carried out, and when it’s time for the ‘big event’, you will be asked to fill in a consent form, just like a tattoo, and you can choose from an [almost] infinite amount of designs (which is discussed above). It’s best to discuss your piece with an experienced professional before undergoing it, and take on board any points they make about changes to the design.
DOES IT HURT?
Yes, it’s a 2nd degree burn. But not in the way you think it will. Brands are done at VERY high temperatures, burning yourself on a lighter, an oven or a cigarette may be around 200-400 degrees Celsius; this will damage your skin and nerves and cause you a lot of pain. Thermocautery pens operate at around 1,000-1,200 degrees Celsius. They ‘kill’ any nerves, meaning that the process is much less painful than expected. The area around the brand will be sore and tender for a few weeks after the procedure, but the procedure is much less painful than most people anticipate. Personally, I found the 2 weeks AFTER being branded was the worst part about it.
HOW DO I LOOK AFTER IT?
OK, this is the iffy bit about brands! Getting them done is all very well and good, but looking after them is the hard part! As mentioned, I found the first 2 weeks the worst. No tight clothing over the area (waistbands, collars, bra straps, jewellery like necklaces, chokers, bracelets, etc.) Wear clean clothing around the area, and avoid anything ‘fluffy’.
After being done, it’s likely that your practitioner will cover the brand with cling film (this is what I was given) which will protect it. After a few hours, remove the dressing and wash with clean lukewarm (if it’s too hot, you’ll know about it!) water, no soaps, etc., and pat dry with a clean towel, then re-dress with cling-film dressing, as it will stop clothing rubbing on the area.
Wash GENTLY with lukewarm water for the first few days and use a cling film dressing as needed, but do allow air to the brand. Now comes the tricky part, with brands, agitating them will help the scar be more pronounced (though the scarring would still be present even if you didn’t agitate the wound). Agitation is done at your own risk, and can result in uneven scarring. If you want a perfectly flat, neat piece – branding probably isn’t for you.
To agitate: ALWAYS wash your hands before touching your brand. After 3 days, soak the area in clean, warm water (saline is also fine to use). Use a baby’s soft toothbrush (always buy a new one!), gently scrub along (not across) the lines of the brand. This WILL hurt, just take your time and keep flushing with clean water/saline. You may be able to peel off a bit of burnt skin, never pull or yank at this, but help it peel if it wants to. Do not be tempted to use any chemicals or other liquids on there. Pat the area dry with a clean towel. After this, you may feel like the skin is less tight on the surrounding area. It will be very tender and sore, and you will start to see how much the branded scar is spreading. It may look pink/red on the outer edges, and the middle of the lines may look ‘juicy’ after agitation. Apply a cling film dressing if needed, but leave to air-dry if you can. Agitate every 3-4 days or as needed – you do not HAVE to do this every few days (I think I did mine twice, which still gave a clear, bold scar), more agitation = chunkier scars = less detail in the healed piece so beware over-doing it, and if you want a check-up, return to your practitioner. After about 10 days to 2 weeks, you should start to see less redness, and the ‘juicy’ areas will look thinner. Continue to clean the area daily, but there’s no need to agitate further. The redness will start to fade, and once the area is not sore/tender and any scabbing – which would be minimal – has fallen off on its own (usually around 4-6 weeks), you can go back to wearing bra straps/waistbands/etc. over the brand. Applying a vitamin E cream will soothe the area at this stage, but no further care is needed. It will take 4-6 weeks for the wound to heal, but over time (up to 2 years) you will find that the brand can change through pinks/purples/reds and will eventually turn white.
WHAT DOES IT HEAL LIKE?
Everyone heals differently from minor burns, and branding is no different. Most people end up with a thick (4mm approx.) white scar in their desired design – almost the same effect as a white tattoo – though more often than not, the scars will be slightly raised. The brand will look pink for a long time after the initial procedure, but it will usually turn white over time. Aftercare and peoples genetics are the biggest determining factors in healing scarification. People with different skin tones can end up with different results too. It is best to research the varying healing possibilities before getting anything done. Also, I recommend getting a small piece (or something which can be incorporated into a bigger piece at a later date) to start with to see how you go. It can take over a year before a brand is fully healed (by ‘fully healed’ I mean that the scar is white and hasn’t changed colour/shape or caused any irritation in at least 6 months).
Remember the snowflake from earlier?
This is it at 4 days old
2 weeks
6 weeks
I think I have covered the main points about branding in this blog, but please post below with any questions. If you feel scarification may be more for you, you can read more in my other blog on the subject.
Perfect Secret (‘blutanhaenger’) is a German company who specialize in high quality borosilicate glass vials with metal caps (made from steel, with silver, black, rose gold and yellow gold colours available) which hold a tiny amount of blood. The pendants (which consist of your choice of vial and cap) can be worn on a necklace chain. They make a really unusual gift to a loved one, or just something for yourself. If it’s good enough for Angelina Jolie and Billy-Bob Thornton, it’s good enough for you! It’s also an essential piece of jewellery for any self-respecting vampire.
This jewellery can also be used to hold ashes for a loved one – a tiny amount of the ashes are muxed with water, and this is then used in place of blood.
At present, I am the only UK dealer for this brand and I carry a range of their caps and vials with regular orders being placed to replenish stock and to get other items not normally stocked. You can see the full range on www.blutanhaenger.de – I can order in any item shown on there, just ask.
So, What’s Available?
See below for a picture of my basic stock (caps and vials shown empty). You can select ANY cap to be used with ANY vial, making this jewellery completely customizable. I also stock basic steel necklace chains – which are an optional extra. I have the equipment and materials to carry out the short procedure to build your jewellery and fill it with your blood. This is all done while you are present, so you can be sure that the jewellery is entirely yours.
How Much Does It Cost?
The cost depends entirely on your choice of the cap and vial.
Any questions – just get in touch or call into the studio.
How Big Is The Jewellery?
It varies with each piece, but the majority are 1”-1.5” long when assembled – to have a better idea of sizes, just pop in to see, or contact me for more pics and sizing on individual pieces.
How Is It Done?
Once you have selected your jewellery components, you will be shown through into the area I use for piercing. I will set up all the equipment I need to carry out the procedure and ask you to sit or lay down (however you would be most comfortable).
I will clean the tip of one finger using an alcohol swab (the same type used in piercing, or before an injection at the doctor’s), then a small lancet (looks like a little tiny double edged sword blade!) is used to prick your finger. There will be some discomfort here, but it is a short pain, and once the procedure is done, there is a minimal amount of after-pain. It is important that I state that your blood is NOT taken via a syringe (like a blood test). It is a finger prick, the same way a person with diabetes would monitor their blood sugar levels, not taken from a blood vessel. A plaster is applied to your fingertip once the blood has been taken.
The blood is dripped off your finger tip into a small cap (like an ink cap used in tattooing). Perfect Secret have developed a liquid that is mixed with your blood which will stop it coagulating (clotting) and maintain the bright red colour. Once these are mixed (the two liquids are sucked into and out of a pipette to mix them) the mixture is ready to be inserted into the jewellery.
The blood vials have a very small (less than 1mm) opening, so a syringe is used to suck up the blood mixture and transfer it into the vial. Once the vial is filled, a basic solvent glue with hardener is applied to the top of the vial and the cap pushed into place, this attaches the cap and makes the vial airtight.
The glue takes around 2 minutes to harden, after which you can wear your jewellery! You will walk away with it the same day. The whole procedure only takes around 15-20 minutes. You also get a certificate with a note of your jewellery type and my details to confirm when and where it was done.
How Do I Look After My Jewellery?
After the glue has hardened, your jewellery can be worn immediately. The hand-blown borosilicate glass is very tough and shatter-resistant, though it is still glass and should still be treated with care – avoid contact with hard surfaces and placing the jewellery anywhere it could be crushed or bent. You cannot change your jewellery style after the procedure has completed, though you could have more than one piece made.
The liquid mixed with your blood will stop it from clotting and turning a darker rust red colour. You will notice some darkening over time, this is normal. In the first few weeks, you may notice the blood and liquid separating; just shake the jewellery to return it to normal.
When not being worn, make sure you store your jewellery carefully and in a cool, dark place – a jewellery box is ideal. Never expose your jewellery to temperatures exceeding 40 degrees Celsius, as this can cause the blood to clot and darken, and exposure to bright light can cause the blood to fade.
This is a question I get asked a lot. And especially at the start of summer holidays. My reasons may differ from someone else’s – and there may be people reading this who do not think my reasons are valid… that isn’t for me to argue, it amounts to the same thing whether you agree with me or not (I won’t pierce your child’s ears).
If you’re seeking a competent and professional piercer that WILL pierce childrens (under 16) ears, drop me a message and I will sent personal reccomendations. Studio policies change, which is why I’m not posting details here.
But what I am seeing (and am glad to see) is the amount of people contacting me asking if I will do this, and when I won’t, they are saying “I’m really struggling to find somewhere that will do it”. There are reasons that more and more places are requesting higher ages for piercings (yes, even ear lobe piercing), and I hope that this blog will explain why.
I want to start by saying that at time of writing there is NO law for ear piercing in the United Kingdom. Any restriction is the result of a combination of a piercer’s insurance restraints and that piercer’s personal moral compass. In Wales, there is a law for 18+ on tongue, nipple and genital piercings – and in the rest of the UK the only law is 18+ for genital piercing. This is hopefully on the change, but only time will tell what happens.
What this means is that LEGALLY, someone could bring a baby to a piercer and have their nose, lip, eyebrow, whatever pierced and there would be NO LAW BROKEN – of course, an insurer wouldn’t cover it, and morally I would hope no piercer would do this (praying to the piercing deities that this is true!) and this then presents the question, if you are horrified at the thought of a parent presenting their perfect, precious baby in a studio and saying “I want to get their tongue pierced, it’ll look so cute!” why is it different because it’s their ears?
A tongue-in-cheek extrapolation of this argument: https://reductress.com/post/were-piercing-my-babys-tongue-heres-why/
Sure, there’s the age old “well we all had it done when we were kids and nothing bad happened” – but we could say this about a lot of things in the world, doesn’t mean they were right. Change cannot simply happen overnight in the absence of a change in the law, but it CAN happen over time, which is why things are on the change now.
Full disclosure: I used to offer select piercing services to under 16s. After an abusive confrontation in 2008 where I wouldn’t allow a stepmother (no parent present) to sign for her stepdaughter, I made the call to be 16+. I am not a parent, so I cannot say what I feel is right “as a parent”, everything in this blog is “as a piercer”. No one knows your child like you do, and any piercer offering this service will want your input to a degree, but ultimately, they will decide on whether or not to do the piercing based on speaking to your child. I think you would agree that this is fair? So this is where the issue with babies and toddlers comes in – they cannot ask for and understand this procedure to the level needed to be comfortable with it, despite having many parents speak to me saying “but s/he REALLY wants it done” and then when enquiring about the age of the child they say “s/he’s 3”.
Regular followers will know that I will advise strongly against gun piercings – yet by not offering piercings to under 16s, this looks a little hypocritical. I am aware of this. If the laws were clearer and there were set measures in place, I would feel very different, and would likely offer the service. Probably gonna cause waves with this, but I truly feel that ANY piercing (or indeed ANY UNECESSARY alteration to your body) should be 18+. Though I know that this will never be the case, so I would be happy to have a lower age BY LAW if it meant there was an actual law which would cover my back, with set restrictions on what requirements must be fufilled.
Something I do not (and will not) discuss in this blog is ‘culture’. Cultures around the world have infant’s ear piercing as a huge part of welcoming them to the world. Me agreeing or disagreeing with this is an irrelevant point, because it is not a ‘thing’ in MY culture. We could argue that there are many things which are cultural that we don’t agree with or understand when it is not our own culture being discussed, so I have purposely left out this discussion.
**throughout this blog, I will use the words ‘kids’, ‘little ones’, ‘children’ and ‘minors’. To clarify: this is referring to a person under the age of 16, and using the term ‘parent(s)’ to mean a biological parent, or legal guardian**
So, historic ‘normality’ aside, what are my reasons? I would love any piercers reading this to add theirs in a comment too!
I’m not great with kids.
Let’s start with a debateable one…. SOME piercers who pierce minors put on a show, they are chatty and entertain little ones and make the whole thing an incredible panto-esque show that is absolutely amazing to watch. I’m not like that, I can’t talk to kids and I just don’t feel I can keep a relaxing atmosphere. A lot of this is probably down to me struggling with other kids when I was a kid, but the reasons why are not important. I can’t communicate efficiently with children.
Getting ID from people is hard enough, without me needing 2 items.
Insurance/Environmental Heath Dept. require the parent AND child to show valid, in date, photo ID. When we consider that a child needs their own, official, form of ID… it gets complicated – passport, driver’s licence or provisional or proof of age card with the PASS hologram are accepted. The proof of age cards aren’t available to a person under 13, provisional licences are only available for someone at the age of 15 years and 9 months, so the only option remaining for the child is a passport. The parent must also show photo ID (same options). Most piercers also insist on a birth certificate too – as proof that the adult is the parent of the child, and the names MUST match – this is to prevent someone other than a parent consenting to the procedure BUT it also means that if there has been a name change (a parent remarrying, or a child’s surname changing) then it won’t match. This makes it very difficult to have appropriate ID, and needing 3 forms makes it even harder, especially when I often struggle to get ONE piece from people!
Mo’ ages mo’ insurance!
As we’ve covered, insurance is needed (side note – it is NOT a legal requirement!) and that insurance, like with cars, costs more if you need more cover. Piercing children requires a modified insurance policy, which of course costs more per year. Sure, I’m getting insurance ANYWAY so an extra cost is no biggie, but it’s something that has to be factored in, extra expense for me has to then be reflected in my pricing of the services I offer.
How do I decide what age to pierce from?
This would be something that an insurer would guide me on, but my ethics could be different. If an insurer would cover me from 7 years, and I only felt comfortable piercing from 10, then I’d pierce from 10. But similarly, if insurance would only cover from 14 or 15, I’d have to weigh up if it’s worth the extra cost and, for want of a better word, hassle, to be able to offer a service 2 years sooner than I already do.
Every child is different – while some are ready to make a decision about their own body at 7 or 8. Some are ready at 11 or 12, and we could argue that some people are in their late teens before they can make rational decisions about their body. Who can tell this? The child would know, but may be coerced by a parent. Parents know their child better than anyone else in the world – I would hope that a parent would not push their child into something, but at the same time, not deny their child the chance of self-expression. This is a HARD THING TO GET RIGHT! Call me cautious, but I feel it is better to wait a little longer with this kind of thing – not rushing into something that both the parent and child may feel was “too soon”.
Personally, all the other reasons aside, if I offered piercing on under 16s, I would feel comfortable working on a case-by-case basis with 10 as my minimum age for earlobes. Another point I will discuss later is the factor of people requesting OTHER piercings, not just earlobes.
The child is not giving their own consent.
Obviously, this is something I would discuss with the child, explaining what would happen, talking them through it, and if I got the inkling that they weren’t 100% on board, I wouldn’t do it. But it is the PARENT that ultimately signs their name and consents on behalf of the child.
Working on a young person of 11 or 12, you can ask them questions. You cannot do that with a baby or toddler. Taking away a child’s right to consent to what is done to their body (not just piercing, circumcision, FGM, child marriage – obviously MUCH MORE extreme but still an adult choosing what is “best” for the child without the child having any input) can affect them in later life. For an unnecessary thing to be done to them with no medical benefit, without their say-so its simply not – in my eyes – appropriate! Teaching children about consent and boundaries is very important – I don’t want to get too much of a ‘downer’ here, but we tell our children that they must say “NO!” if a stranger approaches them, if someone – anyone! – touches them in a way they do not want to or are uncomfortable with and that they have a right to choose what their body goes through. And there can be no double standards, you can’t tell a child this but then YOU force them to go along with something they have changed their mind (withdrawn consent) from.
It’s never happened to me, but I have piercer friends who have done ONE of the pair of earlobe piercings, and then the parent has instructed the piercer to continue – the child has said ‘no’ – and the parent then bullies the child into doing the other “you’ll look silly with just one!”, “you have been asking for weeks, and you’re getting it done NOW!”, “I won’t bring you back again!”, “[piercer] must think you are being very silly for not getting the other done!” – yes, I have heard accounts of all these being said.
A worrying account from a former [Canadian] employee stating that she was instructed to go with the PARENT’S request, not the child’s – once again, the parent is giving consent to the procedure to be carried out on their child, so unless the PARENT says “No”, legally this is not wrong.
We’ve just touched on unnecessary – but to hammer it home, this is a thing done to a child at a young age and it is not necessary. People will post on facebook “oh no, I have to take the little one for their injections on Tuesday!” feeling awful that they are having something don’t that will HURT but will get their ears pierced without a second thought. Why? A vaccination is important, necessary and saves lives (antivax comments will be deleted, so don’t bother) – a piercing is not. In babies and toddlers, piercing is done to satiate the parent’s vanity – nothing more.
Small Parts…
Something not many parents consider is the earrings themselves – would you let a baby or toddler handle a pair of earrings? No. You would not. Why? Well, they are going straight in the littleun’s mouth and getting swallowed, aren’t they? They are a choking hazard. So why attach 2 of these potentially lethal items to the sides of their little heads? Small objects all present a choking hazard, and earrings are no different – if they were to come loose, and fall out, baby sees them, picks them up and as babies and small children explore their surroundings using their hands and tiny little mouths, that’s where they will end up. Toys often have warnings “not suitable for children under 3 years due to small parts” – why are earrings different?
THEY HAVE TO TAKE THEM OUT FOR SCHOOL!!!
Any child of school age will have to remove their piercing(s) for school – sure, maybe they are allowed a small plain stud in each earlobe – but they have to come out for PE. Many schools simply do not allow piercings or any description. Honestly, I disagree with this. Kids have 5 years at secondary school where they can – within reason – do whatever they want to express themselves. If a child under 16 wants to be pierced, and the parent is allowing it, then the school should respect the PARENT’s decision. But that’s not the way it is.
However, the flip side of this – PIERCINGS TAKE LONGER THAN 6 WEEKS TO HEAL!!!! With some exceptions (tongue, septum – both of which are usually 4-6 weeks) piercings need longer to heal than the child will be out of school. The ‘6 weeks’ rubbish is only stated so parents will allow it to happen. And please don’t get me started on the unicorn piss 3-week-healing-solution that certain retailers will sell you for an extra tenner. If there is a ‘better’ aftercare product, why not only sell that one? (spoiler – neither the ‘regular’ or ‘3 week healing’ stuff is worth the money – sterile saline is the only thing you should be putting on piercings). This company is all about money – they do not care if your piercing heals or not, because they have your money! The ‘3-week’ stuff is essentially watered down (heavily watered down) bleach. I would love to know the difference in ingredients between the 2 different solutions to see what the magic ingredient is in the ‘3 week’ stuff.
Kids Grow.
I won’t be winning any nobel prizes for pointing this out, but when we are born, our eyes are the same size as the day we meet our maker – but our ears, nose and mouth (i.e. the things we pierce!) will grow, change shape and develop throughout our lives – mostly during growth spurts! I see soooo many people who have had a piercing done as a small child, and it is not in the wrong place due to the tissue around it expanding and developing.
Kids cannot take care of a wound.
Sure, maybe some can. But for the most part, leaving a child in charge of caring for an open wound is a bad idea. In most cases the parent will, of course, assist with the cleaning and care – as it is their signature on the form, if we want to be nit-picky, the piercing is THEIR responsibility (not the child’s) but kids will fiddle with and pull on their piercings – they will move the jewellery around through the piercing channel, not wash their hands, pick at any scabbing/dry skin…. In short, think about this as exactly what it is – a small puncture wound. Would you let your child look after that if it were on their arm or leg? Probably not.
Where does it end?
So, if I were to offer piercings for under 16s – what piercing locations would I offer? Sure, earlobes are the focus of this blog, but as long as I have been in the industry, I have seen people given an inch and they take a mile. If I offer earlobes, then the question will be “WHY won’t you do her helix?” “WHY won’t you do a navel?” “he already has 2 earlobe piercings on each side, WHY won’t you add a third?”. Offering one service opens a can of worms on what I will and won’t do – and people will lie and misrepresent themselves to get what they want, making me look like a fool.
So those are my reasons… If you would like to ask about something discussed, please post below. If you think I’ve missed something out, or have a counter-argument for anything, please let me know! I will add to this blog as needed. And I’d LOVE to hear from other piercers and parents about this one!
As I mentioned at the start – I feel that ALL piercing procedures should be 18+ – many reasons for this, the main one being that then no one would have to lie about anything. People would be upfront and things could be discussed. But reversing each of the points made above, this is why I feel piercings should come with higher age restrictions:
I feel I can communicate more effectively with adults.
Most people would have at least one form of photo ID by the time they are in their mid/late teens.
My insurance costs would be minimal (I still protest to myself that this ISN’T a real reason, mentioning it to be thorough).
Deciding what age to pierce from means I have a clear boundary.
The person would be giving their own consent
It’s still unnecessary, but at least the piercee is going into this of their own free will
Small parts are still small – but less of a choking hazard
Generally, any educational institute catering for people of 16 or older couldn’t give two hoots if they have piercings. Still the issue with jobs – that’s a whole other blog though!
Growing – all done!
Having an age limit also means having limitless possibilities when you reach that age.
What can we do about it?
Honestly? Not a lot. We can start petitions, make noise, DEMAND a law – but ultimately this isn’t something we can argue with the top about – we need to start at the bottom. Speak to your local environmental health department at the council. Sign (and start!) petitions on the .gov website. Share information – like this blog – to make people take notice. No minds will ever be changed with noise – lay out facts in a calm and concise way, use logic instead of tradition and slowly, minds will change. But keep your little corner of the world as safe as you can, and it will spread!
If you need more convincing – look at these pics and tell me if ANY of these children look like they are comfortable with the situation? (These were all from google) THESE PICS MAY BE DISTRESSING TO SOME PEOPLE!!! – Pics taken from google (public domain).
Lots of you will have seen stretched piercings before, and I’ve put this blog together to help those of you who want to stretch your piercings and need advice on how to do it, as well as for those of you who’ve already got stretched piercings to give you some tips on tricks on how to get the most from them, and how to avoid – or fix – any issues.
Most of the time, people stretch their earlobes, but it is possible to stretch any piercing. It is also quite common to see genital, septum, tongue and lip piercing stretched. Nipple, navel, nose and other ear piercings can also be stretched, but it is less common.
I will mainly be referring to earlobe stretching in this blog, but if you would like to see something discussed in more detail, please let me know. Or you can call into the studio and I’ll have a chat with you!
OK, so when you are 1st pierced it is usually at a relatively small thickness – most commonly 1.2mm or 1.6mm (intimate piercing – particularly a Prince Albert – is usually done at 2.4mm and above) in America, they use a numbered gauge as a size guide, which we are slowly adopting over here too – but we usually stick with millimetres for larger gauge. Here is a chart that shows the gauges against millimetres. I work in millimetres for the most part, but do let me know if you need your gauge writing down too – if buying jewellery online, some webshops use one or the other, and some use both.
How Do I Get Started?
Wait for the piercing to FULLY HEAL before stretching. Stretching a still-healing piercing is asking for trouble. If you know you are planning on stretching your piercing, tell your piercer your plans and ask for it to be done initially at the largest gauge/thickness possible. This saves you time and money!
If you’re planning on stretching an existing piercing, check that the piercing is in the correct position and that it is straight. If it isn’t in the right place, stretching it will make it look even more off-centre. If it isn’t straight (if the front of the stud is higher on your lobe than the back), stretching it will mean that the back of the jewellery will hang lower and possibly even make the underside of the lobe – the bit pointing towards the floor – get smaller and smaller.
Think about what size you would like to have the piercing once it is stretched. I know from my own experience that you get to your ‘planned’ size and then go even further, however if work/school are going to protest, it may be worth checking what size would be acceptable before you start.
Massage your lobes daily. Massaging will help the blood circulation in your lobes. Do this for a few weeks before you stretch up each time. Personally, I massage my lobes daily, even when I’m not stretching, as I find it really helps keep my lobes in good condition. Using a vitamin E cream/oil, or an unfragranced body lotion works great, as well as specially-for-lobes products, like jojoba oil or Holey Butt’r. The skin is unbroken, so you don’t need to be too particular about what you use.
This vitamin E cream from Superdrug is an ideal easy-to-obtain product for massaging your lobes with. It will give your skin more elasticity and improve its condition. It’s relatively cheap, non-greasy and non-fragranced. I love Superdrug own brand as it is all cruelty free, and the majority is vegan. This is what I use personally, but there are a lot of other products available.
The chart with sizes on (above) shows the order you should stretch your ears to, working down the chart. I have found from personal experience that after 4-6mm it is possible to stretch up 2mm at a time. However, if I am stretching a piercing for someone else, I do not like to go up more than 1mm at a time. I will only stretch piercings on people aged 18+. I will sell jewellery and stretching tape (see stretching methods) to people under 18, but will not fit it.
Is There Any Way I Can See How It Will Look BEFORE I Stretch?
Sometimes, if you’re unsure about how a stretched piercing will look (or if work/school aren’t happy with stretched piercings), you can fake it! A 1.2mm or 1.6mm piercing isn’t very obvious, and most people will not notice it, so you can use a 1.2mm or 1.6mm ‘fake plug’! These will fit ‘regular’ piercings but look like a stretched piercing (example below).
OK, I’m Ready To Do This! How Do I Get Started?
There are four main ways of stretching your piercing, only two of which I would recommend. Most people find their own favourite or use a combination to get to the desired size. When you first start stretching, it’s best to get a professional piercer to get you through the first few millimetres (see option 1), watch what they do, ask questions and listen to advice given, and then you can give it a try on your own when/if you feel ready. The rule of thumb for stretching is “a millimetre a month”. Meaning you should leave a minimum of 1 month between each size (2 months if going up in 2mm increments) but this will vary from person to person and piercing to piercing, but the longer you can wait between sizes, the better (easier and less painful!). IF IT HURTS PAST THE POINT OF MINOR DISCOMFORT, YOU ARE DOING IT WRONG OR TOO FAST. Try going up in smaller increments, waiting longer between stretches or try a different method.
1 – With metal tapers, straight up by 1mm (available from me and most other professional piercers).
This will usually be done at 1mm increments. The jewellery you have in is removed, the piercing area and new jewellery are cleaned, then a sterilized (autoclaved) metal taper is gently pushed through your piercing (with lubricant) and the new jewellery follows it. I ask customers to buy the jewellery from me at the size they will be stretching to (so I know it’s of acceptable quality, and so I know the correct size is being used). If you’re unsure what size you are at or what size you should be going to, ask your piercer. I charge a small fee for a stretch PLUS the cost of the jewellery. The 1mm stretch is done in one go and is relatively quick and will only leave a ‘tight’ feeling for a few hours. Only available to people aged 18+, as this is a body modification procedure and stretching – using any method – cannot always be reversed easily and is a permanent change to your appearances (will cover this more later in the blog). This is what the metal tapers look like (different sizes):
Advantages: Quick procedure, not too painful. Can be used on all piercings.
Disadvantages: You need to visit your piercer regularly to get this done, can be more expensive than other methods.
2 – ‘Taping’ using stretching tape (DIY method – tape is available from me).
This is MY preferred method, and how I stretch my own piercings. Get some jewellery at your current size (a 12mm long barbell or unflared plug/tunnel – see below for jewellery types – is best). Make sure you clean your piercing and jewellery thoroughly before starting. Best done after a hot bath or shower, clean and dry your existing jewellery and wrap 2 layers of stretching tape around your plug/barbell, then insert it as normal, using a bit of lubricant – or vitamin e cream. If it won’t fit, unwrap some of the tape until it will. Add 1-2 layers of tape every 3-4 days and start testing with your next size after 6-8 layers.
‘Stretching tape’ (shown below, and available from me) which is like bondage tape (ideal because there’s no adhesive) is my favourite, and the only thing I recommend. I have seen people use medical tape and electrical tape (the adhesive has been known to cause allergic reactions – doesn’t happen as much with medical tape as it’s designed to be used on skin, but medical tape is often porous and textured, so pros and cons to each).
Advantages: VERY gradual, so next to no pain, can be done at home, brilliant for tricky areas like ear cartilage because of how gradual it is. Can be used on most piercings, relatively cheap.
Disadvantages: Can get a bit stinky, and you need to buy new jewellery (unflared plug/barbell) in the next size up before starting. You can buy ‘piercing deodorant’ to help the stink. See later in the blog for care products.
3 – DIY with acrylic or steel tapers. I don’t recommend this method as much as the previous two; or at least not until you have had some experience with stretching.
Definitely the most popular method, but the danger with using these is that a lot of people do too much too fast. The tapers pictured below would stretch from 2mm to about 6mm which is much too large to do in a single stretch. I know people who have done it, and I get told often “Well my friend went from 1.6mm to 6mm in a week, and his was fine” but it just isn’t sensible. Just because you CAN, doesn’t mean you SHOULD. There is also a temptation to share tapers with your friends. This is not hygienic and acrylic tapers cannot be sterilized. If you are at 4mm, it would be OK to use the 2mm-6mm tapers to get up to 6mm. If you DO go down this route, please do NOT leave the taper hanging out of your ear after stretching. Replace it with an appropriate piece of jewellery at the correct size as soon as possible (usually possible after a few days, as long as it all feels OK). The acrylic tapers are NOT suitable for long-term wear. I have tried this method myself, but I didn’t like it and found it painful and awkward. For this reason, I do not sell tapers in the studio.
Advantages: Cheap, easy to get hold of, can be done at home.
Disadvantages: Easy to go too fast, can be painful, unhygenic, slow method. You need to buy the taper AND the plug/jewellery to insert once stretched. If you aren’t clued up, you can do some serious damage.
3 – Old skool method. I don’t recommend this method, though many people have had success with it.
I have used this method myself for my earlobes (it isn’t really suitable for any other piercing), and while it worked for me, I DO NOT recommend it. The only reason I mention it here is because it is a method that can be used. It can be awkward and take longer to heal (so leaving longer between sizes is essential); it can also cause swelling and a lot of pressure around the piercing. To do it, simply put as many barbells/BCRs (as well as the plug size you are currently at) through your piercing as you can.
When I started stretching my ears (I think it was 1998 when I first stretched them… showing my age there!), larger gauged jewellery was not as easy to come by, and once I got into the habit of just putting as much through my lobes as I could, I just kept going as it worked. The pic below shows my ear with a 28mm clear PMMA plug and two 4mm PMMA BCRs. This lobe went to 30mm after 2 days of this. PMMA – the plastic stuff – is much lighter than metal, and the jewellery is usually cheaper – so it’s great for use when stretching, but always make sure you use a suitable, inert plastic like PTFE or PMMA. Plastics are not suitable for long-term wear.
Advantages: Can be done at home.
Disadvantages: Really only suitable for earlobes, can be expensive having to buy extra jewellery, can cause pressure points and thin your lobes, easy to do damage if you don’t know what you’re doing. Can be painful.
So…. Is This Gonna Hurt?
Short answer: A little bit. Stretching your ear (or any other body part) is going to cause some discomfort. If you find it too painful, try stretching by smaller increments, or leaving longer between stretches. If it REALLY hurts, you’re doing it wrong! You will feel a ‘tight’ feeling or a warm sensation, almost like a minor friction burn, but no real pain. DO NOT use ice to ‘freeze’ your ear to numb it. Cooling it will cause the skin to contract which will make it even harder to stretch. Freezing it regularly will also reduce blood flow to the area, which will make it harder for the piercing to heal. Stretching is usually easiest after a hot bath or shower (so the exact opposite of cooling it!)
You usually notice the area will feel tight immediately after stretching (I always feel like I need to push the underside of my lobe up, against the plug/jewellery when I first stretch it) and this may continue for a few hours. Keep the area at a constant, warm temperature to help circulation and try not to fiddle with the piercing. Treat a freshly stretched piercing as you would a freshly done piercing. Unless it is very painful or uncomfortable, leave the jewellery in. If you feel you have gone too fast, and/or there’s a great deal of pain/discomfort, put your old jewellery back in (going back a size), and try again after a longer period of time. See later in this blog for info on what to do if things go wrong!
Most people (myself included) find the first 8-10mm of an earlobe stretch the hardest, after that it gets much easier. If you try one of the methods above and find it painful or difficult, try a different one. If you’re ever concerned about your piercing, or want some advice, STOP STRETCHING and consult your piercer.
I’ve Decided On Which Method I Want To Try, How Often Can I Do It?
I am a firm believer in knowing your own body. I just “know” when my ears are ready to be stretched again (no discharge, no pain, able to sleep on the piercing without discomfort, jewellery can be easily and comfortably be put in and out). All in all I recommend waiting at least 1 month between 1mm stretches, though you get to know what your body will and will not take. It sounds a bit new-age, but listen to your body, and if you’re unsure, wait a little longer before attempting another stretch, and never stretch during the colder winter months. After putting larger jewellery in, ideally you want to wait at least a week before taking the jewellery out, or you risk not being able to get it back in and having to start from the last size you were at and work up again. If you take it too quickly, things can go wrong.
Kati started small, and slowly stretched up to 00ga using lubed tapers and slow progression. After that she started stretching by wrapping more and more electrical tape around her jewelry (that’s how I stretched as well), and at six months in she had reached 5/8″. Then she sped things up, adding a bit more tape every day or two.
“It soon became an addiction. After I got to an inch, I would be gauging my ears every day. This was especially bad because my boyfriend had ripped my gauge several times, and it would fall out during the night or during the day, and even at shows, which was the worst. Even through all the stress I was putting on my ears, I was so excited and desperate to have the biggest ears around that I kept going.”
“My ears started to thin out big time, but my ears were so healed they wouldn’t gauge down and — of course, stupid me — I kept gauging them up because they were so healed that they would fall out if I didn’t, and because it was tape, there wasn’t any flaring to keep them in place. I tried to put vitamin E oil on them, and it worked for a while, but then scabbed up and fell off and they got even smaller. Eventually they were so thin, that I was in class and I just had to go to the bathroom and take it out.”
The picture below accompanied the article.
Here’s another pic which looks like the person in question has either gone up too fast and/or had an allergic reaction to the jewellery. Keeping the piercing clean is also a must. You should treat a freshly stretched piercing like a fresh piercing.
I’m not putting these pictures up to scare anyone, merely to illustrate the importance of taking it slow and looking after your piercings. I have seen a lot of people who’ve gone too fast and it’s damaged the piercing in the long run, meaning they can’t go as big as they’d hoped. Your ears will still be there in a month, so give it some time and ENJOY the process.
What Should I Do If It Goes Wrong?
HOPEFULLY you will never need to use this info, but I’m putting it out there in the hope it helps someone! If you run into issues while stretching OR at any point (problems can arise even long after stretching, and seemingly without any provocation!) the following information will be useful.
‘Issues’ can include: pain, bleeding, swelling, dryness, itching, redness (though on a fresh stretch, it can look a little pink for a few days!) and a tight feeling (again, normal for a few days after a stretch).
Think you have an issue? Follow these steps!:
Firstly, don’t panic. Yes, it sucks, but its fixable! Before you do ANYTHING ask yourself “what might have caused this?”
If you’ve recently (in the last month) gone up a size – it’s likely to be that. Take ACTION asap.
If you have been at this size for a while:
*Have you recently changed your jewellery? (Could be an allergy? Pop your old jewellery back in and see how it feels after a day or so).
*Have you slept on it? (I recommend taking out jewellery to sleep in if possible – especially at larger sizes, but only do this if you have been at this size for a month or more).
*Has it been caught on something, or pulled? (Might be worth giving it a day or so to see if it feels better).
If it starts to improve after 24hrs, monitor closely, and leave your jewellery in, but if it doesn’t improve, or gets worse, take ACTION asap.
ACTION!
Remove the jewellery. This is absolutely essential. No one likes to have to go back a size, but truly this is the only safe option.
If you can get the next size down in there EASILY then put it in (I recommend keeping ALL your old jewellery for emergencies such as this!) If it won’t go in, try with the NEXT size down.
If you can’t get any jewellery in, continue to follow the steps below, but try daily to get a piece of jewellery in – again, try with smaller and smaller jewellery until it fits. Use a piece that you haven’t had any issues with to be sure it’s not a piece you are allergic/sensitive to. Ideally, we end up with SOME jewellery in – even if it is several sizes smaller than when the problems first kicked off.
Is there any blood? If so, use a clean and dry tissue (avoid cotton wool, as fibres can stick to the wound) to dab the area, apply GENTLE pressure until it stops. You may be able to see a scab/dried blood – do NOT pick at this.
If there was blood, keep everything dry as much as possible – do NOT soak it in the bath/shower, just give it a quick rinse with warm water once a day, and then dry thoroughly with a clean/dry tissue. You could use saline to clean it too, but clean water is enough. Drying is the most important thing here to get that scab healed.
If there was no blood, you don’t need to use anything like saline to clean it (with unbroken skin, there’s no wound, so no need to treat it like one) you can use a light moisturiser (vitamin e cream as mentioned at the start of this blog is ideal) and gently apply once a day – use sparingly. Wash gently with warm water once a day, you can use an antibacterial liquid soap (gently lather up and rinse thoroughly) if you want to. Always dry thoroughly – I finds applying cream after baths/showers helps.
Hopefully you will see an improvement quickly (within 24hrs), if not, you may need to go down another size – or potentially keep the jewellery out altogether. Again, this sucks, but it is the only safe option.
When your piercing has recovered, you CAN stretch it again – if you have gone down a size or more, this is good news for you! Make sure you give plenty of time and monitor it closely. Stretching up after downsizing is usually a little easier.
Worst case scenario, it closes up completely, and you have to start again…. But that may not actually be the worst-case scenario (honest)….
There is always a chance that your lobe could split – this is more common to see at larger sizes but is not unheard of at smaller sizes!
When this happens, reconstruction is the only option. This is something that has to be carried out by a plastic surgeon and is unlikely to be available on the NHS. This can be very costly and lobes may not look ‘perfect’ even with the best surgery. There are body modification artists that offer this; however this is not permitted in the UK (Google ‘Mac McCarthy’ for info – Mac was an accomplished and competent artist who was – sadly – successfully prosecuted in 2019 for carrying out these procedures). I now recommend people seek out body modification artists overseas for the procedure, in this piercer’s opinion, better results are achieved via body mod artists – not plastic surgeons. I recommend Chai at CALM in Sweden for this. Other artists are available, please ask to see portfolios before committing to a procedure.
After reconstruction, it is possible to re-pierce, but you have to wait a minimum of 6 months. See later in this blog for more info on reconstruction.
Is There Anything I Can Use To Make It Easier?
You can use a product called “Holey Butt’r” which is a vegan ear balm specifically made for stretched piercings. I stock it and it’s something I will recommend to people looking for some extra special care for their piercings. A little goes a long way, so you do not need to use much to get results. The manufacturers’ website has the following to say:
“Holey Butt’r is the premier ear crème, specifically developed and dermatologically formulated to aid the healing process and maintain supple, healthy stretched ear lobes. This dedicated ear care product contains the perfect natural blend of Jojoba Oil, Soya Butter and Karanja Oil to gently soothe, soften and moisturise damaged and dehydrated expanded ear lobes.“
1, Always wash hands with Simple Cleanser before handling your piercing.
2. Apply a small amount of Holey Butt’r to your lobes
3. Massage lobes for 30 seconds with Holey Butt’r
4. Apply twice a day or as necessary
5. Wash hands again after touching your piercing.
The product comes in a small rectangular tin with a sliding lid (think lip-balm sized) with 10 grams of pale yellow Holey Butt’r. The label has a full list of ingredients on the reverse, and on the front, it states it is a Vegan product – which I know will excite a lot of people, as balms and butters often contain beeswax.
Opening the tin and giving it a sniff, it doesn’t smell unpleasant (I thought it smelled ‘plant-y & green’ if that makes sense!). It has the consistency of greasy lip balm and melts from the heat of your fingers easily. You don’t need to use much at all, massaging the oily balm in spreads it evenly and after 30 seconds of massaging, it is mostly absorbed. I use it once a week, more if I feel my ears need it such as during the colder months of the year.
Other stretching balms are available – such as Stretchy’s Finest, which is also vegan – and offers a ‘sensitive’ care which contains no menthol or camphor (which the ‘original’ does) so is ideal for sensitive skin. More of a cream than a balm, but the same principle of ‘a little goes a long way’ applies. According to the website:
“Treat your stretched ears to the best there is! Stretchy’s Finest was developed especially for stretched ears and as a preparation for the next stretching step. It stabilises the skin of your lobe, assists circulation and stops unpleasant smells.”
As with any skincare, some people will prefer one or the other, so if one product doesn’t work – try the other! Always check ingredients, and if you experience any irritation from the product, discontinue use immediately.
I stock both Holey Butt’r (10g tin) and Stretchy’s Finest Original – happy to order in the ‘Sensitive’ on request – (15ml bottle), as well as bottles of jojoba oil which is also great for use on stretched lobes.
OK, I’m Taking It Slow And Getting There With It. What Can I Wear In My Piercing?
Lots of different jewellery is available, and different jewellery will feel/look different depending on what size you are at and where your stretched piercing is, and a lot of the reason behind a particular choice is just your personal preference. I can order in any jewellery you need, and I always stock a decent range.
Below are some basic body jewellery types which can be used in any piercing – and can be inserted into a fresh stretch, as long as they are a suitable material (titanium is ideal).
Ball Closure Ring (AKA ‘BCR’)
Sometimes, at larger gauges, the bar screws onto one side of the ring.
Barbell
Can also be curved – though there are only a small selection of piercings that would require a curved barbell (a navel piercing for example).
Circular Barbell
Very popular choice as it’s easy to get in and out. Balls screw on either end of the bar.
The following jewellery pieces are suitable mainly for ear lobe piercings, but can be used in other piercings. There are 2 basic types, solid ones (often referred to as ‘plugs’) and ones you can put your finger through (can be called ‘tunnels’, ‘flesh tunnels’, ‘eyelets’ or ‘tubes’)
‘Unflared’ Plugs/Flesh Tubes
Usually seen with rubber O-rings on either side. The ones shown are UV plastic/metal, they are also available in other materials, such as glass, and with designs on. Glass versions can be used in a fresh stretch.
Double Flared Plugs/Eyelets
Can be a little tricky to get in and out. Available in different colours and styles. DO NOT use double flared plugs to stretch with, save them for when you are settled at one size. Available in most materials, as well as organics such as stone, wood, etc.
Single Flared Eyelets
Easier to get in than double flared, usually come with an O-ring. Also available as plugs. Can be used to stretch with as long as they are an appropriate material (titanium/glass).
Flesh Tunnels
Various sizes shown, available in different colours and styles. One of the outer ‘discs’ is threaded and can be screwed on and off to make insertion easier, and there’s a much lower chance of your jewellery falling out! Can be used to stretch with but internally threaded (shown below) would be the best option, so the thread doesn’t pull on your skin as it slides through.
Silicone Plugs/Tunnels
Incredibly comfortable, especially for sleeping in! Available in different colours, as well as teardrop shapes. Make sure you buy a good grade of silicone, such as KAoS brand. Do NOT use these to stretch with, they can cause a lot of damage when used to stretch. I absolutely adore my Kaos pieces.
Ornate Ear Jewellery
Various colours, styles, materials and sizes available. Best not used to stretch with – save them for settled piercings.
Ear Weights
An infinite number of styles and designs are available – these are amazing if you have stretched ears but miss wearing ‘dangly’ earrings. You can also wear hoop earrings through your stretched lobes. Weights and hoops can be worn through ‘naked’ lobes – on their own – or through a tunnel, silicone tunnels are a popular choice for this, and my personal favourite. The pair shown below are by Diablo Organics – photo is of @summerhernandez and photographer is @dannzilla (Instagram links). Some people have used weights to help a stretch, but it can be risky, personally I recommend only wearing them in settled stretched piercings, and not constantly.
Most of this jewellery is available from your piercer, but for specialist items and for bigger sizes, you may need to look further afield. Most piercers will stock up to a certain size, but happily order in larger sizes. Be aware that the bigger you go (especially past 30mm) you will probably have to pay more for your jewellery and will find that fewer styles are available. Many people will have pieces custom made, but this will cost more. The easiest sizes to obtain are 6-20mm. It’s worth noting that if you stretch your piercing, you will no longer to be able to wear plugs at the ‘smaller’ size – but do keep them in case you ever need them!
I Think I Might Be Allergic To My Jewellery, My Piercings Are Irritated. What Can I Do?
When you first stretch up, it will feel uncomfortable, but if this doesn’t settle after a few days, try some different jewellery, or go back down one size until it settled and then try again. If you’ve previously experienced an allergic reaction to a type of jewellery, try a different material. I am allergic to the rubber O-rings that come with ‘unflared’ plugs or flesh tubes, so I wear them without the O-rings on, or wear alternatives. The jewellery shown above comes in many materials, which fall into 3 main categories:
Metals
Titanium or a good grade of steel are the best types. Titanium is much lighter and contains no nickel, so it’s highly unlikely that you’ll be allergic to it. Steel is much cheaper and you can get fancy jewellery pieces in steel, as they’re cheaper/easier to manufacture. However, there is a higher risk of being allergic to steel as it contains a small amount of nickel. Plus, it is much heavier than titanium.
Plastics/Glass
PMMA is the most common, but PTFE is also used. PMMA is nice and light and smooth, and it’s cheap, which makes it a popular choice for using until you get to your desired size – which is what I used. However, most plastic pieces are simple and other than colour variations, there’s not much to shout about. It’s worth noting that cheap acrylic can leach chemicals into your body with long-term wear… so best avoided. Glass is a bit heavier (and more expensive), but you can get some truly amazing designs in glass. Glass carries no risk of allergic reaction.
Organic Materials
This is the horn/bone/wood/coral/stone/bamboo pieces which are often sourced from natural materials (always check they are sourced sustainably and buy from a reputable retailer. They can be quite heavy, especially at bigger sizes. As they are natural materials, no two will be identical, even if you buy a ‘pair’. The wood and bamboo tunnels and plugs are nice and light and will even stop your ears from smelling funky (you’ll see what I mean as you stretch bigger!) Organic plugs/tunnels are almost always double flared, so are not suitable to stretch with, but are fine to wear in healed stretched piercings. Horn/bone jewellery would not be suitable for vegans/vegetarians, I am happy to order in these pieces, but I do not stock horn or bone. Organic jewellery often requires special care, contact me or see my ‘Jewellery Materials’ blog for more info!
If any piercing – stretched or not – is irritated or causing you discomfort, act sooner rather than later – return to your piercer for a check-up!
What’s That Smell?
As mentioned earlier, stretched piercings can get a bit stinky. This doesn’t mean that anything is wrong, the smell comes from what we commonly refer to as ‘Ear Cheese’ (yuk!) which is a whitish-yellow gunk that builds up on the inside of stretched piercings, the area in contact with the jewellery. All piercings get it (even non-stretched ones), if you have ever left a piercing out for a few hours and then put it back in (or some people who have retired a piercing will squeeze around the old hole) and a little white ‘worm’ will come out of the hole. This is a build-up of dead skin cells, sweat, general bacteria and dirt. Your body doesn’t want to absorb it (very sensible!) so it just keeps it in the piercing until you clean it away. This is why it’s important to clean ALL your piercings, and jewellery, regularly. Once your freshly stretched piercing has settled (at each size as you progress and once it has reached the desired size) wash it daily. You don’t need anything fancy, some warm water and antibacterial handwash will do nicely, and dry/polish with a soft cloth. Remove the jewellery (‘regular’ piercings and freshly stretched piercings – less than one month since going up a size – don’t need to be removed every day, but settled stretched piercings have a larger surface area so more room for ‘ear cheese’ – which is why the smell is more noticeable than in ‘regular’ piercings), wet the area with clean warm water, rub the handwash lather into it, then rub your jewellery with the lather and rinse both the piercing and the jewellery well in clean water, then dry them. I usually do this in the bath or shower and once dry I massage the piercing with Vitamin E cream/stretching product.
There are products available to ‘stop the stink’ – two were mentioned earlier in the blog, Holey Butt’r and Stretchy’s Finest, both work well. Another product on the market is Smelly Gelly which is a balm – similar consistency to lip balm. Unlike Holey Butt’r and Stretchy’s which are all-round care, Smelly Gelly is specifically a ‘deodorant’ for stretched piercings.
It’s ideal for use on septum piercings which will – for obvious reasons – be more likely to give you a whiff of ‘Septum Cheese’ (double yuk!) I stock Smelly Gelly in the studio (8.5g Tub), so if the stink is bothering you, give it a go!
To use Smelly Gelly, remove and clean your jewellery, and clean your piercing. Then, once the piercing and jewellery are dry, use the tiniest amount of Gelly and rub it around the part of the jewellery that is in contact with your skin. Replace the jewellery and make sure its secure. You only need to apply Smelly Gelly once every 2-3 weeks, so a small tub will last you a long time. Smelly Gelly is not suitable for any piercings in/partially in your mouth or on organic jewellery (see above).
Work/School Aren’t Too Keen On It. Anything I Can Do To Hide It?
Sometimes, stretched piercings need to be hidden. Skin-coloured silicone ‘hider plugs’ which are available from KAoS can make stretched piercing much less noticeable. They will NOT make it invisible, but as they are hollow and have no back, you can ‘pierce’ the front of the plug and wear a smaller ‘regular’ earring in it which will help disguise it further.
Here are the basic ‘hider’ plugs which I stock. These are of course available in other skintones too!
What If I Don’t Want My Piercing This Size Anymore?
Taking out a stretched piercing can be a little tricky, as you can be left (especially in the case of earlobes) with loose skin, which can get caught on things. A piercing stretched up to 8mm (or less) will usually return to a small, unnoticeable hole – maybe not as small as a ‘regular’ piercing hole, but small enough to not be obvious. Though this will vary from person to person and piercing to piercing. If you are unsure as to whether you will want your stretched piercing permanently, stick to smaller sizes (under 6mm). Stretched piercings WILL shrink down, but only very small gauge piercings (4mm or less) will go back to a pinprick hole. If you have a large gauge piercing, you CAN still have it put back to a tiny hole, though it does involve reconstruction – in 2019 a competent and experienced body modification artist was sadly prosecuted for carrying out this kind of procedure (Google ‘Mac McCarthy’ for more info), and as a result, in the UK this procedure can only be carried out by plastic surgeons. I recommend people seek out body modification artists overseas for the procedure, in this piercer’s opinion, better results are achieved via body mod artists – not plastic surgeons. I recommend Chai at CALM in Sweden for this. Other artists are available, please ask to see portfolios before committing to a procedure.
After reconstruction, it is possible to re-pierce, but you must wait a minimum of 6 months.
The procedure is relatively straight forward, an incision is made either side of the ‘hole’, meeting at the top of the hole, and the tissue is taken out, the two open incisions are then sewn back together. It takes around 30-60mins per ear (larger/more complex ones may need longer, or require a slightly different approach). This is discussed at length in one of my other blogs, so do check that out for a more in-depth look.
Here are some examples of reconstruction results, all are by Chai at CALM.
Before considering reconstruction, to help your piercing shrink down, use Bio-Oil (and/or Vitamin E) to massage the lobe and this will assist your skin in tightening up. Wear the lightest plugs you can (PMMA or light organic material such as wood) at a size down from what you are at, just the same way you stretched up, but in reverse! Or just leave out the jewellery completely, but be careful not to get your lobe caught on anything, just go with whatever is comfortable for you.
Here’s a quote from Helen, who shrunk her 6mm lobe piercing:
“I stretched my ear to 6mm and its shrunk quite well, only a 1.6-2mm-ish hole left, barely noticeable… There’s no problem with wearing ‘normal’ earrings. I just make sure to have a rubber back on it if I have fishhook earrings in.”
Anything Else I Need To Know?
Everyone has different experience with stretching piercings. This write-up is a combination of personal experience, common sense and knowledge of how piercings work. Your friend may find stretching easy, and you may find it difficult. This doesn’t mean you’re doing something wrong, just that your body has a different requirement to your friend’s. Some people find that their piercings stretch themselves after a certain point, the main contributing factor is the weight of the jewellery. I have seen lots of people who have never used any stretching methods on their ear after 3mm, and the piercing just makes itself bigger, and every few months, they go up a size. This isn’t common but it does happen. If your piercing is doing this, and you don’t want to go up a size – try leaving the jewellery out overnight and wear lighter jewellery (titanium, PMMA, silicone and wood are the lightest available).
Speaking of overnight – sleeping on larger sized jewellery, especially solid plugs, can be uncomfortable, but once the stretch is fully healed (a month or so) you can remove the jewellery overnight. However, it’s worth ‘testing’ to see how long you can leave it out for before the piercing will shrink a little. A quick vitamin E massage every morning will help get plugs back in. If you don’t want to leave your jewellery out overnight, try some soft silicone plugs or tunnels.
Cold weather, illness or a knock, pull or bump to the area can cause a stretched piercing – even a fully settled one – to kick off a bit. This is normal, but it is sensible to downsize your piercing (just by 1 or 2 millimetres) until you’re feeling better or until the weather is a bit warmer if it feels irritated or tight for more than a week or so. I have another blog up about summer and winter care for piercings which will elaborate more, but it’s sensible to pop some lighter jewellery in for everyday wear, like the plastics mentioned earlier – PMMA or PTFE.
And I think that covers it all!
Stretching your existing piercings is a type of body modification you can do yourself, and it is lots of fun. Enjoy the journey! Anyone can do it and it looks amazing on everyone, which is why it is so appealing and popular. The jewellery range is HUGE and you can use different types of jewellery in multiple stretched piercings to get some amazing effects. Please share your opinions and experiences in a comment!
One of the most common questions I get asked with regards to microdermals and skin divers is “What’s the difference?” I’ve written this to answer this and a lot of other common questions about ‘Divers’ and ‘Dermals’. This kind of piercing is in the same category as surface piercing – which you can read about here: http://skinseamstress.com/wp/2022/01/12/surface-piercings/
What Are Microdermals And Skin Divers?
Microdermals (AKA Dermals, Dermal Anchors, Anchors, Surface Anchors, Dermal Implants) and Skin Divers (AKA Divers, Mini-Dermals) are two forms of Transdermal Implant. The original Transdermal Implants (AKA Transdermals) look like this:
They were invented and pioneered by Steve Haworth (HTC Piercing, USA) whom we have to thank for a lot of the other more extreme modifications that you see. The ones shown above have 5 holes drilled in the base which circles around the post (which protrudes through the skin). The base sometimes has fewer holes drilled in it (some look like a 4-leaf clover). This is what they look like being fitted:
And once they are in (this is one of the most famous – or infamous! – pieces that Mr H has done, on Joe Aylward).
As you can see from the pic of the implant in progress, it’s quite a big procedure. Removing these is also very difficult, as the part of the implant which is under the skin is quite large. You can read about the removal of these larger implants here:
So, while these implants are versatile and can be placed more-or-less anywhere on the body, they aren’t something that a lot of people could deal with getting done, due to the size of them, costs and not being easy to remove. Then a gentleman called Ben from House of Colour came up with the procedure and body jewellery design for a less extreme concept that would be more accessible, and Microdermals were born! They can be used in the same way as the original transdermal implants (and give the same look aesthetically – but smaller) but their base is more of a ‘foot’ than a plate. They were seen as the answer to people’s prayers after surface piercing proved (generally) to be very difficult to heal (I have another blog up about surface piercing which you may also want to check out, as all 3 types of piercing – surface/dermal/diver – are related). It is worth noting that the original transdermals are still in use, but Microdermals and skin divers are seen much more commonly.
This is the jewellery that I use for microdermal implants. They are made from titanium with a removable ‘top’. There are some minor variations in design among dermals, some don’t have holes drilled (the holes help ‘anchor’ the jewellery in place, as tissue grows through them and reattaches above/below the plate), some have contoured sides and the posts (the part that comes up through the skin) can be different lengths. I use these ones mainly, but on faces and hands, I will use ones with a slightly slimmer base. I offer a plain silver disc – as shown – or one with a clear gem or white opal in as initial jewellery (other styles are available, just ask – this has to be arranged in advance!)
The disc shown on the top is the only part of the implant that is visible once the implant is fitted. This photo shows a pair of Microdermals I did in October 2010.
And a trio on the back of the neck from around 2015
The discs on Microdermals can be unscrewed (though the base of the implant stays in the skin until the implant is removed for good) and changed for other things once healed (discs in other sizes/colours, jewels, opals, spikes, balls, posts, shapes, etc.) This is the main difference between the dermals and divers, as divers cannot be changed. Pic shows a few examples of other ‘tops’ that can be used.
It is important to let the microdermal settle before changing the disc, trauma to the piercing (like moving the skin around it while taking the disc on and off) can cause it to migrate (‘grow out’) but I’ll talk about problems with the piercings later on.
Skin divers are the little sister of the microdermal. They are smaller overall, and the discs on the top are generally much smaller too. Like microdermals, they too are made from titanium. The flat disc is the one visible on the skin’s surface. The slightly conical disc (shown on top of the one on the left of the pic) is under the skin, with the pointed end pointing down (it isn’t sharp at all, just a rounded off point).
The visible part of skin divers CANNOT be changed. When getting a diver you would be shown all the options that your piercer has available so you can make a choice on which style you would like to go for. The commonest types are the basic titanium circular disc (as shown above) and gemstone disc tops in lots of colours, both of which are available in different disc sizes:
Because they are smaller, skin divers are often used in pairs or multiples to give a more obvious effect, but sometimes less is more and a single dermal looks stunning. This is a row of fresh divers I did in July 2014 (you can see the different colours, baby pink and clear gemstones).
I have seen cases where a diver has been removed and replaced with another (immediately after the first one has been removed) and they have settled, but it is not something I would recommend. I have also seen cases where the gemstone gets tarnished and looks duller over time (this can also happen with microdermals, but the disc could just be replaced with a new one) and this remove/replace method could be an option if you don’t like the duller disc, but there is no guarantee that the replacement diver will heal, even if the one which was removed was perfectly healed. Another problem that comes up quite a lot is with the shaped divers, the stars in particular. The points on the star shaped top catch on a lot of things (threads on clothes, hair, etc.). Please see later in this piece for info about taking care of the piercing, but I felt it was worth mentioning this while looking at the different choices with divers.
There is a third option – not as widely seen or available – ‘skin wheels’ these are a similar shape to a skin diver, with a round base, but incorporate the base holes that are seen in microdermals, so kind of a hybrid of the two. Like microdermals, the ‘tops’ can be changed. However it’s worth noting that microdermal threading (1.6mm internal) is NOT the same as the skin wheels (1.2mm internal), so microdermal tops would not fit, though similar ones will be available in the appropriate size. The procedure is slightly different, the jewellery is placed into the hole (see later in the blog) that was made by pushing down and twisting, corkscrewing the base under the skin. A bit fiddlier than the other two types, and takes a little longer to do, usually, but the healing time/process is the same. From the outside, it looks just like a diver or dermal.
How Big Is The Jewellery?
Not very! The jewellery as a whole is very small, but less than half of it is visible when installed. The visible part of the jewellery is available in different sizes (even though divers have a fixed top, there are a few different sizes available). This shows the sizes of the dermal and diver jewellery against pennies.
How Are They Done?
The method for both types of implant is very similar. A hole is made on the surface of the skin (this is a single point piercing so there is no ‘exit’ hole) for the implant to go in; a small pocket is created under the skin (the jewellery is often used to create this) and the jewellery is inserted into this hole/pocket.
There is only one method used for skin divers, but microdermals can be performed by one of two methods, the needle method and the dermal punch method (I’ll explain dermal punches in a sec!), both of these are shown below. It is quite hard to explain in words exactly how the whole thing works, but these cross sections and diagrams explain it pretty well.
Microdermal Methods:
Needle Method: Needle is used at an angle to create a hole and pocket. Often the needle is used to make another pocket in the opposite direction to the 1st (but in through the same hole) to make another pocket for the ‘heel’ of the dermal.
Jewellery sits between the dermis and epidermis. The red halo shown is the surface area that has to heal to hold the dermal in place.
Dermal Punch Method: The dermal punch is used at 90 degrees to the skin. It is pushed and twisted about 4mm into the skin (though this varies for different placements). The edge is razor sharp and cuts through the skin easily. It removes a cylinder of skin tissue, then a needle or taper is used to create a pocket (personally, I use the jewellery to create the pocket), which the microdermal slides into. This is the method I use, I feel I have more control with the punch than with a needle.
This shows the removable part of the dermal. When the disc (or whatever is screwed onto the top) is removed, the dermal is barely visible. A lot of people take the disc of to clean the piercing, but as mentioned above, it is best not to move the disc while the piercing is healing.
Skin Diver Method (pic from www.wildcat.co.uk):
The skin is pinched up.
Dermal punch is held at 90 degrees to the skin and gently pushed and twisted to about 4mm deep (varies depending on placement).
The punch is removed, leaving a hole and removing a small cylinder of skin tissue.
Sometimes the tissue does not come out with the punch, so this is removed with sterile tweezers.
The diver is popped into the hole – this diagram shows a tool holding the diver, personally I just use my thumb and 1st finger.
Cross section of a skin diver in place.
What Is A Dermal Punch?
Dermal punches (AKA Biopsy punches, punches) are like tiny apple corers. They are a plastic handle with a metal cylinder attached at one end which is razor sharp. They are available in different diameters, but for dermals and divers, they are usually 1.5mm or 2mm wide (tongue and navel piercings are typically done at 1.6mm in diameter to give you an idea of size). They work by being pressed against the skin and being twisted. The sharp end slices out a perfect circle of tissue and once the punch has gone deep enough (around 4mm, but this varies with placement/anatomy) it is removed. Usually, the cored-out tissue comes out with the punch, but occasionally it has to be removed with sterile tweezers and scalpel. This is what they look like. The one in the packet looks about 1.5mm (which is used in skin diver piercing) the other one – out of the packet – looks much bigger, about 4mm.
So…. Which One Is Best? Dermals or Divers?
Both have their pros and cons, and a lot of it is personal choice. I had a dermal on my chest which stayed in for about 6 months and I had divers on each wrist which lasted over 2 years, but microdermals tend to have a longer shelf life. If you are unsure about which would be best for you, it may be down to where you want it as to which would be best.
Personally, I found microdermals on areas that had thinner skin had quite low success rate (hands/fingers for example) and skin divers in these places have worked better, though I do not recommend ANY piercing on hands/fingers. There are some places that either implant will work equally well (wrists, hips, chest, etc.) Some people have had more luck (trust me, luck is a factor!) with dermals and some with divers. However, it is important to remember that neither of these piercings is guaranteed to heal and stay put until YOU decide it’s time to take it out, often your body will just decide it doesn’t like it and kick it out. Because there isn’t much holding the piercing in place (especially when they are initially done and your body hasn’t had chance to close up around the jewellery), having them pulled or knocked can cause them to come out (this is what I meant when I said luck was a factor!) fiddling with the piercing or changing the dermal disc too often will also irritate them. I will go into more detail about aftercare later, but being gentle and leaving the implant to do its own thing is often the best option. See later in the blog for info on taking the piercings out and scarring.
Just because you’ve had a problem with one type of implant, doesn’t mean the other kind will do the same. It is possible to re-pierce the same site with a dermal or diver, but the scar tissue that will be present (even when fully healed) can cause the piercing to reject, so I would recommend trying a different site, even if it’s in the same area as the first piercing, just slightly higher or lower or to the side if it wasn’t a ‘centred’ placement.
Because of the unpredictable nature of this type of piercing, if you are considering more than one, I recommend getting just the one done at first and if it heals well and you are happy with it, then go for more (I would say give it at least 4 months before deciding whether or not to do more, just to be sure). A lot of people want formations done of multiple divers or dermals as shown below (neither by me – please comment if you can credit the artist!):
One of the problems with this is that is one of the piercings decides to come out (for whatever reason) then the whole effect would be ruined and the piercing may not be able to be re-done.
How Much Will This Hurt?
Nothing is painless as far as piercing is concerned. I found that both procedures were more uncomfortable than painful. Most people find it is more of a friction burn type pain than a scratch or a pinch; though this will vary from place to place on the body and person to person. Microdermals take a little longer than skin divers to do, and once the jewellery is in place, any pain stops. There may be some swelling and tenderness for a day or two (bruising and a small amount of bleeding is also normal, as with other piercings). As there is no ‘exit’ hole, which is usually the painful part of a traditional piercing, most people find them to be easier than expected.
How Do I Look After Them Once I’ve Had Them Done?
A lot of piercers jokingly refer people to the LITHA method (Leave It The Hell Alone!) which actually makes perfect sense with these piercings! Once I’ve done a dermal or diver, I will put a dressing over it (unless the client has told me they are allergic to dressings, in which case I will use a wad of tissue and some cling film where possible). I recommend leaving a dressing of some kind on for at least 1 week after having the dermal/diver done. I realise that some people don’t like plasters due to cleanliness issues, and changing the plaster every day is fine, but make sure it is kept covered, and gentle pressure is applied to the top of the implant by the plaster (this helps keep the jewellery under the skin until the body has chance to form a tight ring of scar tissue around the post of the jewellery). If the client is allergic to plasters I will ask them to use the tissue and cling film (or masking tape/surgical tape and tissue, as long as the client hasn’t had an allergic reaction to that too) on the piercing for a week or so – or if they know of a certain type/brand of plaster that they aren’t allergic to, just to use those as soon as they get home.
To clean (if keeping the area covered, I recommend doing the following every other day, so do it one day, miss a day, then do it the day after), use clean warm water to clean the piercing (and lathering up with a mild antibacterial wash) doing it in the bath or shower is usually good too, just make sure the water you rinse with is clean. I’ve found that pinching a cotton bud (with clean, dry hands) into a flat shovel-shape makes a perfect cleaning tool to get juuust under the edge of the disc. Use this to clean the piercing (you will need more than one cotton bud, as using the same one will just spread any bacteria from one side of the piercing to the other) and always make sure to dry your piercing thoroughly, pat/dab dry with a clean towel or tissue/cotton bud – do NOT rub dry – then replace the plaster once dry. After a week or so, you can leave the piercing uncovered, but I recommend cleaning gently once a day. ALWAYS (even when healed) cover your dermal/diver if you’re worried it may get knocked or bumped…. So stock up on plasters!
I have found – with both my dermal and my divers – that every now and again, the area gets a bit pink, tender and inflamed, even when the implant has been done for a number of months with no previous problems. When this has happened, I have applied light pressure around the implant, and some lymph fluid (clear/white/pale yellow gunk) has come out. After cleaning it away with clean water and a cotton bud – in the same way you would normally clean it – pop a plaster (or whatever you would normally use) over it and leave it for a day or two. This generally settles them, but return to your piercer if you are at all worried about the piercing. If you are doing any activity which may cause the dermal or diver to be knocked or pulled at (sports, concerts, work) then cover it with a plaster.
OK, How Do I Change My Microdermal Top? It’s REALLY Fiddly!
Yes, it is! A lot of people struggle with them, I had a microdermal done a few years ago and I couldn’t change it myself (though doing other peoples is no problem!) So, I don’t mind changing the jewellery for people free of charge when they buy the attachments from me. Most piercers will offer this service, so just ask. The jewellery is ALWAYS internally threaded (instead of externally threaded which is sometimes seen in body jewellery). You cannot interchange internally and externally threaded jewellery, but microdermal accessories are widely available, and I am happy to order in different items, just call in and ask. This diagram shows the difference in thread types with a labret stud:
So… What Happens If I Don’t Want The Dermal Or Diver Anymore?
If you decide to get rid (or if the jewellery is starting to grow out and you want rid before it grows out completely – which would cause more scarring) then both types are easy enough to remove. I’m happy to take out dermals or divers (if I didn’t do the initial piercing for you, I do have a small charge for this service, but if I did the dermal/diver, it’s free) if you feel you don’t want it anymore or if it’s being problematic.
Divers are easier to remove (as they are a smaller implant and there are no holes drilled in the base which tissue can grow through) and to be honest; you could probably get them out yourself. If I take out a diver, I’ll thoroughly clean the area, massage around the base to try and work the jewellery out, then holding the disc at the top, pull it out – sometimes a small incision (2mm max) is needed on the base, but 9 times out of 10, these pop out without any problems. There is usually a little blood – even if there isn’t an incision, and as when the piercing is 1st done I will pop a plaster or some tissue over the site and ask you to keep it on for a couple of days, and then just to keep it clean until it has settled down.
Removing dermals is a bit fiddlier as they are larger and have the holes drilled in the base. I would not recommend trying to do this yourself. The area is cleaned and massaged, and I will try and ease the dermal out, getting the shorter ‘heel’ of the implant out 1st and then working the rest of it out. More often than not, an incision along the length of the foot (about 5mm) has to be made if the dermal is not being removed because of a problem, and the tissue growing through the holes has to be severed, though this would be a very small piece of tissue to cut. Once the jewellery is out, a plaster or tissue is put over the site and left on for a couple of days until the area has settled, and then just keep it clean and it will heal in its own time.
The removal of dermals and divers is nowhere near as extreme as the removal of the original transdermal implants. There is very little blood and while the procedure will be a bit painful, it is generally no worse than getting the piercing in the 1st place. It’s worth noting that removing a fully healed dermal/diver is trickier to remove than one which has been problematic, as problematic ones are generally on their way out anyway.
If they are taken out, or decide to grow out, or if they are yanked out, or refuse to heal (refusal to heal is rare) then any scarring left is minimal. The site of the piercing often looks angry for a few weeks after removal. The hole will be healed up after a couple of days, and the area settled down within a few weeks. It is important not to pick at or scratch any scabbing/dry skin left by the removal, as this would cause more scarring. You can minimise the appearance of scars from them (or any other piercing) by using vitamin E lotion and/or Bio-Oil after a week or so when the wound has closed.
I think I have covered all relevant points in this blog, but if you would like more info on a certain part, or if I have missed out something, please leave a comment below.
This blog is a bit of advice for those of you who are thinking of taking a piercing out – short term or long term. Or for those who have removed a piercing and want it back.
Retiring Piercings (Taking it out and leaving it out)
So you’ve had a piercing done and you’ve decided to “retire” it and take it out then leave it to close up. People decide to do this for 4 main reasons:
1) The piercing has had trouble healing and you’ve decided to get rid.
2) You simply don’t want the piercing anymore, though it has healed well.
3) Work/school don’t like it.
4) The piercing isn’t straight and/or you aren’t happy with the placement.
The following instruction applies to all the above reasons; I will go through the above reasons in more detail later in the blog:
*When at all possible, wait until a piercing is healed before taking it out, otherwise you leave an open wound which can get infected/abscessed and give more scarring. If at all possible, give it at least 2 weeks from the date of the piercing, to minimise the risk of beeding.
*Scarring from piercings SHOULD be minimal. If the piercing was done properly and healed up well, AT WORST you will have small white dot-scars once the scarring has healed.
*You can buy Bio Oil from any chemist or drugstore (Boots, Superdrug, etc), it really helps minimise scars (also great for stretch marks).
OK, the numbers below correspond to the reasons above….
1) As mentioned, it’s best to heal up a piercing before taking it out. Try cleaning the piercing 2-3 times daily with saline or return to your piercer for advice. (See my piercing aftercare blogs for more info). Switching the jewellery may help – downsizes are super important on a lot of piercing placements. Some piercings just take longer to heal, which is unfortunate, but they WILL heal eventually. Some people struggle with healing more than others – if you’ve had a longer healing time with previous piercings, you can expect it with others. If you absolutely must take it out, remove the jewellery, but continue to clean your piercing with saline for a week or so, to reduce the risk of any infection.
2) Easy Peasy. Just remove the jewellery and make sure that no bacteria gets into the piercing while it ‘closes up’. Just clean with antibacterial soap twice daily for a week or so. Piercings can always be re-pierced if you decide you want it back (see later in this blog!). Some piercings never close 100%, so sometimes a full re-pierce isn’t required, it would just need some jewellery putting in.
3) Try using retainers (clear pieces of jewellery – see pic below) to make the piercing less noticeable, or return to your piercer for advice. If the piercing has to be removed, so be it, but it’s worth looking into alternatives!
4) If you are considering having the piercing re-done, call in and see me (or return to the place it was originally done, or see any other piercer) BEFORE taking it out as there may be other options (changing jewellery for example). If it needs to be re-done, any scarring will have to be fully healed (white) before it can be re-done, this usually takes a few months.
Leaving Piercings Out For Short Periods Of Time
Leaving jewellery out of a piercing of a relatively small gauge (thickness) for more than a few minutes is not a great idea. There is no set time that it’s guaranteed a piercing will (or will not) close up. There is no formula to give any estimate on how long a piercing will stay open after jewellery is removed relating to how long the piercing has been there.
Larger gauge piercings and stretched piercings (stretched earlobes for example) may not close completely quite as easily, but it can shrink a little, usually a massage with some vitamin E cream is enough to help it through, but ‘standard’ piercing sizes – 1.2mm and 1.6mm – can close much faster than you’d think!
Some people can leave their piercings out for months, and still get them back in; some will struggle after a few minutes. Different placements on the same person can mean different things – some may close faster than others. In short – there’s no hard and fast answer to how long any piercing can be left out for.
Ideally, piercings will not be left without jewellery – you should assume that if you take your jewellery out and do not replace it within a few minutes it will close.
Depending on your reasons for needing to leave the piercing out, there may be other options. If it’s for an operation or scan, or to hide it for work, retainers might be an option – see point 3 above – the plastic retainers are ideal for scans and operations too, as there’s no metal at all in there.
Often if a piercing has been left without jewellery, even if it’s shrank, it can be helped through with some lubrication and a small taper (I offer this service, as do most other piercers, though there may be a small fee – or if you have lost the jewellery, most piercers, myself included, will offer a free fitting with jewellery purchase) – THE SOONER YOU TRY TO GET A PIECE OF JEWELLERY BACK IN, THE BETTER! I see clients for this reason who will come in with their jewellery asking for help, and then tell me it’s been out for a month – meaning the chances of getting it back in are slim, but it’s worth a try!
(Just while we’re on the subject – NEVER carry jewellery loose in a handbag, purse or wallet. It can get damaged and scratched and coins are FILTHY and you could spread bacteria to your piercing. ALWAYS use a grip-seal bag – ask your piercer for some! – to carry and store your jewellery!)
To prevent accidentally losing the jewellery, make sure screw ons are secure (righty tighty, lefty loosey! – or clockwise to tighten, anti-clockwise to loosen), and if you DO lose a ball, get a replacement ASAP (secure the jewellery with some medical tape or a plaster to keep it in!) Your piercer will stock spare balls, so it may be worth getting a couple of spares in case they are needed!
CHANGING JEWELLERY
If you’re taking your jewellery in and out yourself and changing it, familiarize yourself with it BEFORE taking anything in and out. There’s definitely a ‘knack’ to changing jewellery, and the only way to get it is with practice. Bear in mind that most piercers (me included) will fit any jewellery bought in the studio free of charge, so there’s really no need to change it yourself unless you really want to – I’m happy to show you how the jewellery works while I change it for you.
I have another full blog up about changing/fitting jewellery – so check it out if you need some info on this.
RE-OPENING & RE-PIERCING
If you can’t get a piercing back in, return to your piercer for advice. As mentioned, sometimes piercings can just shrink a little, and re-opening them is possible (not actually making a new hole, just making the old one a little wider to allow jewellery through). It nips a little, and will feel tight for a few days; it’s a similar procedure to stretching a piercing, just on a much smaller scale and as a one-off. It’s important to use good quality titanium jewellery and treat it like a ‘new’ piercing for a week or so. There may be a small amount of blood (we’re talking the TINIEST amount) and some tenderness or swelling, but usually within a couple of weeks its back to normal.
If the piercing has closed completely, re-piercing is an option. If there has been any infection, or the piercing has been ripped or torn, you will have to wait until it’s fully healed (scarring has turned white, no dry skin, scabbing or irritation) before re-doing it.
The procedure for re-piercing is the same as a ‘normal’ piercing procedure. If the old piercing was in a good position, then it can be re-done in the exact same place (and will often heal faster) re-using the holes. If not, or if there’s no visible marks or dimples, an entirely new hole is made. Most people don’t notice a huge difference in the pain or discomfort of getting something re-pierced, some say it’s more painful, some say it’s less. I never noticed any difference, personally.
Microdermals/skin divers and surface piercing don’t always cope well with a re-pierce, and it’s usually a better idea to position it as near to the old site as possible.
If a piercing has grown out or migrated, there is no guarantee that re-piercing will mean it won’t do the same again. It can sometimes fall back into the ‘old hole’ too, if pierced very close to it.
Hope this answers some questions! As always, comment below with any queries or comments!
Anaesthetics and ‘numbing’ piercings is something I get asked about a lot. Most people are under the impression that piercings hurt a LOT more than they actually do – but when you’re a bit scared, doing something new (or if you just plain don’t like the idea of pain), it can be something you ask for to make the experience as easy as possible. No judgement from me here!
**DISCLAIMER – I DO NOT AND WILL NOT USE ANY ANAESTHETICS OF ANY DESCRIPTION IN PIERCING PROCEDURES AND WILL NOT PERFORM ANY PIERCING PROCEDURE ON AN AREA THAT I KNOW OR BELIEVE TO HAVE HAD AN ANAESTHETIC APPLIED** (This is discussed later at greater length later).
What Are Anaesthetics?
Anaesthetics are strictly controlled medicines which are used in hospitals and ‘medical’ environments so that a patient feels no pain, or is not aware of the procedure they are undergoing – they fall into 2 categories (local – which is where the area is ‘numbed’, and general – which is where you’re ‘put under’ and are asleep for the procedure).
General anaesthetics in the wrong/unexperienced hands are extremely dangerous. Medical professionals are trained specially in dosage, use and administration of these, and the meds are never seen anywhere outside a surgery situation. A patient is either completely ‘asleep’ or they are ‘sedated’ (which means they are conscious, but not fully aware of their procedure – often having no memory of it after the sedation wears off).
Local anaesthetics are split into a further 2 groups – topical (usually creams or gels, but also liquid sprays) anaesthetics are used on unbroken skin and often rubbed in or covered with a non-porous dressing and left for a period of time. They give a short-term effect and are often found in other medicines like ulcer gels and antiseptic creams. The second type of local anaesthetic is one administered via injection into the tissue (under the skin).
The use of injectables is prohibited outside a medical setting and training is needed. This type of anaesthetic is never used in body piercing.
When Are They Used In Piercing & Tattooing?
Topical anaesthetics are seen in the body art industry, for the sake of being thorough, I will cover tattooing too – but piercing is my focus.
For tattoos the most commonly used brands are Emla and Ametop – these are both tubes of white gel/cream which are usually available without a prescription. Commonly used before injections (before a cannula or ‘drip’ is inserted, or for injections, such as a diabetic patient using it before an insulin injection for example) you can request them from a pharmacist. Tattoo studios are not permitted to sell these anaesthetics, so clients are asked to buy and apply them themselves (an hour before the appointment is usual), and these will usually give 40mins to an hour of ‘numbness’ on the applied area, which gradually wears off. There are other brands on the market – such as TKTX which are not regulated and can be risky to use.
There are liquid sprays that can be used in tattooing (the most commonly seen is Bactine, which is not readily available in the UK). These are applied to broken skin (they DO NOT work on unbroken skin), rubbed in, left alone or covered with a non-porous dressing for 20-30mins, then wiped off and the procedure continues.
Anaesthetics more commonly seen in piercing are an ethyl chloride spray often called a ‘freeze spray’ – it is a pressurised, sausage size/shaped glass tube which, when the metal cap is pressed, gives out a stream of clear liquid. This often causes the tissue to go white. The tissue is ‘frozen’ before piercing it. The second type seen is Xylocaine, an oral (for use in the mouth) anaesthetic which contains lidocaine, often banana flavoured. This usually comes in a small, rounded bottle with a plastic ‘straw’ type applicator.
Why Should They Not Be Used?
We’ll look at both types in more detail (WHY we don’t use them) but first, it’s important to note that the use of any anaesthetic in body piercing (unless a piercer has had medical training) is not permitted by local councils, and further to this, no insurance company (that I am aware of!) will cover a piercer for the use of anaesthetics. Anaesthetics can cause longer healing times, there is no way to know if a client will be allergic to an anaesthetic – an anaphylactic shock would require medical treatment, and the use of anaesthetics presents an additional risk to the procedure – which are my reasons for not using or piercing anyone who has used either type.
What Are The Anaesthetics That Are Sometimes Used?
Ethyl Chloride Spray (Chloroethane)
A clear, odourless, flammable liquid in a pressurised glass container. It is sprayed onto the area to be pierced a few seconds before the needle is used and it – literally – freezes the skin. The affects last about 15-20mins (so very short term) and then you will feel any after-pain from the piercing.
There’s a few reasons we don’t use this one (aside from legalities/insurance). The main issue being that when the skin/tissue is ‘frozen’ it will contract, thus meaning that a piercing that looks straight and well-placed may end up crooked or too deep/shallow as the skin expands, as the circulation returns to the area. Speaking of circulation…. Any blood vessels in the area will also contract, meaning they are not visible – and could be pierced. As the tissue is frozen for several minutes, no bleeding will occur, until the client has left the studio. Repeated exposure – so if client has the anaesthetic applied, then needs a little time to compose themselves, sensation starts to return, so the spray is used once more – can cause the skin to dry out and crack – and obviously damage to the tissue. Ethyl chloride cannot be used for facial piercings, due to the risk of it getting into the eye area.
As the most commonly seen anaesthetic in piercing, many of my clients expect to see it used. The simplest way to explain why it shouldn’t be used – though I hate using the word ‘butcher’ in a professional environment – is to think of a butcher. They don’t bring frozen meat out and start cutting it up, do they? Piercing frozen tissue requires a lot of force, it is much harder to do, takes a fraction longer, and as the effect wears off, you will feel the after-pain. In winter, if you go out in thee cold with no gloves on, then go into a nice warm house, your fingers often tingle and sting as the restricted blood flow returns – this is what happens when using any type of ‘freeze spray’.
Xylocaine Spray (Lidocaine)
Lidocaine is an anaesthetic most commonly used by dentists. It’s usually flavoured (spray is banana, the pink gel is usually bubblegum). The spray is far more common to see in use for piercings. The applicator (shown next to the bottle in the pic) must be appropriately processed (sterilised) after each use. It is sprayed onto the area – the mouth is its most common use in piercing.
Lidocaine is a commonly used anaesthetic and it can be injected (the solution used as a spray CANNOT be injected). The effects of the oral spray used in piercing will last for about 20-30mins, so a short-term anaesthetic. With all oral anaesthetics, there is a risk of biting the tongue/cheek without noticing, due to it being numb, and lidocaine must be used with caution on anyone who has any heart defects or irregularities. As with any medication, there’s a risk of an allergic reaction and if swallowed, it can cause vomiting (not good over a fresh piercing!) and in some cases, lidocaine can cause veins to enlarge – meaning you’re running a much higher risk of hitting one if you don’t check thoroughly! Lidocaine can also cause an ‘asthma attack’ if used on clients that suffer from asthma. Scary stuff!
What If I Use An Anaesthetic Myself?
Whilst the above are the most common anaesthetics that would be used BY piercers (again, not entirely legal for this use, nor covered under any insurance policy I’ve ever seen), clients often take it upon themselves to use the topical creams mentioned in the first section, which are often used for tattooing (Emla and Ametop) and apply these themselves before getting pierced. A client applying an anaesthetic themselves, then getting pierced (NOT the piercer applying for them) does not break any laws, but it would be a grey area for an insurance issue – the reason I wouldn’t pierce someone in this instance is the other reasons listed – chance of allergic reaction, problematic healing, the additional risk of another product being used without a further risk assessment on the procedure – but also, if there were an adverse reaction, guess who’d be taking the blame???
I am seeing more and more people using Emla and Ametop – I WILL refuse service if these have been (or if I suspect they have been) used on the area to be pierced. I would be happy to offer an alternative (if client has used it on one ear but not the other, I would be happy to pierce the other side) but if not, I would need 24hrs to be sure that any affect (desired or side-effect) has presented and then worn off.
These creams would generally not work well enough to numb a piercing, as they do not penetrate deeply enough to fully numb the area, making their use somewhat futile. So, the risks listed are taken for nothing, it wouldn’t be numb, AND you’ve added a whole host of obstacles to what was originally a pretty straightforward procedure.
But I Don’t Want It To Hurt!
In that case, piercing may not be for you! It’s gonna hurt – only a tiny bit, and only for a split second…. But yes, you WILL feel some discomfort. Piercing is (should be!) quick. We’re talking a second or so for the needle to get through and stop moving, then another second or 2 for the jewellery insertion. After that, it will feel tender, tingly and/or warm, but not painful, just a mild discomfort.
If piercing DIDN’T hurt, it wouldn’t be exciting. It would be as dull as having your toenails trimmed. To get the ‘rush’, you need the sensation. And it may mean you need a few months of toying with the idea of a piercing, but as soon as the ‘want’ for it outweighs the perceived thought of how much its going to hurt, you WILL get it done.
One phrase every piercer has heard countless times is “It was nowhere near as bad as I thought it would be!” Ask friends and family about their piercing experience, find a piercer you trust and feel at ease with (this may be a different piercer to your friends!) and take the plunge!
Gun Piercings – We’ve all seen high street shops offering the service, as well as countless hairdressers, nail bars and jewellers (among others). But what’s so wrong about it? How do the guns work? What is the difference between a gun piercing and a needle piercing? What are the pros and cons with each? I’m going to cover as much as I can in the blog, but do leave a comment if there’s something that needs more explanation.
To outline many of the issues raised in this blog, I have included pics of gun piercings that have ‘gone wrong’ – these are all at the bottom of the blog.
I operate a strict no-gun policy. I do not own a piercing gun, nor will I ‘recommend’ anywhere that uses them. While we’re on it, I do not pierce babies, toddlers or children either (no one under 16) I have another blog on this subject, if you’d care to read it. There are no laws on ear piercing, but it’s generally accepted that anyone under 16 must have a parent or legal guardian with them who will sign the consent form for their child (by law, there is NO minimum age for ear piercing).
*Piercing guns, and the use of them is completely legal in the UK*
No one can blame you for getting pierced with a gun, you walk in somewhere offering and you – quite rightly – assume that the procedure will be done using the most up-to-date and safest technique possible. This is where the gun-wielders will let you down. And this is why I have made this blog – to educate you on your options, so you can make an informed decision. What you choose to do, and where you choose to take your custom is – and always will be – your choice alone.
A piercing and its quality and the risks involved come down to the following:
The environment you’re in.
The knowledge and experience of the person carrying out your procedure.
The instruments used and their cleanliness.
The jewellery used.
The aftercare instructions you follow.
We’ll discuss each point at length, why it’s important, and where the gun can let you down.
What about the people and places that used guns?
(The Environment you’re in and the person carrying out your procedure)
As mentioned, there’s no laws being broken, but that doesn’t mean that this is the best option. I’m sure there are guns being used in tattoo and piercing studios that uphold the highest standards of cleanliness, however a reputable studio will NOT use a gun for any piercing work.
‘Training’ to use a gun is part of most hairdressing courses at colleges (and employment in certain shops) and takes about 2 hours. So that’s 2 hours, instead of the years of training and experience it takes to be a body piercer. There is no knowledge of the skin, getting the piercings level, how to work with irregularities, the lymphatic (immune) system, and circulatory system required to ‘pass’ a ‘gun course’. Only knowing how to operate the instrument. The ‘gun courses’ do not teach the importance of sterilization or proper aftercare either – the practitioners are simply shown WHAT to use, HOW to use it, and given a template aftercare sheet to hand out (though I doubt that many of the people handing them out have read and understand them). Due to lack of proper training and sheer narrow-mindedness and a refusal to really look at what they are doing as a surgical procedure (albeit a minor one), the practitioners usually have a lax attitude towards cleanliness and sterility. I have seen many places where gloves aren’t worn, the ‘piercer’ will use the gun to pierce ANY body part (which can cause some serious damage), and the piercings are wonky and not marked before proceeding (frequently, even if they are marked, the marks are not level or evenly spaced).
Thinking about WHERE you’re being pierced is something that not everyone does – maybe being nervous makes you less observant, no one could blame you! Look at a piercing studio – all wipe clean surfaces, a large vinyl-covered bed (in case of a fainter, it helps to have something to lie down on), an autoclave (usually in a separate room – ask to see it if you want!) to sterilize the equipment, easily accessible sink, licenced and registered with the local council to perform these procedures in a safe environment. Inside a high street shop or hairdressers there are a whole range of hazards – a small chair to sit on (you faint, you go on the floor), merchandise hanging close to the piercing area (the microscopic blood spray caused by the heavy force of the gun can spray tiny blood droplets all over this), porous carpets, curtains, wallpaper (these are all unacceptable in a licenced studio), as well as people all over the shop. It’s a cross-contamination nightmare. A bottle of disinfectant and tissues is all that is used to disinfect (not sterilize) the re-useable gun. Many places do not have a sink, or separate area for piercing and the procedure (remember, we’re talking about a minor surgical procedure here!) is simply carried out in the middle of a crowded shop. Everyone watching you, which while isn’t exactly a safety issue, it’s not the most calming environment.
What’s so bad about the gun?
(Instruments used)
Points about the gun that you should consider before getting pierced with one:
Guns cannot be sterilized. The gun cannot be vacuum autoclaved, which is a requirement by law for body piercing equipment and hospital equipment. The gun is a (usually) metal frame with a plastic cover; the cover would melt if it was properly sterilized. There is a small plastic casing put around the stud before use which is disposable (though if you’re getting a pair of piercings, the same plastic casing is used for both piercings), but the actual gun is re-used on dozens, hundreds…. Thousands? Of people WITHOUT being sterilized, simply wiped down with some disinfectant.
Guns use blunt pressure to push the stud through the tissue which creates much more swelling and trauma to the area than a needle piercing. Because of the excessive swelling, the jewellery used is usually too short and does not allow adequate room for swelling and increased blood flow. Needles part the tissue as they go through with the bevel (sharp end), making a crescent-shaped hole which gets larger and larger as the needle moves through, allowing jewellery to be placed in the hole, sliding it through on the end of the needle (or via a plastic tube if a cannula needle is used). When a gun is used, the stud and back crush the tissue between them until the ‘sharp’ end of the stud (which is nowhere near as sharp as a needle) clicks into position, smashing through any tissue (i.e. your body bits) which are in its path.
Gun piercings are cheaper and arguably quicker to do than a needle piercing. An experienced piercer can move a needle through your ear faster than a gun can move a stud (which slows down when the resistance from your ear starts), but when using a needle, the jewellery then has to be inserted, which means that the OVERALL time to do the piercing is slightly longer when using a needle. With the gun, it’s a quick ‘click’ and it’s done; which if you count it as an advantage is the ONLY one.
This is a diagram of the piercing gun. Notice the plastic handle. As mentioned – this would melt if you put it in an autoclave.
This is a close-up of the stud and back loaded in the gun. In this photo the gun is white (not blue as shown above) and the disposable holders for the stud and butterfly back are shown in blue. Your ear/random body part goes between them and the back and stud are pushed towards each other until they snap together.
What type of jewellery do guns use?
(Jewellery being used)
The jewellery used in gun piercings is rarely good quality (I say rarely to be conservative – I have not seen any gun-jewellery which is acceptable, but maybe it does exist). The ‘one-size-fits-all’ studs (arguably, the entire set up and procedure are a one-size-fits-all when it comes to gun piercings, as mentioned, the “piercer” is essentially shown how to operate a machine, and that is it) are too short to allow for swelling on the piercing (I think around 6mm is the standard length). I rarely pierce earlobes with anything less than 8mm. The metal is usually nickel plated and coated in 9ct gold or sterling silver, both of which are porous metals, and unsuitable to be worn in fresh/healing piercings. The backs have a large surface area which means that there are a lot more hiding places for bacteria, any body fluids and general grime than the smooth, simple design of a barbell, labret stud or ball closure ring. I have seen cases (mostly gunned nose piercings) where a back is not used, but the stud has a wider ‘arrowhead’ on the end of it, meaning taking the stud out is very painful and often does further damage. The backs are often painful to sleep on and the sharp point on the stud (which is used to make the hole) can even stab you in the side of the head and neck.
Lots of different places use guns – even some piercing studios that also use needles will use guns for lobe piercing. But the vast majority of gun-use is in hairdressers, nail bars, tanning/beauty salons and some high street accessories shops.
If the practitioner is giving out aftercare, surely, I should follow it?
(Aftercare)
The aftercare advice given (if any) is usually inaccurate and any professional piercer will disagree with 90% of any information given on the aftercare sheets (pre-typed by the gun company) from these places – trust me, I’ve read one.
The general consensus from professional piercers is that a piercing should be cleaned with saline solution twice daily, and not touched or moved.
Reading through the recommended aftercare sheets from companies that sell the guns (part of the ‘kit’ is a pre-typed aftercare sheet to be handed out to each client) the recommendation is to twist the jewellery back and forth (this will re-open any wound, drag dry lymph through the piercing, and scramble up any healing that your body has started to do), and often recommend the use of cleaning products which are far too strong (surgical spirit, hydrogen peroxide, TCP, benzalkonium chloride, etc) which WILL kill bacteria and germs, but can also strip the skin of its natural oils and damage healthy skin cells which are working to rebuild the area that has been pierced.
What about the law?
According to government legislation, it is not against the law to use a gun on earlobes (its grey-area for everywhere else, but as any PROFESSIONAL AND EXPERIENCED piercer will tell you, they should not be used AT ALL!) However, many places will pierce other parts of the ear, and body with a gun.
These shops and hairdressers, etc. get away with using the guns because their licencing and registration (from what I understand – if anyone knows otherwise, please correct me) is separate from that of tattoo/piercing studios. The ‘training’ certificate given to the people who do (either from the gun company, or as part of a hair and beauty course) it is all they need. I’m unsure if the companies and businesses offering gun piercing are insured in the same way as a tattooist or piercer. Most people using guns will agree that the needle is a better option, but continue to do what they do because of one thing – MONEY.
The main culprit is a big company, and a pair of ear piercing studs and a couple of squirts with some disinfectant (to clean the gun – NOT to sterilize it) and some surgical spirit that they give as aftercare (please do NOT use surgical spirit on your skin), along with a sheet that tells you to turn the studs in their holes (actually causes more trauma, swelling and bleeding) costs THEM about £5. And I know that this place offer ‘free’ ear piercing when you buy a ‘starter pack’ (which consists of the surgical spirit, pre-printed ‘aftercare’ (using the term loosely!) sheet from the gun company and a pair of studs which vary in style/price). The starter pack (last time I checked) costs £15-£20+ for a pair, with the cost depending on the style of studs you pick – some options are up to £70. I offer ear piercing with NEEDLES and properly sized, appropriately processed and high-quality titanium jewellery for £35/pair.
What is it about needles that put people off?
Needle piercings are often snubbed because people are scared of needles. Talk to your piercer about this and they will keep the needle out of sight and tell you when they are going to do the piercing, so you can keep your eyes closed, and then dispose of the needle before you have a chance to see it. Why not ask to see the needle(s) after you’ve had the piercing done? It may help you get over your fear of them! Many people have a warped view of needles, stemming from a fear of injections, but if you speak to a piercer, they will explain the procedure to you, maybe ask for a consultation so that you can see all the equipment before you decide to get pierced. Most piercers (myself included) offer this free of charge. It’s worth noting that a piercer will use a new needle for each piercing, so if you’re getting both lobes done, there will be 2 needles. They are not re-used at all, and placed in a sharps bin after use so they can be disposed of appropriately.
Most people find that needle piercings hurt MUCH less than gun piercings. And the burning or throbbing pain which is often experienced after the piercing with guns is reduced to a dull ache/tenderness for a few minutes when a needle is used.
The healing time on a needle piercing on an earlobe is 2-3 months. Yes, the gun-wielders will tell you it’s 6 weeks with the gun, but this is purely so parents will take their children to get their ears pierced at the start of the summer holidays (remember, it’s moneymoneymoney with big companies). With a gun, I would expect anything up to a year for healing, though of course different people will experience different healing times.
The needles I use are delivered to me in pre-sterilized blister packs and are taken out of the packet to be used, and then put safely in a sharps bin once used. They are super-sharp to reduce trauma (therefore swelling/bruising) to the area. The jewellery and forceps (“clamps”) are sterilized in the studio using a vacuum autoclave (the same kind used in hospitals) which I am more than happy to show you if you ask. Notice that everything is taken out of packets when it is used, and once used it is either thrown away or put in a container to be sterilized again BEFORE its next use. I use as many disposables/single use items as possible. The ONLY items that are sterilized/re-used are my tapers, receiving tubes and forceps.
I actually asked an employee of one of the big high street gun-piercing companies how the gun was sterilized when she asked me if I would like my ears pierced (she had no idea what I did for a living). Let’s call her Claire, I think that’s what her name badge said. The conversation went [something] like this….
Claire: Hi there, would you like your ears pierced?
Kim: No thanks.
C: Oh…. I just saw you had a few already?
K: Can I just enquire as to how your equipment is sterilized?
C: *looking flustered* Oh, well we sterilize the gun after each use.
K: And how exactly do you do that, can you talk me through the process?
C: Well, we spray the gun all over with disinfectant [I can’t remember the name of the product she told me] then wipe it down and put it in a sterile pouch, so it stays sterile.
K: And what is done with the pouch?
[To sterilize a re-useable tool, it should be placed in an ultrasonic cleaner with a detergent to ‘shake off’ any blood, etc., checked for any residue, rinsed, dried thoroughly, placed in a steri-pouch, sealed into the pouch, which is then placed in an autoclave and sterilized. This should be repeated after each client, and the whole process takes an hour to an hour and a half]
C: Oh, it’s put back in the cupboard ready for the next customer.
K: So… it isn’t sterilized?
C: Yes it is, the [product] sterilizes it, and it stays sterile when the pouch is closed.
K: No, no it isn’t. This DISINFECTS it. It will not kill the MRSA virus, nor will it thoroughly remove blood/tissue splatters caused by the force of the stud shoving and misplacing the tissue.
C: But it does sterilize it. You have to wear gloves when you spray it.
K: Spraying the instrument disinfects it. Putting it in a pouch and sealing it does not sterilise it. The bag should be put in a vacuum autoclave. If you did that with one of your guns, it would melt.
C: No, all our equipment is sterilized before use
K: *sigh*
I know LOADS of people who have had gun piercings and are fine!
Obviously if everyone who had a gun piercing was reporting issues, the practice would be stopped. There are risks present in any piercing method (gun or needle) but the risks with guns, the environment they are usually used in and the people who usually use them, are much higher than with a needle piercing. I’m not saying that a needle piercing has never caused a problem, but the frequency with which these are observed is much lower than with guns.
OK, I know why you’re here…. You wanna see something gross….
All the pics below are from www.bmezine.com, but if anyone wants to link to others (or correct me on where my photos are from) please leave comments below!
Lobes.
The back of this stud is playing hide and seek. I have seen one (or both) ends of a stud embedded several times before. Most piercers are a dab hand at getting them out, but as the old saying goes “Prevention is better than cure!”
Upper Ear/Cartilage Piercing.
This piercing looks like it is a few weeks old (note that there is still a significant amount of bleeding, swelling and redness). A big problem with the large backs on the studs is hair getting caught around the stud – which you can see here.
This photo shows that a piercer has had to devote their time and materials to removing a pair of studs and putting in BCRs – you can see where the back of the stud has put so much pressure on the ear tissue that it has left a red circle. Notice the white ring where the skin cells have died due to lack of blood flow, caused by the pressure from the back.
The pic labelled ‘3’ is of the girl’s other ear, but her right ear obviously has a lot of trauma from the gun piercing (this could be an allergic reaction). The swelling has gone down by the looks of it, but this takes a lot of time. This is not a common thing to happen.
This is an extreme ear collapse. This isn’t common but it can happen. This is irreversible without surgery.
Close up of the back of a stud. As mentioned earlier, the quality of jewellery used in gun piercing is not the greatest. As you can see the back here has a lot of ‘crusties’ stuck to it. The backs are difficult to clean thoroughly.
It’s unlikely this will heal straight enough to allow a long bar to be worn through both piercings. And even if it was straight, butterfly back studs tend to be 1mm or 1.2mm, standard industrial bars are 1.6mm so would require a stretch when healed.
(Thankyou to Jessica for the pic!)
Tragus piercings – I have no idea how people manage to do these piercings using a gun (I’ve seen conch piercings done with a gun as well, again, no idea how much shoving and pushing that it took to get the tissue into the gun).
FAR too short for swelling. Note all the dried blood and crap stuck in the butterfly back….
And it doesn’t stop there….
People will pierce anywhere that they can with a gun. I’ve seen nipples, navels, conches, rooks, eyebrows and even in one case – an intimate piercing done with a gun. Below are a few more examples of other body parts pierced with a gun. This is rarely the fault of the piercee, as mentioned before, when you go somewhere that advertises that they perform piercing, you expect the piercings to be done in the safest, most hygienic way possible. It is not for the client to question the piercer’s methods, but as is the purpose of this blog, ask which method will be used and then you can make an informed choice.
Nose piercing with a gun in progress (gloves, anyone?)
Nose piercing that has been taken out – the piercer has taken a few pics to show how ‘sunken in’ the jewellery was.
Lip piercing (not very straight) done with a gun.
Navel done with a stud. Not quite sure how they managed to get the skin into position in the gun, part of me wonders if they used forceps and then pierced with a gun in the same way a needle would go through the forceps.
Another Navel, you can really see how swollen this is due to the tissue not being able to expand along the stem of the jewellery. Ironically, giving a piercing enough room to swell makes it swell a lot less than if you fit it with shorter jewellery, as the pressure from the balls on the barbell causes a lot of trauma.
Another lip piercing, it isn’t the straightest piercing I’ve come across, and in the bottom picture you can really see the damage done by the stud when a ring has been inserted.
So, in conclusion….
I’m not for one minute saying that EVERY gun piercing will cause problems, or that EVERY needle piercing will heal without incident. Needle piercings can be problematic and swell, just like gun piercings, but it’s a much less common occurrence. And the damage done (if any) is much more rarely permanent/extensive. Proper aftercare is required with any piercing; failure to follow it can easily result in a poorly piercing, whether done with a gun or needle. The main problem with gun piercings is the jewellery used being sub-standard. I see many more gun piercings that have triggered an allergic reaction than those which are infected. Needle piercing can be SAFELY used for a much wider range of placements, and with far more jewellery options.
Much as I (and no doubt some of you guys too) would LOVE to see guns banned, it isn’t going to happen. The people using them are NOT breaking any laws. The best course of action is to refuse to go to any establishment using a piercing gun, and do your best to educate your friends and family on the dangers. Show them this blog if you think it will help!
The reason I have put this blog together is to educate people that you DO have a choice when it comes to piercings! If after reading all this, you are happy to be pierced with a gun, then there’s nothing anyone can do to stop you, but I do hope that this has given you food for thought.
You can read other articles on gun piercing at the links below:
Cheek piercings are not common to see. They look cute – sure – and thanks to pinterest and other social media, people are seeing them and, of course, wanting them, more and more. In the last 3 months, I have had about 8 requests for them. Of those 8, I have done…. none. This blog will outline the risks of cheek piercing, and why I (and many, many other piercers) are reluctant to offer them as readily as other procedures.
Dahlia piercings are also included in all of this, which is a piercing more to the corner of the mouth than the cheek, they are less common to see but they present the same risks and issues. Many may see dahlias as ‘easier’ than cheeks, and I would agree, but that does not mean that the issues and risks are zero.
Examples of dahlia piercing:
Model/Piercer unknown (please post credit in comments if you know!)
Why Are Piercers Reluctant To Offer Cheek Piercings?
So, firstly, I’m very particular on who I will work on for cheeks, and most other piercers are too. This is a fact, and anyone considering this procedure should be prepared to hear a ‘No’. There’s no hard and fast rules, but it’s safe to assume that unless ALL the following apply to you, it’s a ‘No’ from me.
Have been pierced by me before, several times.
Have (or have had) other facial piercings.
Consistently follow aftercare and return to me with happy, healthy & healed piercings.
Are 18 years of age or over.
Live (or usually live) within easy travelling distance of the studio.
Are prepared for the larger-than-usual financial outlay of a piercing which can involve multiple downsizes, as well as the longer-than-average healing time.
Have read this blog, I guess, to be aware of the risks.
Have been considering the piercing for 6 months or more.
I’ve had people beg, shout, have tantrums…. If you do this, it turns any chance of a ‘Yes’ into a firm, and permanent ‘No’. Please respect a piercer’s decision on whether they will or won’t pierce you – not just with cheeks, with ANY piercing procedure.
Why Do You Ask These Things?
Cheek piercings are – in short – a nightmare to get, have, heal and keep happy, which you will know all about by the end of this blog. I want happy piercings and happy clients. I do not want someone with excessive scarring, who is now unhappy with their face shape (yes, this piercing will change your face permanently – we’ll get to that) on my conscience. Sure, for all the people I have turned away, I’m sure they have gone elsewhere and had the procedure done. But that isn’t on my shoulders.
Points 1-3 raised above:
If you haven’t had a lot of experience with piercings, starting out with – arguably – one of the hardest to heal is a bad idea. If you don’t heal well, and don’t follow aftercare consistently, you will not have an easy time with these. If I haven’t pierced you before, I don’t know you, I don’t know how well you take care of your piercings (point 3) and I would not want someone whom I have never met before taking on a huge burden, courtesy of me, when I don’t know if they will trust me to help and come back to me if there is an issue.
Point 4
Cheek piercing is a PERMANENT change to your face. Even if the jewellery is removed, the scars and dimples left are there forever. Your face shape will be permanently changed. As this is a permanent change, you need to be 18+. There are surgeries that will correct this, but they are expensive and scarcely offered.
Point 5 & 6
Cheek piercing requires multiple downsizes and often causes a lot of issues – I need you to be able to get back to me easily in case an issue presents itself. And for those downsizes as they need to be done – leaving too-long jewellery in a piercing for longer than necessary will irritate it and cause it to swell up again, more scarring, and potentially need to be upsized (longer jewellery put in) instead. I’m not saying I will only work on people who live within walking distance of where I am working, but if you don’t have a great deal of free time to call back, and the ability to get to the studio whenever you (or I) require it, you’re putting more dangers into the mix. The cost of jewellery is not something many people consider, but 6-10 downsizes is not uncommon. If we average that out at 8, for a pair of cheek piercings, that’s 16 barbells/labrets you need to pay for. The healing time on cheek piercings is, on average, one of the longest for any piercing. Any cheek piercings that heal fully in under a year, I’d say have healed quickly. While the swelling may be gone after a few months, for the wounds to heal fully, I would expect 18 months.
Point 7
Hello – hopefully this blog will outline the risks you will have – it’s not meant to scare you off, but after hearing about the dangers, most people will spend at least a little more time considering it
Point 8
So, I guess anyone can lie about how long they have been considering this. But let’s look at it this way – would you get a tattoo on your face after a couple of weeks of thinking? So why not give equal thought to something which will change your face permanently?
Even if all the above are met, if I don’t feel the client is ‘right’ for me, I will still refuse the work. Maybe I’ll lose a client, maybe I’ll be called a bitch, but as mentioned, there’s no hard and fast rules with this, I’d rather lose that ‘sale’ (it’s never about the money, trust me) but sleep well knowing that it’s not me that has caused someone a lot of pain and upset.
So, What *ACTUALLY* Goes Wrong? What Are The ‘Healing Problems’ Talked About?
With the procedure – if it is carried out in appropriate conditions/environment with an experienced piercer and a calm client, very little can go wrong with the procedure itself. It is paramount that the cheeks are checked thoroughly for blood vessels and saliva ducts – to make sure neither are present in the area being pierced. Marking them can take AGES too – but that’s not really a risk. Personally, I will schedule appointments for cheeks so I have an hour with the client. Oh, and never pierce further back than the 1st molar tooth as a rule of thumb.
The handful (and I mean 20 or so) of pairs of cheek and dahlia piercings I have performed in my career, not one person has said the procedure was particularly painful. This is not the issue.
NOT checking for blood vessels could cause a bleed. Using unsanitary equipment or being pierced in an unsanitary environment could massively raise the risk of infection – though these are true of any piercing, not just cheeks.
An inexperienced piercer could miss something, misplace the piercings, or even fail to get them at the right angle. Sure, this is a cosmetic issue, not a real ‘risk’ – but something to consider.
One could argue that once the piercing procedure is done (safely, consensually and to the highest standard), the entirety of the piercer’s responsibility is over with. Anything that happens after this is down to the client and their responsibility. From a legal standpoint, yes. But piercers are (should be!) sensitive and sympathetic to their clients, and do not want them to undergo any pain, trauma and problems – despite it not being our responsibility, we want our clients to be happy, and we want to help them. Things following the procedure *ARE* the responsibility of the client. But these problems are reported back to us and we feel we are responsible for the after-effects of something *WE* did to someone.
Once the procedure is complete they will SWELL. I don’t mean a little puff up here and there, we’re talking hamster-with-an-allergic-reaction swelling. The length of the bars will reflect this. And this swelling will be present for several days, I would expect the 1st downsize after about 7-10 days, but this would NOT be all the swelling gone. Just the worst over – and there is always a risk of this coming back, and needing to upsize the bars when you get these ‘flare ups’ – which can happen even after months/years of the piercings being ‘happy’.
Once the swelling is under control and any bruising (yep, that happens too) has gone, you start getting back to normal. Except:
You can’t wear makeup over them.
Gents, you must be vigilant with keeping facial hair short and make sure no hairs are trapped in the piercing channel (ideally, they would be placed away from anywhere with thicker hair growth though).
They are likely to leak saliva. Yep. Spit coming out of your face-holes.
The barbells can damage your teeth very easily – so you MUST be careful.
No alcohol – it can cause issues with healing, and if you’re feeling particularly ‘refreshed’, you’re likely to chomp on the bars, or smush them about. Or even have a bit of a sick, which is just great in healing wounds in your mouth. Not.
No pet cuddles. Animal hair and dander can really irritate the piercings while healing – again, this is true of ay piercing but can you go [possibly] a year or more without nuzzling your cat/dog/rabbit/whatever? I know I can barely manage a day.
Returning to your piercer every 4 weeks or so for downsizes. Or upsizes. Or getting there and your piercer feeling that they can’t be downsized, sending you home with NO changes made after you have travelled, paid for parking, taken time out of your day, etc.
Could you manage all this? Sure, most of the above is ‘only until they are healed’ – but the leaking and tooth damage (even after downsizing jewellery) are a CONSTANT issue.
*IF* they heal, awesome – but many people experience a prolonged healing time (a year and a half I would say is ‘average’) and often decide to retire the piercing.
It is extremely common to see cheek piercings with larger hypertrophic scars (‘lumps’) on them, which will shrink, and come back, shrink, come back…. And so on – sure, it’s more than possible to get rid of them and keep them away, but it’s hard, and relies on a lot of luck as well as vigilant care.
If they are removed, those dimples/scarring are/is PERMANENT. Decide you don’t suit/like the piercings/dimples? Tough, they’re staying. In some cases, the piercing channel may not close entirely, meaning the ‘leak’ will persist.
Why Are They So Hard To Heal & Maintain?
Cheeks are THICK. I would expect a healed pair of cheek piercings to need a 10mm or 12mm pair of labret studs. This is with the piercing site being ‘pulled in’ and needing a shorter length than an ‘unpierced’ cheek’s thickness, which of course varies from person to person, but could be as much as 20mm. When first pierced, cheeks need a longer bar, usually 18-26mm (though this does vary greatly from person to person). The longer the fistula (hole/tunnel), the longer it will take to heal.
The area we’re putting a hole in moves. A lot. Every time you open your mouth – to speak, to eat, to pull a silly face…. They’re gonna move. Moving = irritation = lumps and bumps and scars (oh my).
Mouths are a bit icky. They’re wet all the time. Bacteria thrives in warm, moist (sorry!) environments. So, your mouth is party town for bacteria. Sure, mouthwash (alcohol free!) is great for an easy clean – but this must be done a LOT and for a LONG time.
Any piercing carries 4 basic rules:
Keep it clean.
Don’t move it around.
Return to your piercer if worried.
Dry it if it gets wet, do NOT soak it.
Cheek piercings make all 4 of these hard to do (‘return to your piercer’ is a LOT more frequent while healing these, or at least potentially more frequent due to the risks.)
But Once Healed, It’s All Good… Right?
Sorry…. But no! Or at least, not every time and/or for ever. As mentioned above, there’s still a risk of tooth damage (true of any oral piercing) or ‘leaking’ – saliva coming out through the holes – even when healed. Many people with cheek piercings report ‘flare ups’ – a piercing that has healed well, but occasionally, will swell, be sore, maybe even some discharge from it. Again, this is related to how easy it is for bacteria to breed in your mouth. Hypertrophic scars can form (often confused with keloids) which is an inflamed lump of scar tissue – these often come and go on other piercings too, but are extremely common on cheeks. While hypertrophic scars can be cared for and minimised, the reasons they appear (irritation/inflammation) are just constantly present with this piercing placement. See later in the blog for testimonials from people who have/have had cheek piercings.
What Jewellery Can You Use?
Jewellery size depends entirely on the client – I generally use 1.6mm (14g) jewellery for these, but it’s common to see larger gauge jewellery. I wouldn’t recommend any smaller than 1.6mm. Length will vary – as discussed – depending on how old the piercing is and what the client finds comfortable. Straight titanium (or other safe metal) bars – either barbells (removeable ball on each end) or labrets (fixed, flat disc on one end – worn inside the mouth and removeable ball on the other). Curves and flexible bars are not really suitable; curved bars put pressure on the entry and exit holes of the piercing, and turning and sliding back and forth will irritate the piercing (remember, movement = bad!) and the flexible bars put pressure on the ‘inside’ of the fistula (hole) when they bend, and often have sharp edges on the threads and from being cut to size, because they are soft(er than metal) they can also be damaged easily – scratched (bacteria can hide in those tiny scratches), warped and chewed on. I once pulled a pair of plastic labrets out of a smoker’s cheeks which were bright yellow – stained from the nicotine, since switching to titanium bars, she has found them far comfier. As for ‘fancy stuff’ – the ‘outside’ ends can be changed for an infinite amount of jewellery, though its best to keep it simple with balls or discs (rather than claw-set gems or ornate ends) while healing, and for ‘every day’ wear, and keep the fancy stuff for showing off, nights out and special events (when healed).
Can The Scarring Be Reduced Or Removed?
There are procedures that can remove the scarring left, and plump out the cheeks. However, they are not cheap, nor easy. Recovery can take some time, and there will still be SOME scarring left from the reversal. As with any scar, it depends on the person. Vitamin E creams and oils can help, but nothing will take them away completely. This also isn’t something that is readily available – your piercer cannot do this for you, you need to speak with a body modification artist or plastic surgeon.
Is There An Alternative? I Just LOVE The Look Of Them!
Firstly, consider if you would suit these piercings. As a rule, they work better on people with round or square faces – as they pull your cheeks in, they can elongate a face. So, people with oval/long faces may find it makes their face look longer.
It might be worth getting a photoshop-savvy friend to edit a pic for you. Or use some stick-on gems to get a feel for it (bear in mind the gems will NOT pull your face in to give the look of dimples).
I have seen people opting for microdermals in the place of cheek piercings. Microdermals come with their own issues, which is a whole other blog, but they are usually short-lived, as the high movement in the area means that they are pushed out by your body, and like the stick-on gems, will not pull in your cheeks to give a dimple. I would NOT offer microdermals in this placement.
Surely Not *EVERYONE* Has All These Issues?
Nope, there are some people who have less problems than others (once more, this is true of any piercing), but with cheeks, people who don’t have any issues past the initial few months of healing are few and far between. Pictures don’t always accurately show the issues people have had with them – when all you see are older, un-irritated, ‘having a good day’ piercings, it’s easy to assume this is the rule, not the exception. I asked colleagues and friends for a testimonial about their piercings, as I have not had mine done before (nor wanted them), so read some experiences from people who have gone through it below:
“I’ve had mine 8 years. I’ve had embedding, fissures, leaks and I have a hair follicle that grows inwards and really sucks. They are a piercing for the die hard, I generally call them a “piercers piercing”. They leave extreme scars that require cosmetic surgical procedures to remove. A large range of post types, lengths and gauges must be kept at quick access to keep them happy.”
– Aiden Johnson (Travelling Piercer)
“They’re a fuck on!! However I do love mine and refuse to take them out but I don’t recommend anyone gets them done (I’ve put several people off having them done after I’ve told them how much work goes into having them) mine still leak (one of the more attractive features) and regularly just itch for no reason, I have to change to longer bars on occasion because they get irritated and flare up and I can’t put anything shorter than say 8mm in otherwise they just impact immediately and knack, but I’m stuck with bars that are too long and catch/tap on my teeth (and I play with them too much.)”
– Salem (Alternative Model)
“Mine swelled up and one side of my face went solid with scar tissue I’ve had them out 6 years and even now the scars get mega itchy and shitty.”
– Amy (Mother of 2)
“Had mine done and had nothing but a nightmare with them. Have some cracking scars now too”
– Stacie (Piercer)
“I was super lucky! Had mine 16 years not a problem other than the initial swelling healing in about 3-6 months!”
– Rhianna (Piercer)
“They were flat out a nightmare – worst piercing I’ve had and nothing like the many others I had. One healed relatively easily but still wasn’t a breeze. But The other swelled and was sore for the entire year and half I had them. It got spots and lumps constantly – which had to be drained or popped. It was pretty much sore for the entire time I had them in.”
– Daryl Watson (Tattooist)
So, in conclusion, cheek piercings look cute but are definitely not for everyone. Anyone considering them should take all the above into account when making their decision. None of this is here to scare people off (though if it does, I guess it has served a purpose!) it is to outline all the [many] problems that can arise with this piercing placement. Should you decide it’s STILL something you want done, research your piercer and only go somewhere you feel comfortable. Ask to see examples of the piercer’s work – and cheek piercings they have done, ideally. But do consider the first section of this blog – not every piercer will just work on someone because they are asked to – respect the piercer’s decision if they explain that they are not happy to carry out the procedure on you.
I’d love to hear from those of you with cheek piercings – and from other piercers. Please post more comments below to assist those reading this and considering cheek piercings with their decision!
Just prefacing this blog with direction to help people who have lost their jewellery (either it’s fallen out by accident, or you have taken it out and can’t get it back in). Scroll to the bottom of the blog for info on what to do in an emergency situation like this.
So, let’s talk jewellery (my favourite topic!)
This blog was made during the COVID-19 (coronavirus) pandemic of 2020/21 – I decided it was a good time to put together some info about sizing and switching your jewellery, this information is particularly helpful at this difficult time, but something I know will be handy for you in the future too!
Often, I get requests from all over the country (and the world!) asking if I ship jewellery. The answer is YES! I love being able to help people get the most fabulous jewellery! However, as with people calling into the studio to buy jewellery as a gift, I need to know what size is required before I can help. A photograph of the person’s piercing/current jewellery is not always helpful, as it is impossible to measure something without having it in front of me.
Before we go any further, the absolute best way to buy jewellery is from a reputable piercer (inbox me if you want a recommendation for a studio local to you – wherever in the world you are!) and to call into their studio and get their help. A good piercer will look at your piercing, the jewellery you are wearing, maybe ask you some questions about how long it’s been pierced or how long you have worn the jewellery you have in and if you find this size comfortable. They will then ask if you have any ideas of what you’d like (if not, be prepared to be shown a LOT of jewellery!) you can see the items in person (so you aren’t trying to gauge something from a picture) and the piercer may be able to show you how a piece looks fitted via their portfolio – which is always helpful! When you have selected the jewellery, your piercer will explain if you need anything else to make it work (for example, if you choose a threaded end, but are currently wearing a ring, you will also need a post to screw the end onto) and give you a price on the whole piece – if your piercer has an anodiser, they can even change the metal colour, so will ask you this too! Most piercers (myself included) will offer FREE fitting on the jewellery, and install it for you there and then, making sure it is secure and fits correctly. So, you leave the studio with ‘the full Monty’ as it were.
**IF YOU ARE BRINGING BODY JEWELLERY INTO THE STUDIO, PLEASE BRING IT IN A BAG. I ALWAYS PUT JEWELLERY IN A BAG FOR YOU – OR BAG UP YOUR ‘OLD’ PIECE, BUT A FOOD BAG OR SMALL NON-POROUS BAG WILL DO THE JOB. LEAVE THE JEWELLERY IN THE BAG, I WILL TAKE IT OUT WITH GLOVES ON. THIS IS A HUGE HYGEINE ISSUE, AND THIS REQUEST IS MADE FOR THE SAFETY OF MYSELF AND OTHER PEOPLE IN THE STUDIO**
DO NOT put jewellery loose in your purse, pocket or handbag, ideally do not put it in a purse at all, as the coins can scratch and damage it, even through a bag, but if the jewellery is rattling around in a small space with money, which is the dirtiest object you handle in day-to-day life, it is a massive hygiene issue. Keep your jewellery bagged and in a safe place – an EMPTY and CLEAN tobacco tin, Tupperware box or jewellery box is ideal.
Body jewellery is designed to be taken in and out, so it can come loose. This sucks, but it is something that CAN happen and is sometimes ‘just one of those things’ – we’ll talk about how to check your jewellery to make sure it is secure later in this blog.
This being said, it all sounds pretty simple…. But let’s look at it from the piercer side, what goes on in your piercer’s head while the above is going on?
Here’s my usual chain of thought:
New jewellery? Awesome! Let’s see the piercing….
Yeah, that looks healed, we can switch it! (If it isn’t, we then choose pieces that will work without causing any undue stress or irritation to the piercing).
It’s a ring, looks a bit big, so a smaller one might be better… maybe an 8mm?
Oh, they want a stud… hmm… 6mm length should do it.
Ok, show them the threaded ends, see what they like.
They just want a small gem…. Ok, what colour? What setting? What size?
Clear gem, 4mm. Niiice.
Prong setting or disc?
Disc. Sweet, that will sit nice and flat.
Metal colour?
Purple, oh man, this gem is gonna look so good with a dark purple casing around it.
So its £x for the disc, £x for the bar, that’s £x in total, free fitting. Let’s do this!
When someone comes in to buy jewellery for someone else, or messages me with the generic “I need new jewellery for my ear piercing” it’s hard to work through that chain of thought, as I can’t see the piercing in question to make the decisions I need to make. All the above are things your piercer needs to know to ensure you have an appropriate type, size and fit. Sometimes certain jewellery types don’t work in a certain piercing – almost daily people come in and ask about the septum/daith clickers for a helix piercing. While they will fit, the gems are on the wrong plane of the jewellery, so won’t sit as desired. This is hard to explain over a message, so once again, it’s best to call into the studio.
When messaging about jewellery, the following are helpful:
What piercing is it for?
How long have you had it? (Is it healed?)
Did I do it? (this will help me figure out what is in there at present)
What gauge (thickness) is it?
What length/diameter do you need?
What thread type (if applicable)?
What item you like the look of (this way your piercer can suggest alternatives, if that exact item is unsuitable/unavailable).
If the piercing is still healing, or if you’re having trouble with a piercing, certain jewellery types may not be suitable, simpler, less fancy styles are usually best for fresh/healing/problematic piercings – and rings are often best left for healed piercings (in most cases).
Here’s a guide to the names of some jewellery types – knowing your types will help you choose!
Hopefully this will explain why it’s best to call into the studio for jewellery, but please do message with as much info as you can about your piercing/jewellery and the piece you like the look of. As always, I have photos of my stock up in my picture section on Facebook and you can screenshot any items you like to either send to me, or show me in the studio so I can direct you to it.
If calling in is not possible, send me as much info about what you have and what you’d like, and I will do my best to help – firstly we’ll look at how to measure your jewellery. It’s hard to do without callipers, but you can get a rough idea with a ruler! Below is a chart showing what measurements you can take. Note that the ball size is NOT included in the length of items! Only the ‘straight bit’, and you always measure the INSIDE of the ring.
Often when people are buying jewellery for someone else, they will say “oh just the same size as mine” – all bodies (and body parts!) are different, there is no ‘one size fits all’. Nose piercing is a perfect example of this. I usually pierce noses at 1mm, unless requested otherwise, so if I did the piercing in question, its more than likely it will be at 1mm (unless the client has put a different size in themselves… which is ANOTHER consideration!!!) but then for the ring diameter, it could be anything! 7mm, 8mm or 9mm are the 3 most commonly seen, but there isn’t a ‘right’ size that fits everyone.
Below is a [doctored] pic from Instagram. This is wildly misleading, because everyone wants a snug fitting ring (which look amazing BTW) so people come in and ask for a 6mm ring, and refuse to accept anything else… THIS nose with the piercing in THIS position needs 6mm. YOUR nose with YOUR piercing will likely need a different size (the majority of nostril piercings I do work with an 8mm ring, but again, this isn’t absolutely definite).
So, you know what jewellery and what size you want. I pierce mainly with internally threaded jewellery (I occasionally use push fit too) and ALL my stock in the cabinets is internally threaded or threadless. This means that for most piercings, if you want a stud, it will have to have an internally threaded post to screw the jazzy new end onto. If you already have an internally threaded stud in the correct size, it can absolutely be re-used… but if not, you will need to purchase a new one.
This infographic illustrates the different thread types. The push fit will have a slight bend in the pin to hold it in place.
As you can see, the internally threaded jewellery has a little ‘stick’ on the ball (or whatever end you have) which goes into the bar, then you screw it on until its tight. There are many reasons for my choice to use only internally threaded (that’s a whole other blog in itself!) but for the purposes of what we are discussing, I have found this is the most secure fitting and results in the least amount of “Please help, my ball has come off!” messages. A lot of people message and say their jewellery has ‘broken’ as they are used to the externally threaded type, but this is not the case, it’s just a different thread, and WILL screw right back in. This isn’t hard to do BUT it is fiddly – get someone to help you, and wear gloves for a better grip!
If you lose an end, don’t panic! Try and screw it back in (you don’t need to take the post out) righty tighty, lefty loosey! So, turn the end clock-wise (to the right) to tighten it back on.
Same to check/tighten your jewellery. If you can feel the end turning (if the whole stud is turning, that’s ok!) then make sure it is tightened to secure it. If you run a thumb/fingernail along the length of the straight part of the stud, it should be smooth right up to the ball/disc/whatever, if you feel a little ‘step’ the end may be loose! Tighten it yourself (turn the end clockwise – or if it’s a threadless/push fit piece, press the decorative end further into the bar) or return to your piercer. If you’re in with me getting another piercing/jewellery change, just ask and I’ll check a piece is secure for you!
Getting the stud back in if the whole thing has fallen out can be fiddly – again, getting someone to help is usually best! So, don’t remove it unless absolutely necessary! But if it has come out, hold the ball/disc (in the case of a labret stud) and push it back through – this is easy if you’re putting it through somewhere you can see easily (tongue, nipple, navel, lip, eyebrow) but on ear and nose piercings, where you may have to put it through from the back, it can be awkward – I’ve attempted a step by step guide of diagrams below! Using a standard butterfly back earring (one of your own, do NOT use anyone else’s jewellery!) put that through from the front, so the post is sticking out of the back (the side you need to put the ‘proper’ jewellery in from), then place the thin wire of the earring into the hollow end of the stud (where the ball would screw in) and push it forwards, so the earring guides it into place. Then screw the ball/end on – if you can’t screw the end on, see later in this blog for what to do in an emergency!
So that’s threaded jewellery, what about nose studs, hinged jewellery (clickers and hinged segment rings) and clip-in pieces (BCRs or segment rings for example)?
Nose studs are an easy one – they have no attachments, just a solid piece, hold the ball/gem/fancy bit between your thumb and first finger, then push the end of the ‘curl’ into the hole, and twist slightly.
For hinged segment rings and clickers, open the jewellery (it’s attached by the hinge, so you can’t lose it!) and slide it through (hinge segment rings, it doesn’t matter which side you do it from, but for clickers, make sure the detail is going to point in the right direction). Once the post is clear of the skin, you can push the rest of the jewellery to meet it, and you’ll hear/feel a satisfying ‘click’ when it closes.
BCRS (or rings with a clip in detail) are fiddly, and for the hundredth time, get someone to help you! Segment rings where the entire segment comes out can be VERY hard to do – I don’t currently stock these, as hinged segment rings have hit the market in the last few years, and they are so much easier. Get the ring through the piercing (doesn’t matter which side you put it in from) and then the attachment has a small dimple either side, the ends of the ring are both in contact with this and it holds the attachment in place with the magic of tension!
Keeping an eye on your jewellery and checking everything is screwed (or pushed) in regularly will reduce the risk of you losing your jewellery, and to do this it’s important to be familiar with your jewellery type. Here’s a great little infographic from joeltron.com that shows all the different types and how they fit!
WHAT TO DO IN AN EMERGENCY!
Sometimes, life has a terrible plan for you that involves you wither not being able to get the attachment on… or losing the entire piece, or not being able to get it back in! As mentioned above, body jewellery is designed to be taken in and out, meaning there’s no way to 100% guarantee that jewellery will never fall out. First things first…. Don’t panic!
Getting the jewellery back in there IS important if you want to keep the piercing – how long you can leave it out for without it closing is impossible to say, there’s no formula for how long you have had the piercing vs how long you can leave it out for without it closing, but fresh/healing piercings will close up MUCH faster than healed ones.
See the pics just above that show how jewellery works, and how to guide a stud back into the piercing from a ‘fiddly’ angle/position.
If you can’t get the attachment on, bag it up (see above) and bring it in, and I’ll do it for you (if the jewellery is bought from me, this is free of charge – I do not fit jewellery from elsewhere). And until then, just keep the bar through! You can pop a plaster on the side that has a ball or disc to keep it pushed in, and I’ve seen some wonders worked with a small ball of blu-tak squished around the ‘missing’ end of the bar.
If you can’t get the post back in, bag it up, and bring it in and I’ll do it – but do bring it in, as we can possibly re-use it, saving you some cash! If you have lost it completely, remember I always have spare pieces. In either case, try and get SOMETHING through there, if you lose a stud, but can get a ring in (or vice versa) that’s fine, even something at a smaller gauge is better than nothing. Butterfly back earrings are NOT an ideal thing to keep in your piercing, but in an emergency, this will keep the hole open. The hole shrinking a little will suck BUT it’s better than it closing up completely. We can taper back open, which will feel a little uncomfortable, but it’s easier than having to get it re-done. Call in as soon as you can to pick up some new jewellery or have your old piece refitted, just leave your temporary piece in there and I’ll take it out and fit the appropriate piece for you.
These things happen, and this is why I always give clients their old jewellery back! So that you have a spare in case you ever need it! Be it an end, or a whole piece, in an emergency, you’ll be glad of that little baggie! 😊
I hope this saves some piercings, and some pennies! – and remember, it’s not the end of the world if something closes up, most of the time re-piercing is absolutely fine! And tapering a piercing open (not re-piercing it, just using a small taper to widen the hole so jewellery can be refitted with no break to the skin) is often possible! The sooner you get back to me (or other reputable piercer) after a jewellery mishap, the better – these things are an easy fix the sooner we get to fix them!
This is something I get asked a lot, usually a Facebook message accompanied by a picture of a piercing on someone else, and a picture of the person asking’s face. (It’s usually with a reference to facial piercings, but I’ve also had it about ear piercing and other body piercings). In the case of a tattoo, it’s usually a design image with “Where should I get this?” or “What body part would this look best on?”
My answer is always the same, while I can tell someone if a piercing will fit/has a good chance of healing, I cannot say what will or won’t suit a person.
The reason for this is because ‘suiting’ (or not suiting) something is a matter of opinion. And guess which opinion is the only one that matters with this? Yep, the person wearing it.
There are a few inexpensive ways you can ‘try before you buy’ with piercings (and tattoos!) I’ll talk you through the advice I give people who want to know if they will suit something and this way you can try them yourself and decide if you think YOU will suit them.
While it’s only YOUR opinion on YOUR tattoo or piercing that actually matters, I know that a lot of people want the opinion of friends, partners and family on this type of thing. Take a few pics of yourself trying out a piercing or tattoo, post them on Facebook, twitter, wherever, and ask for other people’s opinions if you must, but remember, this is YOUR choice alone. If you like it, but no one else does, that’s none of their business, and in the same way, don’t be pressured into anything just because your bestie thinks “It looks cute!”
TATTOOS
Obviously, a tattoo is there forever, you don’t wanna get something with any doubt in your mind that you won’t like it. Bear in mind that you have a lot of skin – if you are trying to choose between 2 designs – why not just get one, and then get the other at a later date?
If the design is relatively simple, get a marker pen and try drawing it on yourself (or ask someone else to). It doesn’t have to be perfect, but get it as close to what you want as you can. You can get skin markers online and a lot of toy shops sell ‘tattoo pens’ in different colours so that kids can experiment with non-permanent body art – they might be designed for kids, but plenty of the “adults” (using the term loosely there….!) I know love having fun with them! The kits often come with stencils too, which can help you figure out shapes and colours, if not the exact design. This type of ‘try-out’ will last a couple of days, or until you want to scrub it off
Another option is a henna tattoo – however it is VERY important to buy a good quality kit and to do a patch test, following the instructions to the letter, if you choose this. Instructions vary from kit to kit, so read all the instructions before you start. Natural henna (reddish brown) is usually very safe, but black henna has been known to cause severe allergic reactions, so tread carefully! This will last around a week as long as you don’t scrub your skin when washing around it. The kits often come with mehndi style templates, but you could get creative and freehand it. DO NOT USE HENNA IF YOU HAVE EVER HAD A REACTION TO HAIR DYE.
Transfer tattoos are the 3rd and final option for anyone wanting to try something out. You can buy the generic designs online, even eBay sell them in ‘party packs’ designed for kids parties. There are also ‘celebrity’ transfers available from many fancy dress shops, so that you can dress up as a pop star or actor and have their tattoos to make the costume complete. A lot of companies (check out anywhere that does business cards, flyers, etc.) will do ANY design you want as a transfer tattoo, but this is a bit more expensive (and you have to buy a minimum amount of the same design, usually 50 pieces). However, if you’re really keen to try out a transfer, you can reapply once a week (the transfers usually last about 4-7 days if you’re careful when washing them) for a year, so you get a good idea of if you really want this. Top tip: dust the transfer with talcum powder to make it look more ’real’ and use baby oil on a cotton wool ball to remove it easily. There’s a company called ‘Inkbox’ that make longer lasting transfers, more info here: https://inkbox.com
It’s worth mentioning that there is no such thing as a ‘5-7 year tattoo’. Semi-permanent makeup is a form of ‘temporary’ tattooing, which will fade over around 3 years, BUT there’s no guarantee that it will (or won’t) fade. The pigments used are very different to tattoo inks. They may blur slightly or fade completely over time. If they were used to do a ‘regular’ tattoo, the design would not hold well and would look ‘melted’ within a few months – and then there’s still no guarantee of it fading out completely. The ‘5/7-year tattoo’ myth came about in the early 2000s, I remember it well, as it was around the time I started my first position in a tattoo studio as a receptionist/apprentice. We used to get asked about it a lot, and we explained that anywhere offering them as a service was using watered down ink, in the hope that it would fade more than a ‘regular’ tattoo. Bear in mind that semi-permanent makeup was not widely available at this point in time.
People were under the impression that they could mark their diaries for 7 years’ time, and their tattoo would magically vanish on that day. This was not the case. I saw many people with blurry, melt-y looking blobs on their skin, which required laser removal (the same used for ‘regular’ tattoos) to get rid of them completely. I never saw one that had gone in the timeframe the client had expected.
PIERCINGS
So, at the end of the day, if you don’t like it, you can take it out. Yes, there may be a small scar or dimple left, in the case of most piercings, but this will fade over time. It may never look as it did before, but that’s the risk you take. The major exception to this rule is cheek piercings, where the scarring left by them will give you dimples permanently, whether you wear the jewellery or not.
To try out piercings, you have to be crafty!
To try something out with a ring, get a small ball closure ring from your local piercing studio (or use a spare if you have one), you can get them online, but always buy good quality jewellery from somewhere reputable – you may end up using this jewellery in the piercing if you decide to go for it! Remove the ball (ask when you buy it if you want it taken off for you) and then slot the gap in the ring over whatever you’re thinking about getting pierced. It’s tricky getting it so stay put, so you might want to ask someone to help you, and take a picture for you so you can see it clearly.
To try out a stud, it a little trickier, you can buy spare balls from any piercing studio, or online, etc. Get ones at the size you plan on being pierced at – ask your piercer to help you with sizing – so that you can use them on the piercing, if you decide to go for it. Buy some eyelash or false nail glue – cheapy beauty stores and supermarkets sell it, I think that most pound shops also have it in – and use this to stick the ball onto wherever you’re planning your piercing (make sure the skin is clean and dry so it will stick) and apply a tiny dot of glue to the ball, but don’t be tempted to put it around the threaded area of the ball, or it won’t stick properly AND the ball can’t be used on a piercing, because its furred up with glue! Put it on the side of the ball and press it onto your skin. Again, might be worth getting someone to help you and get some pics. Please don’t use glue in your mouth to try out tongue piercings! For piercings completely in your mouth, use a dot of Vaseline after drying the area with a bit of kitchen roll. And try not to swallow the ball! You can also buy stick-on jewels from most craft shops – and the pound stores – which are often pre-glued, making it even easier!
Magnetic items are available, but PLEASE to not use these as a long-term thing, as they would put a lot of pressure on your skin and cause pain and irritation. Do not use them anywhere they could get lost (inner ear, noses, mouth) as this is super dangerous! They are a great way to try out nipple or genital piercing, but again, not suitable for long-term wear. You can get decorative magnetic earrings, as well as plain balls to try out different looks.
Another way you can try out piercings is to use ‘fake’ plugs and ear cuffs.
Fake plugs can be worn in ‘regular’ earlobe piercings, but give the impression of stretched earlobes. They’re available in all sorts of colours and designs – even different shapes, to look like spirals or tapers. You can even get magnetic ones, though as mentioned above, I wouldn’t recommend these for long term wear.
Ear cuffs can be bought all over the place (though they are usually a solid piece of thin metal, and don’t look like a ‘piercing’). You can get some really ornate ones, or ones with chains on. Some require a lobe piercing to fit – like the ‘chains’ one shown below – so always check before buying.
However, you can get ones that look like rings as shown below. These are designed to be used on the outer rim of the ear and earlobe.
Scratchers, hacks, kitchen magicians, home-tattooists, whatever you want to call them, the number of people tattooing from home without a licence is on the rise. I have had a lot of messages asking about why people tattoo from home, why they should be avoided and – arguably the most important thing – what can be done about it? Hopefully this blog will answer that, but please post below with any further questions.
This blog is one that will probably be edited a lot as new points are raised (in comments, etc.), so do keep checking back. I would love to hear from other tattooists/piercers as well as tattooed people to get their opinion of this topic, so please, don’t be shy! It’s much less common to find unlicensed piercers working from home, but it DOES happen, so while I’m mainly talking about tattooists here, this will include piercing as well.
I’m not a solicitor, or a police officer, so I can’t speak 100% on the legalities of this, I know the basics, but I’m sorry, I cannot give legal advice. If anyone can expand on the laws/legislation/etc., please leave details in a comment or message me privately if you would like to remain anonymous, and I’ll add/edit the details into the blog (giving you full credit if you want it). It’s a sticky area for discussion, and if you speak to any professional tattooist about this, and they will give you a 45-minute rant, so be prepared for tangents and rambling! I have placed all links to websites on this subject at the bottom of the blog. Hopefully I will cover all points raised, but I would love to hear from people on this subject.
I know lots of tattooists who started from home, and they are now in studios.
A lot of tattooists do start off working from home, and if it was impossible to do, we would not have such a massive amount of 1st rate tattooists in the world today, but for every talented, successful tattooist who, unfortunately, started the ‘wrong’ way, there are countless others who never progressed and are still at it – scarring people and putting their health at risk. Having said that, nowadays, (i.e. since about 2000/2001) apprenticeships are NOT hard to come by (believe it or not) for the right people, and now that tattooing is as advanced and accessible as it is – there is no NEED to work from home. I have another blog up about apprenticeships if you’d like to read more on that. Ask any tattooist in a reputable studio who started out from home, and they will tell you that they made a mistake and that they would have sat an apprenticeship had there been somewhere offering one. It’s something which is often brought up in debates on this subject, and the answer usually boils down to one statement: “It was different back then.” Licensing has, from what I can tell, been mandatory for tattooing (I can’t find a separate legislation for piercing, so I imagine these are both included in this) since 1982 under the “Local Government (Miscellaneous Provisions) Act”. However, like most other council-regulated laws, it is not policed very well, which is why people continue to do it, even though they KNOW it is illegal. The penalties are unclear, but from what I can tell through searching online, the penalty is decided from the individual circumstances of each case.
The main reason why people tattooing from home will rarely – nowadays – progress to a reputable studio is because when someone has been tattooing from home without guidance, they will pick up lots of bad habits and have a lot to UN-learn before they can progress in a studio. The studio taking on the ‘scratcher’ will also be taking on all their mistakes (I’ll elaborate on this in a moment), and have to devote a lot of time and patience to unpicking months (years?) of inexperienced amateurish tattoo ‘knowledge’. It’s much easier just to take someone on and teach them from scratch (excuse the pun!).
Ok, so what did I mean by “taking on all this tattooists mistakes”? If you got a tattoo done by someone in their kitchen and it wasn’t great quality work, then you walk into a studio a few months later and see this person working there, can you honestly say you’d want your tattoo covered up/reworked by the same person who messed it up in the first place? The tattoo studio would be risking their reputation by taking on someone who has worked from home.
How and why do people end up tattooing without a licence?
Buying a tattooist/piercer’s ‘kit’ from eBay or a supplier is as easy as 1-2-3 (please note that no REPUTABLE or QUALITY supplier would ever dispatch items that were not addressed to a registered studio). I hate to sound uppity, but the cost of some of these kits are equal to what a GOOD tattooist will spend on 2 bottles of ink, and top of the range tattoo machines will cost £500+. Each. Without someone to show you how to use the equipment properly, and teach you proper sterilization techniques (required by law), drawing skills, how to get the best out of your equipment, how to correct mistakes, customer service, legalities with consent forms, etc., you WILL cause some serious damage. The items you will be sent in these ‘starter kits’ are inferior quality and – more often than not – manufactured outside the EU (so are not up to the impeccably high standards that the EU insists on for any medical/1st aid/tattoo/piercing equipment within the UK). I could get online and buy lots of dental tools, but this would NOT make me a dentist. Whether or not people can access equipment is irrelevant though, it is still against the law to tattoo/pierce without a licence.
The main reason people tattoo from home and not in a studio is because of money – it’s expensive to run a studio and be up to date with all sterilization/clinical waste disposal requirements. They cut these costs out by working from home, but the reason these things cost money is because there is a lot involved in them, and they are IMPORTANT things to have. A clinical waste contract will be hundreds of pounds a year, because the waste needs to be disposed properly. Autoclaves (for sterilizing equipment) cost thousands of pounds because they are a complicated piece of equipment and they do a very important job. Some tattooists work fully disposable, so wouldn’t need an autoclave, but as its hard for home-tattooists to get hold of disposable set-ups, its likely they will be re-using equipment, and probably not processing it properly.
Home tattooists are looking to make as much money from as little effort as they can. This means sharing ink, gloves and needles between multiple clients, using tea towels (which are re-used) instead of paper towels that are disposed of after each wipe, not buying high quality equipment or having safe roomsenvironments to work in and safe furniture to work on (disinfect-able beds/arm rests/etc.) You can bet they don’t really care about your health and safety – as long as you’re paying them what they ask. I’ve seen some horrific ways of cutting costs: not using transfers or drawing (badly) on the skin, just starting to tattoo on blank skin, refusing to wear gloves at all, using the same machine/needle set up for lining and shading…. The list goes on.
Why should I avoid people tattooing from home?
When a person sits a tattoo/piercing apprenticeship (there’s no time limit on it, but it’s usually 6 months to 2 years before they will actually tattoo or pierce someone), you start at the bottom. You learn about (and the importance of) sterilization techniques, the names and uses of all the different types of equipment/jewellery/piercing/tattoo styles/etc. and how they should be applied using which methods, how everything works, setting up tattoo machines/which needle size and jewellery you should use for piercing, cleanliness/hygiene processes and methods, customer service and LOTS more. Only when you have a good command of all the above will you actually be shown how to tattoo or pierce someone. This makes sense if you think about it…… otherwise it’s like trying to run before you can walk. Or cook a gourmet meal when you struggle to work the toaster.
When you start tattooing in a studio (in the last stages of an apprenticeship) you will have an experienced tattooist to help you work and if it all goes horribly wrong, they will stop you before you do any more, and repair and finish the tattoo (the client will always be aware that this person is an apprentice and working under supervision and they will usually be getting the tattoo at a heavily discounted rate or for free!). If you’re working alone with no guidance, you will not have this luxury. Hairdressers often run a ‘student’ day, where the trainees will cut hair under close supervision for cut-price (again, excuse the pun!) but all the customers are aware that this is WHY they are getting a discount.
Buying a kit and ‘seeing how you go’ means you will not thoroughly understand anything listed above, and you will be fighting a losing battle from day one. Without proper guidance (which is essential for all new tattooists AND experienced tattooists – they never stop learning), you will not have any knowledge of the proper methods to use to give different effects, and you will be tempted to tackle complex designs (again, running before you can walk), which will result in some awful work, which will need covering/lasering off or – worse – because you will have no knowledge of sterilization techniques, etc. or the importance of them, you will end up giving someone a communicable disease or infection and cause them some serious pain and inconvenience while risking their health.
So, there are the basic reasons why people tattooing from home should probably be avoided. I’ve had customers come in to proudly show me work which – while it isn’t brilliant – isn’t too bad, and then they tell me it was done in someone’s kitchen/bedroom/shed/garage, and that this person is the best tattooist they’ve ever seen…. If they’re THAT good, WHY aren’t they working from a studio??? If a person KNOWS that tattooing from home, unlicensed, is wrong (believe me, they all do), then they are knowingly putting their clients at risk and this does not make them a good tattooist. KNOWING you aren’t tattooing in a safe environment with sterile equipment means you have no respect or duty of care for your clients, and through doing this, you are putting out a message to clients – and potential employers – that you don’t care about the ‘serious’, legal side of things, and are willing to break the law.
Why do tattooists need a licence?
Tattoo studios have 2 types of licence, one for the premises that basically says “this address [named] is safe to be tattooed in”. To get this licence, a building/premises must pass all requirements set by the council in an inspection, these include: non-porous floor/walls/furniture in the tattoo/piercing area (so no carpets, fabric curtains and wallpaper), hot running water, a clean environment, an autoclave (sterilization machine – only required if there are re-useable tattoo grips and piercing equipment being used. If the tattooists and piercers dispose of ALL their equipment after each use, it is not required. Most piercing studios will have re-useable steel piercing tools and will require an autoclave to appropriately process jewellery. In all studios, ink caps, needles and any wipes, tissues, etc. should be disposed of between clients). The council ask to see a contract for clinical waste and sharps bin (sharps are disposed of separately to make everything as safe as possible) disposal by a registered company before they will issue a premises licence.
Then each tattooist/piercer in the studio must have their own licence to link them to that studio (if you work in multiple studios, you need multiple licences), this says “this person [named] knows how to carry out a tattoo/piercing safely and hygienically”. Please note that it says nothing about the QUALITY of work – simply that the tattooist/piercer is permitted to do it, because they are doing it safely. Receptionists/cleaners do not need a licence in a tattoo studio, only the people carrying out tattoos/piercings. If you are caught knowingly tattooing/piercing under age people, not working to the accepted standard of hygiene, etc. the licence will be taken away. SOME councils do not issue personal licences, although most do – check with the council where the studio is if you are unsure.
Both licences should be displayed in the studio (they look like certificates). Always ask to see licences if you can’t find them. Some council areas are now introducing an ID card to accompany the licences, to prevent people lying about their name. A lot of councils publish the names of the people licenced to tattoo and/or pierce in their catchment areas on their websites, but as with most of the legal issues, this will vary from council to council.
In most council areas, tattoo and piercing licences must be issued separately, so if someone has a tattooist’s licence, they should not be piercing unless they have a separate licence. Some councils issue one licence that states BOTH of these, but you should always ask to see proof of a licence if you are unsure.
If someone is tattooing without ONE OR BOTH of these licences (premises and personal) they are breaking the law, and you cannot be sure that WHERE they are tattooing is safe, or that HOW they are tattooing is safe. This is very important to remember with ‘mobile tattooists/piercers’ unless they have every home they pierce in licenced and registered, they are breaking the law – this extends to piercing/tattoo parties too. You must be tattooed/pierced in a licenced PLACE by a licenced PERSON.
If it’s so wrong and dangerous, why do people still get tattooed by people without licences?
For the same reason that the scratcher is doing what they do in the first place – money. Home tattooists usually charge less than a registered studio; this is for one of a few reasons:
*That this is their humble way of admitting that they don’t know what they are doing and if there are any complaints, they can simply say “Well, what did you expect for a fiver?”
*They want to undercut studios, stealing their clients.
*Their costs are MUCH lower than a studio (no licence to pay for, poor quality equipment is cheaper than quality stuff, no clinical waste/sharps disposal contract, they just throw their bloodied tissue and needles out with their household rubbish, this is also a hazard to the general public. As they tattoo from home, they don’t have separate business rent and rates to worry about), so they can afford to lower their prices a bit.
I hate to generalize, or make assumptions, but the best way to explain it is this: A person wants to buy a CD. They’ll look in HMV or another high street retailer, and then they’ll look online at various compare sites, etc. and go with the option that saves them the most money. The CD they buy would have been IDENTICAL in every way to the higher priced items that they rejected. Tattoos do NOT work like this. I’m not for one moment saying that the most expensive tattooist will do the best job, but you have to make a decision on what quality of work you would be happy with, not just how much you can pay. The tattoos/money debate is a whole other discussion, but when people ask me for advice, I always tell them to find the quality of work that they want to have done, and then save up for whatever that price is to guarantee you will be happy with the end result. Weigh up your options carefully and compare portfolios of artists (most tattooists will have a portfolio online, if they won’t show you any of their work, ask yourself “Why?”) and you will rarely be disappointed. Good tattoos aren’t cheap, cheap tattoos aren’t good, as the saying goes.
What are the legalities with unlicensed tattooists?
It all boils down to this: What they are doing is illegal as well as dangerous. I HAVE known tattooists (working in reputable, licenced studios) have a room in their home turned into a fully functioning studio, and have had it council inspected and a premises licence (and additional personal licence) issued, so that they can tattoo from home. This is perfectly legal, as long as they are licenced. These studios are few and far between, and I lament having to mention them because it gives the impression that home tattooing is legal – but for the sake of being thorough, I’m mentioning it briefly here. The tattooists who have these studios will have to pay the same business rates and clinical waste disposal as a ‘shop’ would – ON TOP OF the money they already pay for their ‘proper’ studio. So, they are not common to see at all, and then they are usually a private studio which is run by appointment only and only selected people (personal friends of the tattooist) will be tattooed there.
So back to the ‘scratchers’, I emailed a lady from the council in my current area (Middlesbrough) asking about the legalities, and she emailed me back promptly stating:
“I confirm anyone carrying out the business of tattooing or body piercing within the Middlesbrough District must be registered with Middlesbrough Council. As you know we have a list of all our registered tattooist/body piercers available on our website to enable members of the public to ensure they are choosing a registered person.”
Another issue with the legalities of tattooing and body piercing/modification is CONSENT. People tattooing or piercing from home probably aren’t making people fill in consent forms (required by law) and probably not asking for ID either, or being bothered if the people they are working on are underage.
Tattooing someone without consent is illegal. If you tattoo someone who is underage, you have also committed assault on a minor (and could be placed on a register along with sex offenders). This is part of The Tattooing of Minors Act (1969).
I remember a few years ago, I had a phone call from a lady almost in tears. Her 15 year old niece had been tattooed by someone in their house. Obviously, her main concern was for her niece’s health, but also that the tattoo was of poor quality, and if there was any legal action she could take. I advised her that because her niece was under 18, the guy who did it may be eligible for prosecution, because the girl in question hadn’t signed a consent form and the tattooist KNEW she was underage (if he hadn’t known she was underage, he could still be in trouble for not making her sign a consent form, but if he was shown fake ID and she signed a consent form, she has misrepresented herself). The consent thing is similar to statutory rape (which is someone under 16 having sex willingly, but because they aren’t at or above the age of consent, their ‘consent’ is void).
If a person is tattooed underage and the tattoo is poor quality and they need it reworked or recoloured, or if they want it covered with another tattoo (a partner’s name for example), no reputable, registered studio will touch them, or their tattoo until they are 18, so they will be left with a poor quality tattoo until they are old enough to have it fixed. Laser tattoo removal also carries an 18+ age requirement (though there may be around this if contacting a hospital, private clinic etc. to have the lasering done as it could possibly be classed as a medical requirement if the tattoo is distressing the person it’s on).
What can I do if I know someone tattooing from home, or if I have been tattooed by someone who I suspect is not registered?
As someone working in a professional environment, I would advise a trip to the doctor first. The risks of catching a disease are – mercifully – quite low, but a tetanus/hepatitis vaccination may be required. It is infection rates on home-done tattoos and piercings (not the contraction of a disease) which are sky high, in this case a course of antibiotics would be issued from a doctor, and the tattoo would definitely need some repair work.
As far as taking action against the person, the way to tackle it would be to see where you stand by talking to someone who would know the course of action (Citizens’ Advice Beaurau, the police or local council’s environmental health department), you can get more advice on what you can do and what your rights are if you on one of your children (under 18) have been tattooed by someone in their house.
You can report people who you know are tattooing/piercing from home to the local council, but as mentioned before, very little is ever done. It’s a complex topic and the police and authorities usually just turn a blind eye, but it’s worth a try. You can’t take a licence off someone who doesn’t have it in the first place, but there are other punishments that can be dealt out. Telephone your local council and ask to be put thru to the environmental health department, explain the situation to them (giving as much detail/evidence/names/addresses as possible) and see what they can do.
The lady from my local council (Middlesbrough) who has kindly been in touch with me about this said on the subject:
“Regarding the procedure for reporting unregistered persons, I advise if you or your clients have any concerns about illegal tattooist or body piercers operating then contact the Food and Safety team on 01642 728666. The action taken would be very much dependant on the evidence given by the complainant. We would require evidence that the unregistered tattooist/piercer is operating as a business (taking payment for the work.) Such as a witness statement from a person who has had a tattoo/piercing from an unregistered person who is operating as a business.”
Sadly, this means that if someone is not taking any form of payment, they cannot be prosecuted for not having a licence. However, they could still be prosecuted for tattooing people underage (Tattooing of Minors Act), or, on persons 18+, causing ABH – because there is bloodshed and a mark is left upon the person, (this would also be GBH if they pass on an infection that requires medical treatment or is in any way disabling in the long term).
It’s a massive amount to cover, which is why I’m trying to keep it simple – despite this blog being extremely long. So here are the basic situations that could occur:
Someone under 18 who does not give consent: ‘Tattooist’ could be prosecuted for not only tattooing a minor, but also for failing to obtain consent (therefore – ABH/GBH).
Someone under 18 who gives consent: Same as above, only a judge can give consent for a minor to be tattooed (usually under the advice of a medical professional). The consent is null and void.
Someone 18+ who does not give consent: The problem here is proving that the person did not give consent (in all reputable studios, a consent form is filled in, which acts as the consent proof – on the sheet it will state what tattoo is being given, by whom and where on the body, same with piercing). If a person does not consent to a tattoo or piercing, it is unlikely that they would keep still for long enough for it to be carried out. Therefore, it would be up to the individual circumstances of the case to determine what the outcome would be.
Someone 18+ who gives consent: The only way around this would be if the person could prove that the consent was obtained by deception (the tattooist says they are licenced), but this would be a very difficult thing to prove/disprove.
Something which may be of use if you’re reporting someone who has tattooed you from home is to look at the work they are advertising as theirs, if the tattoo you receive is not of a reasonably similar quality, you have grounds to complain. You would have to prove that the artist was professing to hold that high standard, and that their work was in fact not up to that standard, but this is really a matter of perception and definitely not concrete evidence.
The best way to help stop home tattooists and piercers is by refusing to go to them for your tattoo/piercing work and to tell your friends to go elsewhere, look for reputable, registered tattooists with strong portfolios of their work, working in clean and safe environments. Education is – as always – key, show people this blog and the links below to people and spread the word.
I’ve had a tattoo by someone in their home and I hate it – what can I do?
Unfortunately, you’ve learnt the hard way, but there are options. If you’re under 18 – as mentioned previously, there’s not a lot you can do until you turn 18. If you’re 18+, consult a professional tattoo studio and explain to them what has happened – you will find most places are more than sympathetic and are just glad that you can admit to having made a mistake, and are willing to allow them to fix it. Ask to see examples of cover ups/reworks that the artist has done, so you don’t make the same mistake again. Lasering it off is another option; many tattoo studios now offer laser removal.
At the risk of sounding a little rude, it may be worth totting up how much this tattoo will have cost you in the long run. The original cost of the home-done tattoo, plus any medication/prescription cost to get rid of an infection/safeguard your health and also, the cost of the rework/recolour/cover up AND (possibly) of the cost of the laser removal. For something you thought was SAVING you money, it hasn’t worked out so well, but we all make mistakes, the only thing that would make you a fool is if you don’t learn something from it, and try to put it right and – optional extra – try and help people who may end up making the same mistake.
So, there we go. Well done if you’ve managed to read this in its entirety, I hope you can make sense of it all! And I’d also like to thank you – on behalf of the entire professional tattoo & piercing community – because by reading this blog, agreeing with the points raised and by sharing the information with people, you will be able to make an informed decision about what is best for you and your body.
Below are the links I promised to different areas of this topic on different websites – if you have anything more to add, please leave a comment below.
Just a little collection of things that piercers want their clients to know. These are light-hearted and friendly requests – not meant to sound rude or demanding, but all this stuff really helps us out when clients understand! Any other piercers want to add anything on here?
DO
Eat something about an hour before coming in – it really helps stop a dizzy spell!
Ask for everything you want when you speak to your piercer. We can give you a more efficient service (and possibly discounts) if we know everything you want help with that day.
Have an idea of what you want – we aren’t allowed to tell you what to get pierced and/or what side to get, but will advise if something is unsafe or likely to be problematic.
Wear appropriate clothing – nipple piercings for example, if you’re wearing a tunic dress, it will have to come off completely. If getting microdermals on your chest – a lower cut top can be left on, but a high-necked top would have to be removed. It’s not a problem, but some people feel self-conscious stood in their underwear!
Tie long hair back if getting ear piercings.
Turn your phone off. Please. Keep it in a pocket or bag so it won’t distract you.
Tell us if you need something. A drink of water. The toilet. To lie down. You’re paying us, we’re there to look after you!
Listen to the aftercare advice – even if you have had piercings before, this one may need a different approach!
Ask questions if you’re unsure about why we’re doing something/using a certain product.
Correct us if you don’t think we fully understand what you want. If we mark the wrong part of your ear for example – ALWAYS tell us if we’re getting it wrong!
Call ahead if you have an appointment and are running late – we really don’t mind, it just helps us to know!
DO NOT
Bring ALL your friends with you. They will all have to wait in the waiting room anyway.
Touch the mark I’ve JUST made!
Touch your other piercings or handle used jewellery in the shop.
‘Help’ us by taking out your old jewellery.
In fact – just don’t touch yourself at all!
Try to change your jewellery in the studio – either wait until you get home and do it yourself, or ask to have it fitted – most studios offer free fitting on jewellery bought from them. Handling used jewellery (in or out of the piercing) puts YOU as well as the studio staff at risk, it is a massive hygiene issue.
Ask if it’ll hurt. Or bleed. It’s always ‘yes, a little bit’!
Skim-read the consent form or lie on it.
OTHER STUFF
The absolute best way to say “Thank you!” to your piercer is to recommend them to your friends. Leave a review on Facebook or trip advisor, share a business page on Facebook, tag us on Instagram or twitter…. Recommending us to friends is honestly the highest compliment you can pay us!
We don’t expect tips (in the UK) but it’s always nice when you’re given one – even nicer if you give us a batch of homemade cookies or a little gift 😉
Bringing in jewellery that you already have to be fitted is fine – but make sure it is bagged – the grip-seal bags piercers use (ask your piercer for a couple of spare baggies if you want) are ideal, but a clean food bag will do. Having it loose in your handbag, purse, pocket, mouth (!), sock, wherever is not safe – it could damage your jewellery and scratch it, the threaded ends could come loose and get lost (you could lose the entire thing too!), and the jewellery will get dirty. It is NOT hygenic. So please…. Bag it!
If we ask for ID and you don’t have the appropriate type, please respect that we are doing our job by asking.
We (probably) don’t do tattoos. Please don’t ask if we’re ‘just’ a piercer. And if you want advice on tattoos, ask us if we can get someone to chat with you about it – most piercers work in tattoo studios, so we can find you the right person for the job!
Aside from piercing, we have a LOT to do. Ordering jewellery/disposables/products/tools, cleaning (SO MUCH CLEANING!), processing tools, the usual admin (emails, website maintenance), sterilizing jewellery, etc. All this is essential, and often we have to do this without help – so please be patient! There is a (bare minimum) of 2-3 hours of ESSENTIAL non-piercing work to do every day in the studio. If you aren’t seen to immediately, please respect that there’s important stuff we have to do to make sure that we can offer the services you need.
Please don’t bring your kids with you. Most studios will allow children in the waiting area (some won’t – you might want to check) as long as they have an adult with them and are QUIET and UNDER CONTROL. Children are NOT permitted in the procedure areas of tattoo/piercing studios, so you will need someone to watch them (NOT a staff member!) And, again, keep them quiet and under control. Screaming babies are VERY distracting when artists are trying to work. Honestly, it’s best to just leave little ones at home. Tattoo/piercing studios are generally not child-friendly environments.
I recently had an email from someone in the early stages of her first pregnancy, asking about getting tattooed while pregnant. They had heard it wasn’t a good idea but her midwife had assured her that there would be no problems, so they messaged me wanting some more info about it, as they couldn’t find any reasoning about getting tattooed after searching online, simply articles advising against it. I decided to put this blog together to explain some of the main reasons why getting tattooed/pierced while pregnant isn’t a great idea.
If anyone has any experiences or any medical info/links they would like to add, please leave a comment below. I’m not medically trained, but I have a lot of experience with tattoos, body piercing and the way your body’s immune system works, and that is what this blog is based upon. I have never been pregnant, so I would really appreciate anyone who has gone through this to pass their opinion on this below, to give a balanced view.
If you’re newly pregnant – whether it is your first or fifteenth, CONGRATULATIONS! Your piercer will be thrilled for you, and on hand to deal with any issues you have throughout this journey! Approach them with any queries and they will do all they can to help!
A tattoo or piercing which is done in a safe, clean and licenced environment carries a minimal risk of causing any complications, but there is still a risk there. When pregnant, it is not sensible to take ANY risk that can be avoided, and stress on your immune system can be avoided by not having a tattoo or piercing.
Any reputable studio WILL NOT tattoo (or pierce, while we’re on it) anyone who is pregnant or breastfeeding, it is always asked about on consent forms and if you know you are pregnant/breastfeeding, you must be honest about it. I have known people to be pierced by me, and then I’ve had a worried phone call a few weeks later when they have found out that they are 2 months pregnant, asking for advice. As mentioned before, the risks are minimal, and as long as you care for the piercing/tattoo, it is very unlikely to cause any complications with the tattoo or any problems with the pregnancy which are related to having a tattoo/piercing. It is advised to wait 6 weeks after giving birth/finishing breastfeeding to be tattooed or pierced, just to let hormone levels return to normal, and your body to recover from what is – arguably – the biggest challenge it can face!
Your body has an immune system, which can only deal with so much at once (one of the reasons we recommend people are in good health and fit and well before getting tattooed or pierced). If people have weaker immune systems, things like tattoos and piercings (but also cuts, grazes, burns, and general illness) can take a bit longer to heal. The risks of getting an infection from a tattoo or piercing (again, as long as it’s done safely and in an appropriate environment) are very low, so being pregnant and getting a tattoo isn’t putting the baby in any great danger. And even when your immune system is working a bit harder (fighting off a cold, or dealing with something heavier like pregnancy) there are still rarely any complications, but do you really want to give your body another thing on its ‘to do’ list? “Support my body” and “Support my baby” are 2 HUGE things to do – and a lot of people are more susceptible to allergic reactions, illness and sniffles when pregnant for these reasons, so getting a tattoo or piercing for your body to heal at the same time as being pregnant is really not sensible.
I remember reading an article in a tattoo magazine about someone who got tattooed whilst heavily pregnant, and while there were no complications, said it hurt a LOT more than their previous tattoos and took over a month to heal. The following issue there was (in my opinion – a very justified) stream of complaints about it, mostly written by tattooists. There is no law against tattooing or piercing a person who is pregnant, so no laws were broken, but as a piercer I hold the safety and wellbeing of my clients above all else, as should any reputable tattooist.
It’s also worth noting that henna tattoos can cause an allergic reaction, they are best avoided (most women also avoid dying their hair during pregnancy for this reason). Tattoo removal (any method) is also best avoided, for the same reasons as being tattooed.
Another reason against body modifications of any type while pregnant is that you can go into shock when being tattooed (VERY rare, but it can happen). If you faint (again, not a common occurrence) you could fall onto your tummy and hurt the baby, and if you do pass out, there could be a drop in heart/breathing rate. I was asked, several years ago, by someone who was 5 months pregnant if I would pierce their tongue, I refused and they said “I’ll lie on the form ‘to keep things right’”. I explained that having ANY piercing done isn’t the best idea, and especially something which will affect what they will be able to eat for a week, thus meaning the baby could be missing out on some meals.
There are a lot of myths surrounding tattoos and pregnancy (if anyone has heard any other myths, post them below!):
*Tattoo ink does not enter your (and therefore your baby’s) bloodstream.
*Tattoo ink will not cause breast milk to turn ‘sour’.
*It is not advisable to get a tattoo ANYWHERE on your body. I have heard people say that as long as the tattoo is not on your torso, it’s OK.
*The tattoo needle will not pierce your womb (if you have a tattoo done on your tummy).
*If you have a tattoo on your lower back, this WILL NOT mean you can’t get an epidural.
*Getting a tattoo will NOT mean your baby is born with tattoos/birthmarks/whatever.
While I’m on the subject, I may as well mention about how existing tattoos can stretch during pregnancy. Most people end up with some loose skin and/or stretch marks after giving birth. Any tattoo on your torso and breasts is likely to be affected, but any weight gain on your arms and legs, or swollen ankles may also mean a tattoo can distort. Some lucky people have found that their tattoos ping back into shape after giving birth, but most don’t. Using cocoa butter (Palmer’s do a lovely smelling body lotion) or Bio-Oil can help minimise stretch marks and improve skin’s elasticity (meaning tattoos return to their original size more easily). You can have stretch marks or caesarean scars tattooed over to minimise the appearance of them (they will never be completely hidden), but it is best to wait for them to heal fully before having them tattooed. In short, there are ways to minimise damage to tattoos, but it’s unlikely you will avoid it altogether.
Piercings on the face and ears aren’t usually a problem with pregnancy, and can be left in during pregnancy/birth and breastfeeding, however if a piercing is still healing during pregnancy, it may ‘kick off’ a little bit, because – as mentioned before – your immune system has more important things to do. I have seen fully healed piercings become problematic while the person is going through a pregnancy, so keep an eye on ALL your piercings and make sure you are wearing good quality, appropriately fitting, body jewellery for the duration of your pregnancy to minimise any allergy risks. From the neck down, people are often advised to take out their piercings. Nipple and navel piercings can usually be ‘saved’ by switching to PTFE bars (a flexible plastic) in a longer length than what you normally wear. Most navel piercings I see are 8-10mm long, most pregnant people find 10-18mm more comfy, and nipple piercings are commonly 10-16mm, and during pregnancy 16-22mm. However, there is no sure-fire way to save them, and they do sometimes need to be removed. Your piercer would be happy to have regular check ups throughout your pregnancy – just ask.
Basic PTFE barbell:
You can get some funky navel bar designs too, like the one shown below, but the plain ones will do the job just as well.
There’s no guarantee that navel or nipple piercings won’t migrate (‘grow out’) during pregnancy, but the risks can be minimalized by using the jewellery types shown above in appropriate sizes. A lot of pregnant people will be absolutely fine with metal (titanium is best as its hypoallergenic and super light) so its worth just ‘seeing how you go’ but bare in mind you will probably need a longer length in titanium too.
For genital piercings, it is definitely wise to take them out early on in the pregnancy (imagine trying to remove some jewellery from your private parts while negotiating something the size of a beach ball on your tummy!) I have seen people who have used PTFE barbells (mentioned above) in their genital piercing(s) and they have made it through the pregnancy and birth with no problems at all, but if there are any complications during the birth, the jewellery could get in the way of any doctor or midwife trying to do their job, you can always have your piercings re-done once you’ve had the baby.
Another issue that is worth a mention is the nipple piercings/breastfeeding conundrum. If the nipple piercings make it through the pregnancy, then they will need some attention when it comes to breastfeeding. A nipple piercing done properly will sit at the base of the ‘sticky out’ part of the nipple, NOT into the flat area around it (the areola) and if a nipple piercing is done correctly, it will not damage the milk ducts, meaning there will be no problems with your body producing milk. When breastfeeding, TAKE THE JEWELLERY OUT. Your baby will not be impressed if they can’t get their mouth around the nipple properly, and there is a risk of the jewellery coming loose in baby’s mouth, causing a risk of choking. Once you have fed, clean the area (since you’ll have an abundance of baby wipes, they will do for this too!) and replace the jewellery as soon as possible. I have seen cases where new parents are just so tired with looking after a little one, that some jewellery being taken out and put back in is just too much hassle and have let the piercing close, as well as some who have found that they just can’t get the jewellery back in. if this happens, wait until you have finished breastfeeding, give it another 6 weeks to let your body recover, and if you still want to have them pierced, get them re-done.
I hope that this blog helps explain the reasoning behind not getting tattooed while pregnant, and other aspects that link body modification and becoming a parent. If anyone has anything else to add, please leave a comment below, I would love to hear from pierced and tattooed parents about their experiences with pregnancy.
Please note – an earlier version of this blog was posted on my facebook, but used cis-gender terms, this has been edited to add more inclusive language. I am constantly striving to use inclusive terms in all my available literature, please always correct me if I am incorrect.
Lots of links in this one! Some of those links are to the Daily Mail website, I apologize unreservedly to anyone who loses their open mind and brain cells by visiting that website, please click at your own risk 😉 It’s quite a long blog – if you’re looking for my ‘official’ statement on the link between daith piercings and migraines, please scroll right to the bottom of the blog – it’s the last paragraph.
So, unless you have been on a desert island recently (Late 2015/Early 2016) you will no doubt have seen – on various media platforms – that daith piercing is being hailed as a miracle cure for migraines.
The daith is described as the innermost fold of cartilage, just above the opening of your ear canal. The pronunciation is stated as “doth” but most people (myself included) pronounce it “day-th” to rhyme with “faith”. It is most commonly – in my experience – performed at 16g (1.2mm) or 14g (1.6mm), but can be pierced at a thicker gauge. The initial jewellery available is a wider range than with a lot of piercings, rings, heart-shaped rings and circular barbells (“horseshoes”). Lots of beautiful decorative jewellery is also available – see below.
All these daith piercings were done by me (some are fresh, some healed), and these pics show just a small selection of available jewellery. And yes, I couldn’t just choose one, as I love daiths so much!
So where did the hype about daith piercings being a migraine cure come from?
In Autumn 2014, a news article circulated (story based in America) of a lady who had got her daith pierced, and her migraines had stopped (she did not get the piercing to cure migraines, it was just done because she wanted the piercing). I saw a rise in the number I was performing, but only a small one. Then in summer 2015, there were more claims, many from English sources, of daith piercing curing migraines.
The Daily Mail got in there with their, as always, fabulous journalism:
(I love that the guy in this article said he didn’t want a gold piece of jewellery because it would be ‘too flashy’ and that he ‘chose a silver one instead’ yet the photos in the article show a gold-coloured piece of jewellery! Bless him!)
Even ITV’s This Morning had a short segment on it:
Almost overnight, I saw a huge increase in the number of enquiries about the piercing, as well as an increase in the number I was performing. To put this in perspective, 5 years previously, I would maybe do one daith piercing a month/every 6 weeks, when I bought in the daith hearts (I was one of the first piercers in the country to offer the hearts) in June 2012, I saw that increase to 10-15 procedures a week, and I am currently (at time of writing, January 2016) doing 15-20 daith piercings a week, and having between 3 and 6 messages/emails and phonecalls – daily – asking about daith piercing and its ability to cure migraines.
I’m gonna be honest here, I LOVE doing daiths. They are one of my favourites. But the influx of people requesting them with the sole purpose of curing migraines has made me feel like a charlatan, despite telling people that there is no guarantee that it will affect their migraines in any way.
Many of the articles refer to daith piercing as a ‘new type of piercing’ which is misleading – we’ve always had this little fold of cartilage, and the earliest recorded daith piercing is 1992. They also quote prices on the piercing, this too is misleading, since different studios charge different prices, and the clients’ choices of jewellery will also affect the price.
But what’s the science behind it? And are these claims true?
I’m not for one moment suggesting the people mentioned in the articles above are lying, or are mistaken, I have no reason not to believe their claims. But migraines are all very different – and there are different types, different causes and different symptoms from all different sufferers. Some people even find the nature of their migraines have changed over the years, the location of the pain changes, the severity, the frequency… there are a lot of external factors to consider.
Many people simply don’t understand the difference between a migraine and a headache (and that suffering with one is completely different, and would require different treatment, to the other). While both a headache and a migraine can be extremely painful and upsetting, there is a difference between them. The claims being made are referring to migraines, and not headaches. However as we will cover, evidence for the piercing acting as a ‘cure’ for either is thin on the ground.
This link explains the difference between the two.
Medication for migraines has various degrees of success, some people will try a couple of different medications or therapies (acupuncture for example – we’re getting to that in a sec!) and will find one that works for them – which is awesome. Some people will try every pill, therapy and ‘old wives’ home remedy going, and still, nothing works. So just because one thing (say, I dunno, a piercing?) works on one person, it does not mean it will work on everyone!
The evidence behind it, I can’t bring myself to say ‘science’ when referring to this, is acupuncture. While I’m unfamiliar with acupuncture, its applications and methods, from what I have gathered, a daith piercing – or rather, the position of it – is a pressure point that acupuncturists use to ‘treat’ the symptoms of a migraine. However, acupuncture – like many new-age and holistic therapies – has little or no scientific backing, and is widely discredited by doctors and medically trained practitioners.
Despite the claims, piercers and medical practitioners have been quick to try and dispel the guarantee of a migraine cure, with the focus on the fact that no studies have been conducted to prove or disprove the theory. Below are some links which are looking at the situation scientifically, and explaining why the theory is not 100% guaranteed as a cure for any type of migraine or headache:
Speaking from my own experience – and from that of friends – all we can do is explain that there is no evidence behind the claims other than he said/she said, and we remind our clients that our focus and purpose is for adornment (adding something pretty to your body). We remind them that we are not medically trained and that we are making no claims that a daith (or any other) piercing will cure anyone of migraines, headaches…. Or anything else! Since the Daiths/Migraines thing came up, there have been claims of certain piercings curing anxiety, aiding weight loss, and many other things – none of which are true, and if you are concerned about any aspect of your health, speak to your GP, nurse, or other medical practitioner.
After explaining this, I will add that if the piercing does affect the migraines (the frequency of them, or the severity), that’s a bonus. The effect it has on migraines is not why this piercing is being performed, its purpose is to look pretty, and that’s why it is offered in piercing studios. If it ALSO somehow helps with migraines, awesome, but that was never my/our intention.
As piercers (and as humans!) we understand how frustrating it can be to suffer with migraines, and that 99% of people who get the piercing are going into it with an open mind, and doing it simply so they can say they have tried it. This is the best attitude to have – however, there is a lot of suggestion of a placebo effect on people, which – again – is not necessarily going to work.
Having explained this to every client who mentions migraines when getting their daith pierced, I have had – to date – 3 people who have decided not to go through with the procedure, I feel (as do all my piercer friends) that people going into the procedure should do it with all the information, if they decide it’s ‘worth a chance’, then go through with it, and if not, then there’s no loss.
I have actually had to alter my consent forms in the wake of this – adding in a paragraph where the client agrees that this procedure will NOT result in any pain relief or other effects, simply that it is for adornment.
Having mentioned that I feel like a charlatan by performing the piercing on people who are getting it done as a headache cure, many people would be quick to jump in with “more business for you!” “make hay while the sun shines!” but this is exactly what worries me. This feeling is made worse when clients come in saying the following:
“Do you do the migraine piercing?”
“Can I get the migraine cure piercing done please?”
“I get migraines, so I want to get the piercing that stop them hurting”
*shows picture on phone* “I saw that this piercing cures migraines, so I want it done, please!”
I feel that even after explaining the above, my concern is that people will feel misled or ‘cheated’ when the piercing does not ‘cure’ them. I will never refuse to pierce someone unless I have a valid reason, but there has been one instance (from another studio, not locally) where a client has returned and tried to get a refund after the piercing did not cure their migraines. Of course, I know that this is an isolated case (or I hope it is!) and that the vast majority of people would not do this – but it’s still there in the back of my mind every time someone gets the piercing done to try and help their migraines. As mentioned, I love daith piercings, and I really don’t want this flurry around an unproven theory to change that!
Of course, there’s always one or two unscrupulous people who seek to make money and prosperity from others’ misery. I have seen a few studios hike up the price of the daith piercing, and some even making claims that it WILL cure migraines:
I have a friend who is a well-respected piercer, and on seeing this article he said “Because they are offering to cure them does this leave them open to legal action if someone still has migraines after or gets them worse?”
The article also shows the piercing being performed improperly, with a set of forceps (‘clamps’) instead of a receiving tube, and a needle of a far larger gauge (thickness) than required (though the gauge of the piercing could be whatever the client requested, it’s rare to see a daith piercing at this size). Many piercers perform the piercing ‘freehand’ too (no tools, just a needle and their fingers) – but a set of forceps is not appropriate for this placement.
Things like this make me sick to my stomach, making false promises and giving false hope to people suffering with such an awful condition, literally making money from the misery of others. Reputable piercers will respond, as I have, with a statement that makes no claims on the piercing’s ability to cure migraines/headaches, and would certainly not turn it into a competition or scheme which (I feel) is misleading their clients, and shows a complete lack of respect to medical practitioners.
I suffer with migraines and, while I understand that it’s not a guaranteed cure, I want to try it! If it doesn’t work, I still love how the piercing looks.
This is the ideal situation to be in; client likes the piercing, regardless of its ‘healing properties’. Go for it, choose a reputable piercer, call in for a chat and get the piercing when you feel ready.
What does the future hold?
Ideally, some research. So there is a solid, scientific claim on the frequency with which people find some relief (as mentioned, even a reduction in the severity or frequency of the migraines would be of help to people). One of my clients worked closely with a migraine charity, and told me that they were hoping to raise funds for some research to be done. However due to the massive range of symptoms that migraines have, as well as the many different types and ways of diagnosis, it’s unlikely that we will ever be able to pinpoint exactly what type of migraines can be ‘cured’ (or not) with daith piercings. Though, even to be able to say “Daith piercing shows a reduction of the symptoms in [x]% of cases” would offer some guidance for piercers and for clients.
Another thing many piercers are now worried about, is that if this piercing is deemed to be a ‘medical procedure’, we will not be allowed to perform it. So please think twice before spreading the (mis)information that daith piercings are connected to migraines, as your piercer may end up being told they can no longer offer this piercing, and as I LOVE doing daith piercings (have I mentioned this? I think I might have…), I really do NOT want to see this happen!
There was a rumour that did the rounds about 10 years ago that a tragus piercing would paralyse one side of your face, this was a complete myth. Piercings are shallow puncture wounds, unless you plan on using unicorn hair as jewellery or phoenix tears as aftercare (muggles won’t get that one!) your piercing is unfortunately not a magical thing. It’s a hole with something pretty through it – nothing more, nothing less. No piercing placement or piercing/body modification application or procedure (I’ll conservatively add “that we know of yet”) will provide any health benefits, relieve pain, heighten or dull sensitivity in the long term or provide any relief from ailments. If you have a health issue you wish to discuss treatment or therapy for, please consult a doctor or pharmacist – they will be able to assist you more accurately and effectively than a piercer.
OFFICIAL STATEMENT FROM ME ON DAITH PIERCINGS AND THEIR LINK TO MIGRAINES
Unfortunately there’s no scientifically proven link whatsoever between daith piercings and migraine cures. Daith piercing has been around a long time (first recorded daith piercing was performed in 1992), and if there were a connection, it’s likely we would know about it by now. I’m happy to perform the piercing, but please understand that my job is purely adornment – I’m here to fit jewellery in people. I’m not medically trained so I cannot make any claims or representation that anything I do is linked to relieving any symptoms, nor can I diagnose you as being (or not being) a migraine sufferer. I have edited my consent form in the wake of the claims made above, so that anyone consenting to the piercing is also stating that I have not made any claims that this piercing (or any other) will affect the body in any way. If you do suffer with migraines, I would recommend speaking to your doctor or pharmacist before pinning all hope on a piercing. You are welcome to have the piercing done, and judge for yourself if you see a change in your headaches/migraines. At worst, if it doesn’t work in the way you’re hoping for, you will still have a beautiful piercing, which you can wear beautiful jewellery in. Please inbox me if you would like more information (costs, jewellery options, my availability, etc.).
To mean less of a wait for replies to emails/messages, I’ve compiled the questions I am asked most often into one blog.
ARE YOU IN TODAY/TOMORROW/ETC?
DO I NEED AN APPOINTMENT?
WHEN ARE YOUR BUSIER OR QUIETER TIMES?
HOW MUCH FOR…?
DOES IT HURT?
HOW LONG DOES IT TAKE?
HOW OLD DO I HAVE TO BE?
WHAT ID DO YOU ACCEPT?
DO YOU ACCEPT CARD PAYMENTS?
WHAT JEWELLERY IS AVAILABLE?
WILL THIS PIERCING SUIT ME?
DO YOU DO TRAINING?
See below for these questions answered.
ARE YOU IN TODAY/TOMORROW/ETC?
Short Answer: Probably.
Long Answer: I work 6 days a week most weeks. I am not in the studio on Sundays or bank holidays and I do take regular days off, and I try to give notice if there are any changes. I use my Google busiess page to give real-time updates on availability: https://g.co/kgs/vZ4LBNX I recommend checking on there if making a special trip to see me, or drop me an email to enquire about a specific day. I work 11am-6pm but will come in earlier and stay later on request – this MUST be arranged in advance, with a non-refundable deposit.
DO I NEED AN APPOINTMENT?
Short Answer: No.
Long Answer: No. Unless you need to come in for a pre-arranged time (outside of my normal hours) or for a body modification procedure, or for a piercing using non-standard jewellery (such as Industrial Strength pieces or basic jewellery upgrades) – these things must be arranged with me in advance, and a non-refundable deposit is taken. Basic piercing procedures with standard jewellery require no appointment nor deposit.
WHEN ARE YOUR BUSIER OR QUIETER TIMES?
Short Answer: There aren’t any times I can guarantee that there will or won’t be a wait.
Long Answer: Due to not requiring appointments, there is no way of knowing how busy certain days and times will be. Generally, Saturdays between 2pm and 4pm are my busiest times, and early afternoon (1pm-2pm) on weekdays are quieter – but this is not an exact estimate. School holidays, bank holiday weekends and ‘payday weekends’ (the weekend following the last Thursday of the month) are also generally busier times. I have a measure in place that when there is a queue, people will be seen to in the order they come in, sometimes I can do jewellery fittings/sales while other clients are filling in consent forms, but this is not always possible. If it is busy in the studio, I will always do my best to give an estimate on waiting times. I honestly appreciate the patience of my clients enormously when it gets hectic.
HOW MUCH FOR…..?
Short Answer: See pricelist below.
Long Answer: See pricelist below.
Prices are subject to change, please ask BEFORE your procedure if you need to double check any pricing. We are cash only in the studio.
DOES IT HURT?
Short Answer: Yes.
Long Answer: Yes, but piercings are very quick. Many people will say “Oh, if it hurts I’m not getting it done, then”. But 99% of those people WILL get it done anyway! If your desire for the piercing outweighs your worry of how much it will hurt – which in most cases it does! – you will end up getting the piercing done. Yes, there will be a pinch, nip or scratch and of course some piercings hurt more than others (as a general rule, softer tissue hurts less but swells more) but piercings are quick, and any discomfort is over with very quickly. For more info, see my other blog on anaesthetics.
HOW LONG DOES IT TAKE?
Short Answer: 10mins to half an hour in total.
Long Answer: Prep for a piercing (quick consultation/anatomy check, set up, cleaning, checking, marking, re-marking, re-checking and then the breakdown, clean up and aftercare chat) takes 10-20mins – more if its paired piercings (pairs of nostrils, lips, cheeks, surface piercings and microdermals for example) as these require longer to mark – sometimes 45mins or more. The needle going from one side to the other takes under 2 seconds, sometimes slightly more in the case of surface piercings or microdermals. Sometimes people will feel lightheaded afterwards (this is why eating something before going to get a piercing is so important!) and this can mean I will need to spend longer in the piercing area with them. I will never rush a client who is feeling unwell, and I ask people who have been waiting to be mindful of this during busy periods – you wouldn’t want to be rushed, so please extend that courtesy to others!
HOW OLD DO I HAVE TO BE?
Short Answer: 16+ for most piercings. 18+ for nipples, intimate piercings, cheeks, microdermals/skin divers, surface piercing and body modification procedures. I also offer tooth gems and blood vial jewellery, which are 18+. Valid, in-date photo ID is required in the studio. Tattoos are 18+ by law.
Long Answer: While there is no law with piercings in England (except intimate piercings which are 18+), I only offer piercings (INCLUDING earlobes) to people aged 16 or over. For intimate piercing, nipple piercing, microdermals/skin divers, surface piercing/microdermals/skin divers and cheek piercing I will only perform on people 18+. For jewellery changes, I am happy to help anyone of any age BUT for intimate/nipple piercing, it is 18+. I do not offer any services with parental consent, and valid, in-date photo ID is required in the studio. Details below.
Any piercer offering piercings for under 16s (including ear lobes) must be appropriately insured and DBS checked. See more about age restrictions in my other blog.
WHAT ID DO YOU ACCEPT?
Short Answer: In-Date Drivers Licence, Provisional Drivers Licence, Passport or CitizenCard.
Long Answer: Any government issue photo ID. Drivers licence, provisional drivers licence or passport are the obvious ones. ANY proof-of-age card with the ‘PASS’ hologram is also accepted (CitizenCard & ValidateUK being the main ones). I do not accept college cards, bank cards, bus/train passes, National Insurance cards, library cards, NUS/Student cards or birth certificates.
ANY ID shown must be VALID and IN DATE, and the details on your ID must match those given on your consent form (I do ask for a preferred name/pronouns on there as well).
CitizenCard have kindly given me a supply of single-use discount codes EXCLUSIVELY for my clients! These codes will reduce the cost of a standard application from £18 to just £5! CitizenCard is the UK’s most widely accepted proof of age card, and carries the required ‘PASS’ hologram. If you want a discount code, email me (skinseamstress@hotmail.co.uk) with the subject ‘CitizenCard’ and I will get one out to you – these codes are ONLY for my clients and can be used once only!
DO YOU ACCEPT CARD PAYMENTS?
Short Answer: No, sorry!
Long Answer: We don’t currently have a card machine in the studio, therefore only accept cash. for ALL services There is a cashpoint nearby (100m away), please visit this if needed BEFORE your procedure. I cannot take any digital payments (PayPal, etc) in the studio.
WHAT JEWELLERY IS AVAILABLE?
Short Answer: Lots! Initial piercings generally have simpler, plain titanium pieces (upgrades are available) and once healed I offer a HUGE range, as well as having access to the best suppliers around!
Long Answer: For initial piercing, the options for ‘basic’ jewellery – which are included in the prices shown on my price list – are a plain silver-coloured titanium ball closure ring, labret stud, curved barbell, straight barbell or circular barbell (see below). Some piercings have location-specific jewellery options too (Navel ‘belly’ piercing, nostrils, septums and daiths for example). Some piercings can have any of the following (in appropriate sizes, obviously) and some have only one or two options – I can discuss this with you in the studio and show you the options.
Ball closure ring
Labret stud
Curved barbell
Straight barbell
Circular barbell
All the options shown other than the ball closure ring have an ‘upgrade’ option of a rose gold titanium ball (+£5), yellow gold titanium ball (+£5), white opal titanium disc (+£10) or clear gem titanium disc (+£10). For ball closure rings, a white opal disc or clear gem disc are available (+£10). Other options are available – but need prior arrangement and a non-refundable deposit – coloured titanium (instead of plain silver-coloured), alternative gem colours as well as premium brands such as Industrial Strength. I will only ever use sterilized high-quality titanium jewellery for initial piercings. I will not pierce with (or fit) jewellery you bring to me, previously worn jewellery or jewellery purchased elsewhere.
For healed piercings, I stock a huge range of jewellery. Pics are available for viewing on my social media pages, but I strongly recommend calling into the studio to see what’s available – stock changes regularly, new items are always being added, and due to the small size of body jewellery items, it is very hard to photograph and show detail. All jewellery is available for mail order. No refunds or exchanges are available on body jewellery unless faulty – I will provide you with sizes requested but cannot be responsible for any error on your part with sizing. Any items I do not stock can be ordered in at no additional cost, but a non-refundable deposit must be paid prior to the jewellery being ordered.
WILL THIS PIERCING SUIT ME?
Short Answer: If you think it will, then yes!
Long Answer: ‘Suiting’ things is a matter of perspective, and I cannot tell people what they should and should not do to their bodies. Of course, I will offer advice on what piercings will or won’t work, explain any anatomy limitations, and if the procedure in question is likely to heal, but as far as making the decision on what to get pierced, this is down to you. More is available in my other blog.
DO YOU DO TRAINING?
Short Answer: No, sorry.
Long Answer: See my blog on apprenticeships, I have not got the facilities to offer an apprenticeship and it is unlikely this will change. I teach at conferences internationally but only to licenced piercers working in licenced studios.
More information on my policies is available in another blog.
***DISCLAIMER: As most of my friends and regular clients will tell you, technology is NOT my forte. I’m firmly on team technophobe, and so the ‘tech’ side of NFC tags, I cannot be of a huge assistance with. I can install them safely, and troubleshoot any wound healing, but the use and applications of the tag, regrettably you may have to do a bit of research and work yourself!***
NFC (Near Field Communication) tags are a body modification under the ‘Biohacking’ umbrella (humans having technology implanted into them, and/or used in such a way that it gives an advantage to the user). There are a lot of different brands on the market; the ones I am using are Samppa Von Cyborg’s branded tags, though all NFC tags will – essentially – do the same thing. Your tag ID number is unique to you, and you will need this to sync your tag to any devices. I will scan the tag after performing the procedure to get the ID number, and write it on a copy of this information for any client after getting it done; you can view the number any time by scanning it. Sometimes, immediately after the procedure, the tags can be hard to read due to swelling and increased blood flow around the area. Scanning them becomes easier after a week or so when the swelling has subsided and the body has healed.
Your tag is essentially a data storage device – which you can’t lose! You can store your personal and business information on it, so people can scan your chip and get all your information – website, phone number, even your twitter profile (#omg)! Think of it as a digital business card, which you never have to pay to have re-printed! You can pass this information on to anyone with a compatible NFC reader device on their phone (see below).
Your tag is something which can be synced – using the unique ID number and some 3rd party software – to a number of different applications. The most common uses are operating door locks (you can sync your tag ID to the lock, meaning you don’t need a key!), car immobilizers, other security devices and computer log-ins. Other more specialist applications are to sync lights in your home and games console controllers. As is the nature of technology – the uses and operations available will change, more will become available. As long as you have your chip and number, you can use this for any future operations, as well as those already mentioned.
Your tag is NOT a tracking device, a magnet or a communications device, and can only be read from a very short distance, as the name suggests. Your tag will not be detected by metal detectors, airport security scanners etc., It is MRI safe, but it can cause a small amount of blurring of the MRI image in the immediate vicinity of the tag. Quick side-note, magnetic implants are another thing a lot of people into the ’biohacking’ scene get, it is important that magnets and NFC tags are NOT placed too close together, as the magnet can damage the NFC tag.
PROCEDURE: I use the pre-loaded injectors, meaning that the procedure is as swift as possible. The area is cleaned and marked (same as with a piercing) and then the needle on the device is pushed under your skin (like a piercing) but doesn’t come out anywhere, when it is in position (takes a second or 2), the plunger is pushed down and the tag is deployed! Needle is pulled back out the way it came, pressure applied to the wound left, and once cleaned up, a dressing is applied. Done! Start to finish, it takes about 10mins, the actual procedure takes 10-15 seconds.
HEALING: Your tag was implanted using a 2.4mm needle, in the same way a dog or cat would be microchipped. The small puncture wound should heal up within 14 days. You can cover the area with a plaster or dressing (bear in mind it may be harder to read the tag through dressings, clothing, etc.) if you want to. A small scar is to be expected, but will fade over time. The tag can be read and written from the moment it is implanted. The tags can be removed by your body modification artist – using a small scalpel. Once removed, the data remains on the tag and can still be read and changed.
READING THE TAG: As mentioned, you can store info – like a phone number, a website, an email address, or even just a message – to the tag. If you store your contact info on there, someone with an NFC device – an app on a smartphone for example – can scan your tag (in your body) and your information will come up on their phone. You need an app (or NFC reader/writer device) to edit the data on the chip, but a reader (which is available as a standard feature of many smartphones) is all you need to view it. The tag must be kept within range of the reader device while being read, move it away and the data will not show up (hence the name – NEAR field communication).
WRITING DATA TO THE TAG: To do this, a NFC reader/writer device or smartphone app (‘NFC Tools’ and ‘NFC Tasks’ are the ones I use on Android) is required. You can pick the reader/writer devices up from eBay for around £20-£25. They plug into a standard USB port and come with a software disc, but I have found it’s better to download software from gototags.com to your computer and use that with your reader. Each tag can be written to (have the information on it changed/altered/added to) 10,000 times. Meaning that even if you re-wrote the tag once a day, it would still last 27 years! You can lock the information held on it (so it cannot be changed) – but to do this or change the data held on the tag, an NFC reader/writer must be used. NFC reader-only devices can read and display the information, but not change any of it. If you do lock the tag as ‘read only’, this is usually permanent and cannot be reversed. The tag must be kept within range of the reader/writer device while writing and the data must be saved before moving away from the reader/writer.
I’m really excited to see how this technology develops and expands, and even more so to see how my clients use their tags! As this is a relatively new procedure, there are bound to be more questions, most of which I hope I have answered for you above but do get in touch if you have any more queries about this. Anyone with an NFC tag: please post your experience with it below – and tell us what you’ve been using it for! Photos and videos welcome!
Here’s some interesting links explaining more about NFC technology and its applications!
Piercings, tattoos and scarification pieces require different points of care during summer (hot) and winter (cold) months, and fresh/healed ones also require different methods, nothing major, but a few little pointers will help keep your mods happy. So, we’ll start with the summer care (as I like summer more!)
SUMMER CARE
Piercings:
To be honest, there’s nothing much to know! Healed piercings revel in the sunshine, stretched piercings love it, ‘regular’ piercings love it, just be aware that sunburn and piercings do not mix. Sunburn can cause more swelling and obviously more pain, so use loose clothing or a wide brimmed hat to keep healing piercings out of direct sunlight – do not apply sun cream to a fresh/healing piercing, but you can apply it around healed ones, just wipe off any excess from your jewellery. Piercings can sometimes swell slightly more in the summer (when first done) so you may need to be fitted with a slightly longer bar, and potentially wait longer before downsizing (your piercer will advise you on this). If you’re off on holiday, make sure you clean your piercings (especially if fresh) when hopping in and out of the pool. Any jewellery material is fine to wear. Piercings love the constant temperature, as it promotes circulation and most people find piercings heal faster in the summer. If wearing clothing that exposes your piercings, be careful they aren’t snagged or knocked. You need to ideally keep a fresh/healing piercing out of chlorinated water (so swimming pools, hot tubs, etc) for as long as possible after getting pierced. For areas of the body that cannot easily be kept out of the water (navel/nipple piercings for example) it is recommended to get pierced well before going on holiday, as it would not be a fun holiday if you can’t spend any time in the swimming pool!
Additional tips:
If you’re heading away for a holiday, take a few spare pieces of jewellery and balls/attachments with you – just in case you lose something while you’re away. And despite what some bloke in the pub told you, you won’t set off any airport security alarms. Larger/heavier gauge metal jewellery can sometimes cause this (tunnels, large gauge rings, etc) but a few smaller pierces will not cause any issues. Airport security staff have seen it all before, so they won’t be shocked by a couple of piercings.
Tattoos:
Fresh tattoos should be kept out of the sun (sunburn on a fresh tattoo is the worst pain ever!) and they WILL fade (fresh or healed) if you blast them in the sun or on sunbeds. It’s not a good idea to use sun cream on fresh tattoos, just use your usual healing cream and keep the tattoo covered with loose, clean clothing. Fresh tattoos should not be soaked in swimming pools, at all. The general rule is not to get tattooed any less than 1 month before going away on holiday, so your tattoo will be fully healed and settled by the time you hit the beach. Healed tattoos should only be exposed to the sun (or sunbeds) if they have sunblock (factor 30+) applied. This will stop them fading and going blurry. It’s worth noting that laser tattoo removal works by firing short pulses of intense light at the tattoo and fading the ink, so letting the sun blast your tattoo is doing the same, but slower and less powerful. Some people find their tattoos itch a little in the heat, applying E45 cream will help soothe it (top tip – keep it in the fridge!)
Scarification & Branding:
Similar care to tattoos really. Fresh/healing scarification and branding can’t fade if blasted in the sun, but getting sunburnt will HURT. Sweat and soaking a fresh or healing piece can make the scabs mushy and fall off before they’re ready, and you could end up with an uneven scar, so make sure it is covered with loose clothing – do not apply sun cream to a healing scar/brand. When healed, you don’t need to treat them differently to the rest of your skin (there’s no ink to fade, remember) so a bit of factor 15+ to keep your skin happy in the sun is all that is needed!
WINTER CARE
BE AWARE THAT BEING ILL (SUCH AS SEASONAL FLU) OR INJURED/RUN DOWN WILL MAKE ANYTHING YOU GET DONE MORE DIFFICULT TO HEAL AND CAN ALSO MAKE HEALED PIERCINGS KICK OFF! A LOT OF PEOPLE DOWNSIZE THEIR STRETCHED PIERCINGS OVER THE WINTER, SO THAT THEY COPE WITH THE COLD BETTER, THEN TAKE THEM BACK UP WHEN IT’S WARMER.
Piercings:
Most piercings don’t need anything special in winter, aside from the odd clean and check-up. However, the cold can make them kick off a bit (think about what the winter does to you anyway, crap circulation, dry skin, etc.) and healed piercings can sometimes be a little poorly over the winter. Fresh piercings are very delicate and the cold will diminish circulation and mean that if you get pierced in the winter, they often take longer to heal. When possible, in your stretched piercings, wear a good quality grade silicone or organic jewellery, because metal conducts heat away from your body/piercing (your usual metal jewellery is 100% fine in ‘regular’ piercings, but stretched piercings will love you if you give them something nice and light that won’t be cold while you’re out and about). Personally, I keep my titanium in everything but my stretched lobes, in which I wear silicone. Oh, that’s another thing – if you’re stretching ANY piercing, if possible, stop completely during the winter months – as it will be more uncomfortable and your body will not be happy that it’s expected to stretch something with rubbish circulation and cold jewellery! I give my stretched piercings some extra love in the winter with more vitamin E massages (I aim for twice a day in winter). It promotes circulation and keeps them happy.
Tattoos:
Not a lot to know! As you keep wrapped up in the cold, tattoos aren’t exposed to the elements, so they are happy and will love you for keeping them warm. Fresh tattoos need a bit of extra attention and you need to keep tight clothing off it, using the cling film method (wearing cling film over the tattoo after it has been thoroughly cleaned and dried and changing it 3-4 times a day) often helps and stops clothing fibres getting caught in the tattoo and making it flare up. Healed tattoos require no extra attention.
Scarification & Branding:
As with summer care, they should be treated the same as tattoos. Scarification and branding take much longer to heal than a tattoo, so while it’s healing, you may notice the scarring gets darker (purpley-red in colour) when it’s cold, but this isn’t permanent and once you get indoors and warm up, it will settle. Once the scars are fully healed and white, you won’t notice much change in them, and they require no special attention.
I hope this helps in some way, if anyone else has anything they’d like to share, post a comment.
It is my policy to not pierce anyone under 16 years of age. No exceptions (not even earlobes). People 16+ must be able to show government issue photo ID when asked (this is a UK driver’s licence or provisional or a UK passport), CitizenCard – or any proof-of-age card showing the ‘PASS’ hologram. I do not accept anything other than the forms listed above, the ID shown must be in date (I cannot accept expired ID) and details on the ID (including but not limited to: name, date of birth, address and signature) must match those given on the consent form. For nipple, genital, bridge, microdermals/skin divers, surface piercing, cheek/dahlia piercings and other body modification procedures including stretching piercings, I will only work on people 18+ and the client must be able to show photo ID as above. I will fit body jewellery (see below for info/charges) and give help with a problematic piercing (check-up, jewellery resize, jewellery removal, clean up) on anyone of any age EXCEPT NIPPLE AND GENITAL PIERCING – where I may ask to see proof of age that you are 18+. I reserve the right to refuse service if I have any suspicion that the ID shown is fraudulent or does not belong to the person being pierced. An easy way to figure this out – If I cannot legally own a photo of it, I cannot pierce it.
CHILDREN (under 16) IN THE STUDIO
Children under 16 are not permitted in the studio at all. We have had to introduce this due to the high number of incidents where children have been loud, disruptive and have put themselves in danger. If you are coming into the studio for any work to be done (tattoo, tattoo removal, piercing, etc.), you will need another adult with you to watch your children OUTSIDE the studio, we STRONGLY advise not to bring children to the studio at all. Please be aware that ALL tattoo studios are adult environments and are not suitable for children.
JEWELLERY UPGRADES
Jewellery upgrades are available on all initial piercings for an additional cost. Prices stated on my price list will always include one piece of basic titanium jewellery, but you may have something different to this for an additional cost (this will vary with the piercing, anatomy, and client – please feel free to discuss with me) and may be something you need to return to the studio another day for. Any upgrades which need to be processed must be paid for upfront (when requesting) and this payment is NON-REFUNDABLE for any reason. A contact number must also be left. Once the item has been processed, you are expected to return within 2 months (unless agreed prior to the procedure – and in which case you must return within 2 months of the agreed date). If the piece is not collected within 2 months of the processing/agreed date, this item will be sold on and no refund will be issued.
CUSTOMERS ORDERING BODY JEWELLERY (or any other order-in/pre-order items)
Payment in full is required upfront (before I place the order) and is non-refundable for ANY reason once the order is placed. A VALID phone number is also required. When ordering in the studio you will be given the option for delivery, if you want it (online/PayPal orders I will only order if you have paid a P+P cost and left your address). Delivery is free for orders od £10+ – otherwise, £2 P+P charge. If you want this, no problem, items will be posted as soon as I have them, if you are collecting in the studio; once I have contacted you and let you know your jewellery is in, you have 2 months to collect it. If you haven’t collected it within 2 months (or paypalled me the P+P cost), it will be sold on or returned to the supplier, and any amount paid will NOT be refunded. It is your responsibility to ensure the address for any posted-out items is CORRECT.
PAYMENTS (See above for details on ordering in body jewellery/other items)
My price list is subject to change, if you are unsure of any prices (procedures or jewellery), please ask before getting pierced/jewellery fitted. Payment is required in cash or in valid Skin Seamstress vouchers – see below for voucher policy. I do not accept cheques and do not have a card machine. Payment is required in full immediately after the procedure, unless agreed prior to it. I cannot accept PayPal payments in the studio as there have been cases where a payment has not cleared after several days. Any person who leaves without paying (unless agreed prior to this with myself) will be reported to the police and the matter will be treated as theft. If you need to visit a cash point, please do this BEFORE coming in. If you need to get cash AFTER your procedure, you must leave your phone and wallet/purse (other than your cash card) in the studio if you are alone, or if you have someone with you, they must wait in the studio until you return. If you do not return, the police will be informed, and the matter treated as theft. I hate having to ask for this, and my request often offends – but due to past attempts at theft, this is now my policy.
VOUCHERS
I offer vouchers in £5, £10 and £20 values. They are available for sale in the studio and available for mail-order. However, they can only be redeemed in the studio (not online). Voucher must be presented when paying; it will be taken from you. Photocopies or pictures of vouchers are NOT accepted. Vouchers are valid from 6 months of the date shown on them, after that time, they are void and cannot be used. Vouchers can be redeemed against anything (body jewellery, merchandise, delivery, piercing procedure, any other body modification procedure). Any ‘change’ from the value of the voucher will be given as the form of a credit note. Vouchers can be used as part payment, paying the remainder in cash. Please note that my vouchers are separate to those of the studio I work in, so you must request PIERCING vouchers if coming into the studio to purchase – I cannot accept vouchers belonging to the tattoo studio, only Skin Seamstress vouchers, and the tattoo studio cannot accept MY vouchers are payment for tattoos.
FITTING BODY JEWELLERY/STRETCHING PIERCINGS
Any jewellery bought from me (either in the studio or ordered in) will be fitted free of charge, you just pay the cost of the jewellery. If the piercing is of a higher gauge (thicker) than the existing piercing then a £10 charge (+ jewellery cost) is applied for the stretch service (if more than one piercing is to be stretched, as long as they are both being stretched to the same size, this £10 charge covers them all. If more than one piercing is being stretched and they are different sized, the £10 charge applies once for each different size). Once body jewellery is fitted, it must be paid for in full, you cannot ‘try on’ body jewellery for hygiene reasons. Please note, I will not fit body jewellery which has been purchased elsewhere.
MICRODERMALS/SKIN DIVERS
I offer a free re-pierce on any PROPERLY CARED FOR microdermal or skin diver that comes out within the first 2 months of having it. I will remove any microdermal or skin diver which I have done (however long ago) free of charge, though if a healed microdermal or skin diver is removed, the re-pierce (if necessary) will be done at the client’s expense. If I did not do the microdermal/skin diver which is to be removed, there is a £10 charge per microdermal.
BODY JEWELLERY EXCHANGES/REFUNDS
I will not exchange or refund for any jewellery bought (worn or not) unless faulty – for hygiene reasons. Unless I have given you an incorrect size, or the measurements were wrong due to MY error. If the jewellery is faulty or the wrong item sold due to my error, I will offer a refund by means of a credit note or a replacement piece, or alternative piece to the value of the original piece (you can pay more for a more expensive piece). I cannot reimburse you or exchange if you request the wrong item/size.
MULTIPLE PIERCING DISCOUNT
I offer a £5 discount on each additional piercing done on the same client in the same sitting (highest value piercing to be paid in full, £5 off each additional piercing). This discount is at my discretion and applies to piercing with basic jewellery only. Please ask about pricing if getting a jewellery upgrade.
CLIENT CHOOSING TO NOT COMPLETE A PROCEDURE
If a client chooses not to complete a procedure (at any stage), this is permitted – just ask. You do not need to give an explanation why, and if you do not wish to go through with a procedure, you can always come back on another occasion to have it done. As long as no equipment (except a swab and gloves) has been unpackaged, there will be no charge for the procedure. If any other equipment has been unpackaged or used, the client is required to pay 50% of the cost of the procedure stated on my price list. If the piercing cannot be completed because I feels it is unsafe or the piercing/procedure cannot be performed for reasons beyond the client’s control, then there is no charge at any stage. If, at any stage, the client discloses information during the procedure which stops them from getting pierced, which was not declared on the consent form (pregnancy, for example), they must pay 50% of the piercing fee.
CLIENT IS UNHAPPY WITH PIERCING PLACEMENT ONCE HEALED
Swelling can skew a piercing slightly, so I will only offer a free-of-charge re-pierce or refund if the piercing is not in an acceptable placement once swelling has fully subsided and that I believe the client has followed my aftercare instructions. Piercings that have been ripped, torn, or pulled at will NOT be re-pierced free of charge, but I will offer advice on jewellery to keep the piercing looking neat, or the option of a re-pierce, done at the client’s expense. If you remove your jewellery before coming in to discuss a piercing I have performed which you are unhappy with, I cannot offer any refund or reimbursement.
PROBLEMATIC PIERCINGS
Some piercings will take longer than estimated to heal fully. I will always offer free help and advice on the issues present on any piercing I have performed, though this may involve the client returning to the studio. I will also offer help and advice on piercings not done by me, but if I need to offer more than verbal advice, there is a £10 charge plus the cost of any new (and sterilized) jewellery required, though I will only offer jewellery changes, etc. on piercings done elsewhere 28 days or more after the piercing was done. I ALWAYS recommend you return to your original piercer for help and advice on a piercing that they have done. If the client wishes to ‘give up’ on a piercing I have done and have it removed, this will be free of charge (£10 charge if I did not do the piercing). I will always offer alternatives (more aftercare options, different jewellery, etc.) before removing a piercing permanently. If you remove your jewellery before coming in to discuss a problematic piercing I have performed for you, I cannot offer any refund or reimbursement.
MORE SWELLING THAN EXPECTED
Fresh piercings will always swell and so are pierced with jewellery slightly longer/larger diameter to allow for this. In the rare case that a piece of jewellery is too small for a fresh/healing piercing which I have done, I will offer a replacement piece (longer/larger diameter than the original piece) free of charge, this ‘free’ piece will be a basic piece of titanium – however any ends purchased will be fitted on the new jewellery. You must return to the studio for this. The original piece can be re-fitted, and the ends replaced if needed, once the swelling has subsided enough to allow this. On piercings which I did not do, there is a £10 charge plus jewellery cost. Downsizing jewellery is done at the client’s expense in all cases.
CONSULTATIONS/COOLING OFF PERIOD
In some cases, I will insist on a face-to-face consultation and/or a cooling off period before I will perform a procedure. This is primarily to ensure client care. I am not obligated to offer EVERY procedure I can perform to EVERY client who requests it, and I have the right to refuse service to any person for any reason (see below). Face to face consultations are free of charge, and if you would like to chat confidentially, just ask. No obligation to return for any procedure discussed, and any discussions are in complete confidence. Many procedures and clients are such that – in my professional capacity – I feel they require additional thought AFTER a consultation, so I may ask a client to return at a later date for a piercing (a ‘cooling off period’). There is no obligation to return. My decision to not offer a procedure the day it is requested is final.
CLIENT IS PREGNANT OR BREASTFEEDING
While there is no law about offering a service while a person is pregnant or breastfeeding, my policy is not to offer this to a person who is currently pregnant/breastfeeding or has been/done so in the last six weeks – meaning you must wait a minimum of 6 weeks after a pregnancy ends/birth, and if you breastfeed, 6 weeks after you finish breastfeeding.
RIGHT TO REFUSE SERVICE
I reserve the right to refuse any service to any person for any reason. This may include but is not limited to: there being any doubt that the ID shown is fraudulent or not that of the person being pierced, the person’s anatomy not being suitable, the person being aggressive or abusive to myself or another member(s) of staff or person(s) in the studio, if a client’s medical condition or medication could cause any problems during the piercing procedure or healing, if there is any possibility that the person being pierced is doing this under coercion or against their will, client having other piercings which are not healed which I feel could inhibit the new piercing’s healing process, a prior refusal to pay/attempted refusal to pay or deception, intoxication due to alcohol or drugs, and if the client is pregnant/breastfeeding, or has been in the last 6 weeks. If a client is recovering from an illness, injury or surgery, or taking antibiotics, even if the illness/injury is unrelated to the placement of the piercing, I may request the client to return at a later date. For a piercing in the location of surgery (a nipple piercing after breast augmentation, or re-piercing an earlobe after a reconstruction for example) I would insist on the client being a minimum of 6 months post surgery.
[[Originally posted on 9th July 2020 – While I’m now operating as usual with no restrictions in place, and am no longer in the studio mentioned below. I decided to keep this blog up as a personal reminder of how hard things got and – most importantly – that we all got through it. It was the hardest 2 years of my professional career and I feel that I have seen my own resilience because of the difficulties and worries of March 2020 to April 2022.]]
[[UPDATE – 16th July 2021 – despite the government’s lifting of restrictions on Monday 19th July, we do not feel it is safe to do so in an environment such as the studio where we are in close proximity to other people for prolonged amounts of time. Therefore, we will NOT be changing any of the operating restrictions outlined below, they will remain in place until further notice]]
Well, we finally have the green light to open! Today marks 9 years since my first day at Skins and Needles, and it also comes with the wonderful news that we can return to work, as the COVID-19 pandemic’s lockdown restrictions are lifted! Of course, there will be some changes to adhere to (both myself and my clients) which I will outline below. Please be aware that things could change, we may end up back in lockdown, we may have to change the way we do things if advised to (or if people don’t follow our new, temporary, rules). I will edit this post as needed.
**PLEASE UNDERSTAND THAT WE HAVE TO ADHERE TO ALL THE GOVERNMENT GUIDELINES FOR REOPENING, WE HAVE 2 CHOICES – EITHER OPEN WITH THE RESTRICTIONS OUTLINED BELOW, OR NOT OPEN AT ALL…. OBVIOUSLY WE ARE GOING WITH THE FORMER. The restrictions and TEMPORARY rules and changes to operation are not through the studio staff’s choice, they are through the governments advice, recommendations and mandatory requirements. We see the same news reports as you, and the following will be edited and changed as needed, so please refer back to this as frequently as you need to.**
The studio will be reopening on Monday 13th July 2020. Wednesday 2nd December 2020. Monday 12th April 2021
My hours (Mondays and Tues-Sat 11am-5pm) will remain the same. I am not in the studio on Tuesdays, Sundays or bank holidays.
So, until further notice:
WE ARE NOW BACK TO WALK-IN-AND-WAIT! This means I can see as many people each day as time allows, so no more time slots, just come into the studio and put your name down to be seen.
I am still working on a walk-in basis BUT due to the coronavirus restrictions, we cannot allow anyone wait in the studio. If I cannot see you when you arrive at the studio, you will be offered all the available timeslots that day to come back for. Each timeslot is 20mins, and there will be 20 timeslots available each day. A timeslot will cover you for ONE or TWO piercings OR up to 4 jewellery changes. Some people will need 2 slots for a double piercing, the desk staff will advise you. I will not be allowing one client to book more than 2 timeslots per day, and I will not be offering any more than 2 piercings for a client to heal at any one time. If you are unsure of how many timeslots you need, inbox me and let me know what you want doing. I will be informing the desk staff of all this, so they can help you as well.
You must come into the studio to put your name down for that day’s piercing slots. We will NOT (we never have) taken names, etc over the phone/email/facebook – we tried it, people didn’t show up. You are expected to come back to the studio for your timeslot on time (please tell someone on the desk when you return). If you are late, you may lose your slot. Any client who is late or doesn’t show will not be given another slot, and will have to wait until we are operating as normal to be seen (please don’t make me do this!) Regrettably, I will not be able to allow time for you to decide on your piercing – you must come in knowing which procedure you want. This is to minimise your time in the studio and thus your risk and our risk. I CANNOT accept any last-minute changes to your timeslot/procedure. Any late appointments that I do not have time to see to will go down as a ‘no show’, as will clients who cannot present their ID if asked.
All persons entering the studio must wear a mask/face covering over their mouth AND NOSE at all times. This is non-negotiable. If you come to your slot without a mask/face covering, you will not be seen. PLEASE don’t make me do this either. You can buy masks at many shops, and on eBay. You can also make your own face covering with a square of fabric and two hair ties/elastic bands. Instructions here: https://www.youtube.com/watch?v=rz68dGEpqUw (view from 55s). We will have hand sanitiser available – please use this when entering the studio.
If you cannot wear a face mask/covering (for whatever reason) we feel it is best to wait until after mask wearing is mandatory for you to come into the studio – piercing/tattooing is NOT an essential service, and the last thing we want as a business is to put your health, and the health of our staff at risk.
I AM NOT YET PERFORMING ANY ORAL PIERCINGS (Tongue, Lip, Etc). The government guidelines are a little unclear, but imply that I CAN offer oral piercings (tongue, lip, etc) HOWEVER I feel that the risk to myself and my clients is still too high to offer these services, so FOR NOW, oral piercing remains off the menu. To be clear: I will be offering piercing and jewellery sizing/fitting on ear, nose, eyebrow and body piercings – but still NOT for any oral piercings. I will sell jewellery for oral piercings (but cannot measure so you MUST know what size you need) and you can take it away and fit it yourself, but I cannot fit this for you. I’m sorry, this will be changed as soon as mask wearing is no longer mandatory AND I have had both doses of my covid vaccination – I will of course be posting an update when this restriction is lifted. It makes no sense for me to insist on mask wearing, and then for the mask to be completely removed for the procedure. However, I will be offering eyebrow and nostril piercing with the mask left on for eyebrows, and pulled onto the top lip for nostrils (with me piercing from the side). I will be adding a visor to my PPE set up for me to wear during any nostril piercing procedures, your mask must be placed back over your nose as soon as the procedure is done.
NO ONE EXHIBITING ANY FLU-LIKE SYMPTOMS WILL BE PERMITTED IN THE STUDIO – AND WE ASK PEOPLE WHO DO PRESENT SYMPTOMS TO STAY AWAY FROM PUBLIC PLACES. This is at my discretion, if I am concerned you have symptoms, you will be asked to come back when you have recovered.
You MUST come ALONE to the studio for ALL services – no friends, kids, partners, etc (except in the case of intimate piercing where ONE other ADULT (18+) will be allowed with you).
A REMINDER THAT WE ARE CASH ONLY IN THE STUDIO PLEASE BRING CASH WITH YOU!!!
ANOTHER REMINDER TO BRING VALID, IN DATE PHOTO ID TO YOUR TIMESLOT. IF I ASK FOR IT AND YOU DO NOT HAVE IT, YOU WILL NOT BE SEEN AND WILL BE RECORDED AS A ‘NO SHOW’.
Where possible, all troubleshooting and enquiries must be submitted via Facebook (this page) or email skinseamstress@hotmail.co.uk – please do NOT come to the studio ‘just to ask something’ – once again, this is to minimise your time in the studio and thus the risk to our staff and yourself. Emails/messages will likely be replied to in the evenings only. PLEASE DO NOT CALL MY PHONE! At present I am either in my room with a client and cannot answer, or am downstairs waiting on a client, so cannot hear my phone. I will always return missed calls (at the end of each working day) but I simply cannot get to my phone during working hours, so please email me or send a facebook message with your enquiry.
Update on 21st September 2021: VOUCHERS! Huge thankyou to everyone who has purchased vouchers during the lockdowns. 12th October 2021 will mark 6 months since reopening after the last lockdown, and any vouchers bought on or before 12th April 2021 will be VOID after this date, with no exceptions. Vouchers bought on or after 13th April will be valid until 6 months from issue date (as usual). You can see your issue date on the bottom right corner of your voucher. PLEASE use your vouchers ASAP. Inbox me with any voucher enquiries (and include the issue date on your voucher).
If you purchased body jewellery during lockdown and need assistance fitting it, (or if you have any problems with the jewellery) bring it in to the studio (keep it in the little bag you received it in) and this will be done free of charge, however you WILL need to book a timeslot.
I can’t believe I have to say this, but… ANYONE who is abusive or aggressive towards staff (myself, the desk staff, other staff members) or other clients in the studio will be refused service. No, it’s not nice having restrictions, but we are lucky enough to be allowed to reopen and rebuild our business. It’s not forever, but it is for now.
With the COVID vaccine rolling out, we are hopeful that this will mean no further lockdowns, but cannot say with certainty. If you get your vaccination, we recommend not getting pierced in the 2 weeks following either dose – this is to allow your body to recover from the vaccination. I cannot police this, so rely on my client’s common sense and honesty.
Please ask any and all questions about this by inboxing me, or comment below… But the short version is:
Come ALONE for your piercing/jewellery change (no oral piercing/jewellery changes) ONLY if you feel WELL. Wear a FACE COVERING at all times in the studio and sanitise your HANDS when entering. All ENQUIRIES or questions, consultations, etc MUST be made digitally – over Facebook or email – skinseamstress@hotmail.co.uk … And don’t be a DICK.
I will be in the studio this coming weekend to get ready for our reopening. I’m probably gonna spend most of next week in tears, so bear with me. We can’t hug, but we can foot and elbow tap our way through a merry jig.
May I just take this opportunity to thank every single one of you for your unwavering support during what has been the most trying 13 months of my professional career (of 19 years). The messages of support have made me cry, the funny stories and photos have made me smile, and your purchases of body jewellery and vouchers have quite literally paid my bills for the 111 + 31 + 102 days of lockdown. I am forever indebted to each and every one of you, and I hold my hand on my heart and say I do not deserve you all, but I will be the best piercer I can be to each of you.
Stay safe.
Stay shiny.
Kim x
EDIT: I’m still getting lots of requests for appointments, and people getting upset when I explain that it’s a walk-in as always. I feel I need to clarify that I’m still operating on a walk in basis, this is for numerous reasons, which are outlined below.
1) this is how I’ve always operated (i prefer it this way, i like the chaos for some reason!) and I want to keep things as ‘normal’ as possible
2) having appointments and deposits will mean I see less people a day (currently limited to 20) because I will have to sit on my phone/laptop sorting it all out – I cannot add any more work to the desk team, they are already stretched beyond what I dreamed a mere mortal could do, so putting MY appointments on them too is simply unfair.
3) when I have done an appointment system in the past, people don’t show up – taking deposits doesn’t even stop this. Sure, it means I still earn a smidge from a no-show, but I’d much rather give that time to someone (even if its a free consult or check-up), than have a bit of money for not doing something. This is why we are not taking any slots over the phone either. I know this sucks, but this is the only fair way i can do this.
4) with the current uncertainty about being open (I feel its safe to say its HIGHLY unlikely we will have another lockdown, but the threat of another forced closure is not out of sight yet) I do not want weeks of bookings that are then let down.
5) We are asking people not to come to the studio if they are showing ANY symptoms of illness. If someone books an appointment a couple of weeks in advance, and then wakes up that morning with a cough, loss of smell/taste, etc, I am very aware that they would be more than tempted to ignore it, and come to an appointment that they have been looking forward to. This has happened to MULTIPLE friends of mine in the industry. A client has sent a message the evening after their appointment saying they’re sorry but they have symptoms and have done for a couple of days but ‘didn’t want to wait another 3 weeks for a piercing’.
6) Having a full day booked out with piercing procedures means that if there is an emergency (jewellery fallen out, jewellery needing to be removed/retainer fitted for scans/surgery, healing problems beyond what is normal, excessive swelling to a piercing that needs attention…) then I have to say “I cant help you, you need an appointment, my next one is a week on Wednesday.” That’s not helpful at all to clients with piercings that NEED attention.
I have had this blog typed up for 6 months, I have read it. Re-read it. Altered it. Changed it back. And posting it is going to get me a bit of stick. I will repeat the following phrase throughout the blog, but I feel I repeat it where it’s necessary.
“I’m not saying it SHOULD happen, I’m saying it DOES happen”
This blog is about discrimination, but in a stark contrast to a previous blog – about discrimination by the media and employees and my disagreement with it – this one is about people (hate to admit it – mainly the younger generation), and their love of ‘public skin tattoos’ (that’s tattoos on the hands/neck/face) as well as their refusal to understand the permanence and implications of a tattoo and that they will – ultimately (not saying it’s right) be judged on their appearance. And the fact that I disagree with their shock and amazement when it DOES happen.
I want to be clear on what I’m trying to say in this blog. I will NEVER tell someone their tattoo idea was stupid, or ill-thought out (I’ll tell you that about some of my own though!). Working in a tattoo studio since 2002, I have learnt that once someone has an idea in their head, it ain’t going anywhere. And all you – as a tattooist, or the person carrying out the consultation with the client – can do is try to make the best of what YOU think is a bad idea, and give your client what they want, while staying within your moral limits. It’s a tall order, but tattooists do it daily and, god bless ‘em, they usually manage it a piece of cake. I believe that every person on this planet should be allowed whatever tattoos they want, wherever they want them, and no one’s decision and opinion other than theirs should matter. And no one should judge them after they get it. But that (unfortunately) isn’t how the world works.
What I AM saying in this is that any tattoo (but for the purpose of this blog, I’m talking mainly about public skin) will cause people in all areas of your life to see you differently, and there’s nothing you can do about it, so please don’t be surprised when they do. This is not a fashion thing. This is for life. Wanna know a silly story about me? When I was 15, I had a huge crush on a boy a few years older than me, and he got a tattoo and I CRIED because I didn’t like it!!! (No, he never found out about either my crush or my dislike of his tattoo!)
Almost on a daily basis, I see underage/young kids walking around with heavy tattoo coverage (often ‘public skin’) and piercings/other mods and then complaining – on Facebook usually – that they get judged for their appearance, refused jobs (yes, I know, stick with me) and refused entry to nightclubs. While I feel their pain, and I will argue until the end of time that a person’s tattoos should not be a deciding factor on what type of person they are, whether or not they are a competent employee, etc; a little voice in my head says “Well, kid, what did you expect?”
I am not for one second saying that the discrimination in workplaces and nightclubs and by the general public is acceptable. I think that treating a person differently because they have a tattoo or piercing (or any other aspect of their appearance/lifestyle – as long as it isn’t hurting anyone else) is despicable. Sure, it was a conscious decision on the person’s behalf to get a tattoo, but this (to me) is no different from refusing a person because they have a birthmark or a cleft lip, ginger hair, a finger missing, are a little over weight, a smoker/non-smoker, are Christian, etc., etc. I hate discrimination against the tattooed/pierced/modified community and being right in the heart of the industry, I don’t know a single person who agrees with this out-and-out discrimination against someone who has chosen to decorate themselves.
What I AM saying is that a person should not be surprised and attempt to blame everyone else (again, I’m not saying it’s right, I’m simply saying that it happens) when they are refused a job, entry to a nightclub or get hacky looks from some random stranger. They made the decision to get tattooed (good on them) and so they have to live with that decision, for the good times and the bad.
Being adult is not about doing things that you have to be a certain age to do, it is about being mature and weighing up your options and making decisions based on your circumstances, and in the end, doing what is best for you, regardless of your age (yes, 18+ for tattoos, but you know what I mean!)
I see people at 18/19 years old (and younger, sadly) with heavy tattoo coverage, and there’s nothing wrong with that – good on you! As long as you’re doing it safely and accept the fact that this stuff is permanent, bitchin’! But, people at 18/19 getting the ‘public skin’ tattoos (hands/neck/face) and expecting it not to change their life is crazy. I KNOW there are exceptions to this rule, please don’t assume I’m saying anyone under 30 with a ‘public skin’ tattoo has made a mistake/will regret it, etc. – that isn’t the point I’m making at all. My point is that people get heavy coverage/public skin done at a young age and then bitch and moan that these tattoos are affecting their future. What did they expect? (I know I’m repeating myself here, but I cannot make this point clear enough – I’m not saying that it SHOULD happen, I’m just saying that it DOES happen). It was always made clear that this would happen, it’s old news. You knew this when you signed up, soldier. There was never a secret made of it – so where is the shock rooted?
For me, my aim IS to be heavily tattooed. But I want to enjoy that journey and savour it. I COULD go out and get tattooed every month (my bank balance may not allow it though!) but I don’t want to hit 40 (getting closer a lot faster than I’d like!) and have no space left. I want this journey to last as long as I live. Maybe not everyone shares this opinion, but it’s food for thought.
Is the blame down to the tattooist who has tattooed someone on their hands/neck/face? In my experience, a tattooist bases their decision on whether or not to tattoo someone’s hands/neck/face on how much coverage they already have, as well as taking into account their age and how aware they seem to be of what a big thing this is. But for every morally guided tattooist out there, there will be one who isn’t and would tattoo anything, anywhere as long as the price was right. YOU asked for this tattoo, YOU said you understood the implications (or so you said by reading and signing your consent form), and YOU need to be happy with this decision until they put you in a wooden box and nail it shut. If there is even a CHANCE that you will regret this, don’t do it.
Getting any tattoo is a big decision, but getting a public skin tattoo is even bigger. This is something that will be visible every moment you are in a public place, in the case of facial tattoos; you may have to have your ID renewed to add this to it. And people (while it shouldn’t matter) WILL view you differently.
If someone is fully aware of what a massive change a public skin tattoo is to their lives, fantastic, go for it, wear it with pride. But, my point of this blog (yes, I know I’m skirting around things) is that many people may not be aware, and then after getting tattooed, they regret it, for whatever reason. Tattoos on other areas of your body can be hidden, these public skin ones can’t. Be aware of this before you go ‘under the needle’, and you will avoid a nasty shock a little ways down the road.
Please, think before you ink.
In closing, I really truly do not want anyone to be offended by this. I can’t stop you if you are, but my intention was never to upset anyone. Merely to make a point. Or ten. Or the same point worded differently ten times because I’m worried someone will take it the wrong way!
I would genuinely LOVE to hear your opinions on this – good and bad, in agreement/disagreement.
Not as much as an ‘informing’ blog this one, more of a rant. Two rants actually, though they are linked. There will be tangents.
I started working in the tattoo/piercing industry in 2002, and in the time I’ve been doing this job, I have seen a HUGE rise in popularity, acceptance and level of skill involved in tattoos and piercings. The equipment/materials (both for tattooing and piercing) has improved tenfold, and the public’s view and acceptance of tattoos (and those wearing them) is getting more positive every day – more and more people are ‘seeing the light’ and realizing that tattoos do not make a person bad. Or a thug. Or dangerous. Or a criminal.
The first part of my rant is about the media and often corporations are still stuck in the Stone Age. Not that it was EVER appropriate to discriminate or judge someone on their tattoos and piercings (or any other factor for that matter). Nowadays, tattoos are used in film and television (and to a lesser extent, books) to portray a person or character who is dangerous. Lowbrow. On the ‘wrong side of the tracks’. Generally negative things.
Certain documentaries being shown are portraying the tattooed community as people of below average intelligence, in and out of prison, and still all those negative stereotypes (thug/criminal/a ‘wrong ’un’). I watched one of these documentaries and was incredibly disappointed that the media had a great chance to showcase some fantastic work by some excellent artists, show a convention in all its glory, interview tattooed parents, doctors, nurses, and people in ‘high-profile’ jobs. But instead, the ‘documentary’ (I use the term loosely) was poorly structured car-crash TV which the particular channel it was shown on is known for, and instead of a ‘delve into the exciting world of body art’ it was more ‘huh, huh, check out these freaks! It’s ok, have a good stare, it’s a ‘documentary’ you aren’t judging, you’re ermm…. SHOWING AN INTEREST, yeah that’s it!’
Surely that the media (whoever they are) should use this position of (arguably) power to show people that we are ALL part of the same tribe and that these life choices are ones that ANYONE can make – that anyone has the RIGHT to make – and that open-mindedness is truly the only way we can progress as a race.
The second part of this epic soapbox session, is that employers are still refusing people jobs because of their choices in tattoos, piercings and other body modifications – as a collective, let’s call it ‘body art’ – (some are not – and I applaud them for moving forward!)
WHY????
What is so wrong with a person who is heavily tattooed, pierced, etc. working in the same environment as another non-tattooed person?
A tattoo or piercing does NOT stop a person working just as hard – if not harder – rarely do people stop at one, and good tattoos and piercings don’t come cheap, I know I would want to do a few extra hours/earn a few extra tips if it meant I could afford an extra hour of tattoo work!
According to an American survey:
“Thirty-six percent of those ages 18 to 25, and 40 percent of those ages 26 to 40, have at least one tattoo, according to a fall 2006 survey by the Pew Research Center.”
I can’t find any UK statistics – if anyone else can – please post a comment, I would love to see them. So if 40% of people aged 26-40 have tattoos, surely companies should have this reflected in their employees (in the same way that companies are not permitted to discriminate against ethical minorities or disabled workers).
No, a person does not choose their ethnicity or abilities and disabilities, but just as these things do not change who a person is, and their character, neither do tattoos.
People should be free to express themselves, as long as it’s not hurting anyone else. And this self-expression should not be an issue that prevents someone from getting a job. One of the main arguments from employers is that tattoos and piercings make a person look ‘unprofessional’ if they are working in an environment that requires face-to-face customer service (however I know that this is often extended to call centre work for no apparent reason). Personally, if I walk into a shop, or need assistance with something, I would feel MORE comfortable speaking to someone tattooed or pierced. Is that just me? So if the figures above are to be considered, 40% of people would feel MORE comfortable speaking to a tattooed member of staff. If a customer refuses to speak to someone within a business because of their tattoos, surely this is an issue that the customer has, and not the business? And would anyone really be that rude?
A dear friend of mine is a midwife, she is heavily tattooed and pierced, and has scarification pieces and other boy modification work. She also works on a busy maternity ward in post-natal. When working in the delivery room, she said that women would not care if she had 3 heads and no nose, as long as their baby was delivered quickly and safely. Surely this should apply elsewhere? If the service being provided is adequate, why does it matter that the person providing it has a tattoo poking out of their trouser hem, or stretched earlobes – or, indeed that they DON’T? If the service is less than adequate, that can’t be blamed on a person’s tattoos. And if the inadequate service was provided by a person with no tattoos, what on earth could have caused it???
Many employers simply state ‘health and safety reasons’ for not allowing piercings and tattoos. And in some cases, this is a very valid reason for not allowing them, for example: If a person is working in a dirty environment (a garage for example) healing tattoos/piercings could be a problem as it’s a health and safety issue that the employee could get an infection – similarly in a food environment, any bleeding, or lymph ending up in someone’s food isn’t going to be great for the company’s reputation. And where a fully-healed tattoo would not be a problem in these environments, a piercing could be snagged on machinery/fall out into a food preparation area. So, I can understand piercings being removed for health and safety reasons – BUT this should extend to all jewellery for whichever reason it is worn – ANY earrings (though ‘regular’ earrings are more prone to falling out than body jewellery), rings, watches, etc. and nose studs worn for any reason, including religious reasons should also be removed if the company is going to be fair on their ‘health and safety’ when it comes to jewellery. But the point about HEALED tattoos, and jobs that do not fall into the two examples given above still stands – there is nothing that can stop a tattooed person doing their job adequately.
Body modification is NOT just tattoos and piercings. Anything you do to your body to alter it (temporary or permanent) is modification. Tanning, body building, make up, cutting your hair, painting your nails, having a manicure, dying your hair, dieting, plastic surgery (for whatever reason) and I could even be pedantic and extend this to a person wearing clothes (hell, we weren’t born with them!) So to section off tattoos/piercings/etc. from all these other forms that most people – tattooed or not – do every day, is discrimination in my eyes.
I would love to hear people’s thought/opinions and experiences on this – and if you disagree with me, please tell me why. I’d like to hear all sides. Are you an employer? What are your policies?
I know this is a hot subject right now, and I’ve probably missed a few points in here, so please call me up on something if I haven’t been absolutely clear on it.
This blog is one I’ve wanted to write for a while, and it was when I had to use that phrase on the phone to a tattoo client earlier this month that I actually decided it was time to put pen to paper…. Or finger to keyboard.
“Just a piercer” is a phrase used a lot in the industry. It is used (never maliciously) by clients who will often – during the small talk of getting a piercing – say:
“So do you do tattoos as well or just piercings”
“Are you just a piercer or are you a tattooist as well?”
“Are you just doing this while you learn to tattoo?”
(Or some variation on those)
Tattooists and other people in the industry will often use it in a teasing way – and sometimes malicious too.
“What do you know, you’re just a piercer!”
“This doesn’t concern you, you’re just a piercer.”
“Your opinion [on a tattoo related matter] doesn’t count, you’re just a piercer.”
“You’re just a piercer, not a tattooist so you can’t even being to understand this [tattoo related] issue!”
All the above has been said to me at some point or another in my career. While I am unlike a lot of other piercers (in the fact that I used to tattoo), I now consider myself to be SOLELY a piercer (not JUST a piercer). Most piercers have no tattooing experience, and despite me doing it in the past, I now class myself in the same way.
And we are made to feel like lesser beings, like a sub-class of the body modification industry – whether it is meant in a mean way, a teasing way, an ignorant way or simply an unfortunate choice of phrase.
That phrase is “JUST”.
There is no JUST about it.
A few weeks ago, a lady I’m proud to call a friend posted the following status, I immediately copy/pasted it to include in this blog:
“Studio Owners/Managers/Body Piercers & Assistants. I can’t hold my tongue any longer. For anyone who ever asked me if I tattoo, or am I JUST a piercer. The answer is NO! The following is what I can think of off the top of my head. I wish people would appreciate what our job actually involves!
-Emails & Facebook messages: Because people seem to have forgotten how to talk. They seldom phone a studio anymore, they want everything dealt with over email, but believe it or not we have lots of other things that stop us from being able to sit at the computer and reply instantly. -Phone calls: When people do phone they expect us to remember exactly who they are, and when they were last in, who they were booked in with and what their dog is called. Please don’t start your phone conversation with “Hi I’m having a drawing done and want to come in to see it but I don’t know which artist was doing it…” we have several resident artists and hundreds of clients. We expect you to at the very least to learn your artists name. -Bookings: Organisation is key to making sure each client gets the best artist for the job, so we have to know what each artist is and is not comfortable with doing, how long their sessions will take based on a few details from a client and when it’s necessary to book a consultation or not. So again please don’t start your booking query with ” I want a sleeve but don’t know what I want…” research ideas before you expect us to give you them. -Licences: We need these to be legally permitted to provide our service. They detail the conditions we have to abide by. Someone has to stay in contact with the council and environmental health to make sure we are doing everything to the highest standards, that’s us in the background. -Health and Safety: Pretty important measures are in place to make sure the studio environment is safe for you to visit. That’s just us again, in the back ground making sure it’s all possible having any risks assessed and the electrics regularly tested etc. -Cleaning: To the highest fucking standard you will ever come across I doubt any hospital I have been in to be cleaned as well as my whole studio -Sterilisation: Preparing the equipment that isn’t single use disposable, once used. It first goes through a strict process of enzymatic soak, ultra-sonic bath, rinse/scrub down, dried, bagged into manually dated/numbered pouches and then put through an autoclave cycle to ensure that it is fully sterile for the next client. Items of jewellery that comes in from the manufacturers warehouses is also put through this process because we are going to be putting it into your body this is even for healed piercings because we won’t allow you to be fitted with anything with a little debris on it. On some days there are over 200 individual pieces of jewellery which each need to go through the lengthy process. Even our trolley covers are sterile, prep packs are made by us in the studio to ensure the safest piercing procedure possible. When you see us looking like something out of a clean room scene from E.T, sterile prep is probably what we are doing! -Stock: It doesn’t magically appear. It needs ordered, checked and replenished regularly. There’s more than tissue, needles and ink involved! -Errands: The artists need something. Who goes to the shop? We do! -Accounts: Book keeping and bill paying. Making sure the lights stay on and water is running. Yep that’s us again, trying to find the time to do this while actually at work is slim, that’s what days off are for though right? -Tattooing: Are you kidding me? Before you ask your piercer if they do tattoos or ask “Do you JUST do piercing” think about what it comes across that you’re actually implying. Is piercing just not enough to have a stage of its own? And in any case, we wouldn’t have time!
So for anyone thinking about visiting a studio please show some respect and appreciation for those of us who do not tattoo, what we are doing is maybe not visible to you or seem very important, but I assure you the ship can’t sail without us below deck!
Additional edit * oops I forgot a couple things off the list. I also do piercings and scarification when time allows”
Nikki Lloyd-Proctor
Bold & Gold, Edinburgh
www.facebook.com/boldandgoldpiercingart
(Please check out their work and show them some love!)
Nikki owns the studio she works in as well as managing it – so she has staff to take care of, my situation is different (I’ve never known 2 piercers with identical working environments/systems/situations) as [at present] I’m running a piercing business within a tattoo studio – which is run completely separately – a business within a business, if you will. Payments for piercings/jewellery are taken by me and kept completely separate to the tattoo money, I order (and pay for) all my own equipment completely separately, and so on.
Nikki has said pretty much everything I think – only more eloquently and easy to understand. And fewer tangents.
Now don’t get me wrong, this is NOT a pity party (from me or Nikki) – we absolutely LOVE our jobs. But this is why it’s so frustrating, that the thing we love more than anything is reduced to ‘JUST’. As Nikki said – there is SO MUCH that goes into our jobs so that the ‘fun bit’ (doing piercings) can happen.
Many piercers (like me) are a self-employed sole trader. This means that we are running our own business BY OURSELVES. We don’t have apprentices (or most of us don’t) to do any of the ‘boring’ jobs in the studio. In the studio I work in, the tattoo apprentices do 99% of the cleaning, and I honestly don’t know what I’d do without them! And the studio provides me with glass cabinets for jewellery display, and the use of an autoclave. Other than this, everything to do with piercings in the studio is down to me.
Those body jewellery displays you look at in the waiting room?
I arrange them
I choose what stock is going where to aid people in finding what they want
I choose from the infinite amount of items available to me and pick what I think will sell (and if it doesn’t, then I’m stuck with it!)
I buy the stands, the display body bits that I use to show placements and the baggies you get your jewellery in
I source out premium brands to offer the best choice for my clients, this involves dealing with companies overseas as well as inflated shipping costs and paying import tax (around 25% on top of the item’s cost).
The paperwork – the consent form you fill in and the aftercare sheet you get?
I typed them up
I checked them to make sure the legal jargon is correct
I photocopy them when they run out (with a printer and ink that I have bought)
I edit them when things change.
The bench you sit on, the tools I use, the trolley and boxes/drawers I store them all on/in?
You guessed it – I have to maintain them, clean them and replace them if needed.
The tools and disposables I use – they have to be bought in, processed and cleaned (again, I do all this). Keeping records of what has been ran through the autoclave and when is also important – as Nikki already mentioned.
The jewellery you get with your piercing?
I have sourced it to make sure it’s an acceptable standard, ordered it, paid for it and then processed it when it gets to me to make sure it ready for you. I buy in bulk, so when I do my twice-monthly body jewellery order it can take up to 5 hours to order everything needed spread over about 5 different suppliers’ websites (and don’t get me started on how much it all costs!) I now do this on my day off (Sundays) because it can’t be done at work along with everything else I do – meaning at least half of one of the 4-5 days I get off a month is spent at a laptop and my other half has to amuse himself because I’m “Doing work stuff”. If suppliers discontinue an item, it has to be sourced elsewhere (this goes for equipment, disposables and sundries too!) and if a supplier changes their prices, this will affect us hugely as we can’t just hike up prices every few months. In a month of placing orders and buying in the items I use, I probably deal with around 10 different companies – you can’t get EVERYTHING from one place.
And then there’s the training, learning to use new tools/processes and jewellery/equipment. Changes in regulations meaning we have to change how we do our jobs (yes, this happens in the creative industries more than you’d think!) on top of everything else that goes with running a business – filling out tax returns, record keeping, maintaining a website and social media presence, emails, returning phone calls, paying for advertising, maintaining relationships with suppliers and other colleagues (the UK piercer network is magical!) as well as offering support and advice to other piercers, as they will do for me when I need it. Most of us attend conferences, workshops, seminars and ‘learning’ days which often means travelling (sometimes local, sometimes overseas!), again, we must arrange and pay for all this – and the time out of the studio means we ARE NOT BEING PAID!
Time off is a huge luxury – as with any sole trader in any business, if you don’t work, you don’t get paid. As a self-employed person, you don’t get paid sick leave, paid holidays, paid maternity/paternity leave or any other benefits. Oh and everything above, we don’t get paid for that. We make money by piercing people or selling them jewellery. I am not paid for the time I spend at work processing jewellery, cleaning/tidying, for replying to emails, putting up pics on social media sites, placing orders, typing this blog… The jobs above that we can do out of the studio (basically everything other than piercing, jewellery fitting and cleaning/tidying/processing jewellery) we more often than not will save for our evenings and days off, so they don’t get in the way of dealing with clients (i.e. the part where we get paid) maybe that’s a very harsh way of looking at it, but if I have a queue of 4 people waiting on piercings, they are my priority – not responding to a price enquiry email which can wait until the end of the day (and sending a string of question marks every 45 minutes will simply push your message to the top of my list. I answer messages at the bottom of the list first, as they have been there longer, so all you’re doing is bumping your message back in the queue… as well as looking a little rude).
As most piercers will work in a studio 5 or 6 days a week, their one or two days off and the chunks of their evenings where they aren’t “doing work stuff” are so precious. I don’t have children (my dog is my bairn), but I know of many piercers who are parents and I seriously (SERIOUSLY) do not have any clue on how they juggle everything. ‘Down time’ is so rare that we often forget HOW to relax, and so many of us will end up overworked and ill from exhaustion. This is why I am now taking a couple of days off a month on top of my Sundays. Please respect when anyone (self-employed or not) takes time off. No one can work every waking moment. And please respect the privacy of your piercer (or tattooist) – sending messages to personal Facebook accounts instead of contacting the studio or their ‘work page’ means that while they are having some down time and chatting with friends, they are having to go back into ‘work mode’. And if they’re anything like me, their ‘personal’ inbox only gets checked twice a week, so you will have a much longer wait for a response!
(see, I told you I go off on tangents!)
And in between all this we get to do our favourite bits – putting awesome jewellery in awesome-er people (that’s you BTW).
So before you ask someone if they are JUST anything – think about what that JUST is.
I get asked about jewellery materials a LOT. What’s available? What’s best? What’s hypoallergenic? What’s safe? What can I splash out on?
I stock a good range of basic jewellery, plus some premium brands (Industrial Strength, etc.) but many more specialist types/brands are available, most of which I can order in, just ask. This blog will talk you through the materials used in body jewellery (pinched the bulk of the information from somewhere online which I will not give credit to because they have used a LOAD of my photos without giving credit, so have that!) I have edited some of the text for clarity and to add to it, so while it’s not my work, I have edited it.
Pricing is always a consideration when it comes to jewellery – and working on a set budget is no problem, but if you LIKE it, you can and will WEAR it and its high QUALITY – it will last you a long time and it’s worth investing. If you’re stretching a piercing, stick to the most basic of basic to keep costs down, and then treat yourself to something a bit special when you get to your desired size.
Please, please, pleeeeease NEVER EVER share jewellery with your friends. We’ll get on to sterilizing in a sec, but would you want to wear something in your body that has been in someone else, even if it WAS properly sterilized? You probably wouldn’t. Would you want to wear someone else’s unwashed underwear? Gumsheild? No. Don’t be a cheapskate, respect your body.
Boiling jewellery doesn’t sterilize it. Nor does holding a lighter to it, microwaving it, baking it, spitting on it, etc. The ONLY way to sterilize something is with an autoclave – and while not all jewellery types are suitable for autoclaving, when you buy new, unworn jewellery – it’s perfectly safe to put in a fully healed piercing as long as it’s clean (quick wash in warm water or a wipe with an alcohol swab are both fine). Always wash your hands before handling jewellery or changing your jewellery.
What material you wear is up to you – not all types of jewellery are available in every material, so check what is available, but make sure it’s a good quality, reputable supplier and in the case of organics – sourced ethically. There are two main types of body jewellery, Non-Organic (metals, plastics, glass, silicone, other man-made items) and Organic (horn, wood, bone, other naturally occurring materials or those sourced from animals – this is where it’s important to be ethical. Personally I won’t wear horn, or bone, but that’s my personal choice).
Let’s look at the available materials in more detail.
NON ORGANICS
Name: Steel
Uses: Jewellery (not always suitable for initial piercing), Needles and clamps, trays, bins.
Can you have an allergy to this material? Yes, steel contains a low. But present, amount of nickel which you can be severely allergic to! Some premium brands such as Industrial Strength and Anatometal’s Steel has a very low nickel content, which is very useful for those who want a high shine with little chance of allergic reaction.
Vegan? Yes
Autoclavable? Yes
Extra Information: Steel is used globally for jewellery, and piercing tools. It’s illegal to use steel as initial jewellery in the EU due to the nickel content, meaning titanium is used instead. In the rest of the world, however, it’s fine to use steel as initial jewellery, however if you have a known nickel allergy, let your piercer know! It’s shinier than its counterpart titanium, with a more ‘silvery’ look, compared to the shiny gunmetal grey that titanium exhibits. There are three kinds of Steel commonly used in jewellery, 316, and 316L, with the L standing for ‘low carbon’. Finally, 316LVM stands for low carbon vacuum melting, which reduces the contamination and generally produces pure steel, which significantly reduces the nickel content. Your premium brands, like the ones listed above, use this.
Name: Titanium
Uses: Jewellery (initial and otherwise)
Can you be allergic to this material? It’s incredibly rare, and is generally considered the only material not to react to the body, so, whilst you can, it’s virtually unheard of.
Vegan? Yes
Autoclavable? Yes
Extra Information: Titanium is awesome. It’s practically hypoallergenic, and it’s what’s going to hold your bones together if you ever need it! This, in many people’s opinions, makes it the optimal material for initial and post-piercing jewellery. It’s non porous, and you can easily clean it with warm water and a non-scented soap. Because it’s non porous and virtually hypoallergenic, it’s also very light, which makes it super good for freshly stretched ears. Titanium can also be anodized, which is another positive, as you end up with really nice colours! Using an electrical current and a solution, the current causes a very thin layer of the metal to change colour, and the colour depends on what voltage is passed through. Anodisation can sometimes rub off or fade over time, but this doesn’t affect the integrity of the material, simply the aesthetics.
Name: Niobium
Uses: Jewellery (initial and otherwise)
Can you be allergic to this material? Niobium and its alloys are inert and therefore hypoallergenic.
Vegan? Yes
Autoclavable? Yes
Extra Information: As niobium is a very soft metal (can be bent easily), it can’t be lathed to be threaded, meaning it is only generally used for CBRs and other jewellery with no threading (screw on bits). It’s also more expensive than titanium and surgical steel, and is also the heaviest of the three, which can cause irritation to some wearers. Like titanium, it can also be anodised, just not to the wide range of colours that titanium can be.
Name: Precious metals, Gold and silver.
Uses: Jewellery (initial and otherwise – only 14k gold or above is suitable for initial jewellery)
Can you be allergic to this material? You can be allergic to the nickel present in some of the alloys
Vegan? Yes
Autoclavable? Higher grades of gold are, silver is not.
Extra Information: Gold: Lower carats of gold are unsuitable for body jewellery as they are very soft and just wouldn’t withstand the pressure that body jewellery goes through on a daily basis. It’s also easily scratched. If you’re so desperate for initial gold coloured jewellery, use gold coloured titanium. Avoid gold plating because it’s often easily chipped and will expose your piercing to a (possibly) dangerous metal underneath. Stick to pure 14, 18 and 24 carat. 9 carat gold is 37% gold (less than half) so should not be considered ‘gold’.
Silver: Generally marketed as sterling silver, and is safe for jewellery such as necklaces and rings, but not so safe for use in body jewellery. Silver can, however contain nickel, and high nickel content in body jewellery can cause problems. Silver is not safe for initial stretches or piercing, as it can tarnish and cause a dark mark around the piercing, sometimes called a ‘silver tattoo’ or a ‘silver burn’. Save your silver jewellery for those special occasions, it’s definitely not for long term wear like the three main metals.
Can you be allergic to this material? Not necessarily allergic, but it can be severely irritating in some aspects.
Vegan? Yes
Autoclavable? Only Bioplast, bioflex, PTFE and dental acrylic are autoclavable.
Extra information: The body jewellery industry freaking loves acrylic. It’s cheap, cheerful, comes in bright colours and is easily lathed and moulded. This doesn’t however, always make it the best material. It’s very porous, which can irritate your ears/nose/wherever you put it. Not every type is autoclavable, meaning these types are unsuitable for initial piercing. Dental acrylic is slightly different: autoclavable, and good for long-term use as balls and backs in oral piercings. PTFE (Teflon), Bioplast and Bioflex (all very similar materials, same properties, different names) are also autoclavable, and suitable for long term usage, and initial piercing. Some piercers love it; however, some others dislike it. It’s all down to your piercer, and your personal preference. These flexible plastics are commonly used as retainers, such as for pregnancy, to wear during surgery, to hide a piercing and for high impact sports, though the flex in the jewellery can irritate even a fully healed piercing. You can clean non-autoclavable plastics with warm water and non-fragranced soap, but this is CLEANING not STERILISING.
Name: Silicone
Can you be allergic to this material? Yes
Vegan? Yes
Autoclavable? Yes, however only the higher, medical grades.
Extra information: There are two grades of silicone you’ll find in body jewellery, industrial, and medical. Steer well clear of industrial grade silicone. It’s in the name, it’s not meant to be in the body! I’ve seen examples of cheap silicone jewellery react even badly to plain old soap. If it’s going to disintegrate when it touches water, what on earth is it going to do when it’s in your ear? Another important tip: do not, under any circumstances, use silicone as jewellery in a fresh stretch. It’s not okay, nor is it okay to fold up a 20mm tunnel into your 16mm lobes because you’re lazy. It’s going to ruin your ears. There have been incidents of industrial strength-type silicone being marketed under the name ‘Kaos’ or ‘Softwear’. Kaos Softwear is the only silicone brand that works with medical/implant grade silicone, and you should only buy if you are confident that it is that brand. Before wearing any silicone, wash them well with warm soapy water to remove any dust or lint.
Name: Glass (Pyrex, borosilicate, soft glass)
Can you be allergic to this material? No
Vegan? Yes
Autoclavable? Yes
Extra information: Glass is arguably the most awesome material. You can use it for initial jewellery, plugs, tunnels, everything. And there’s hundreds of different things you can do to it for it to be awesome. It’s totally safe for long term wear, too. That’s all there is to it, it’s awesome.
ORGANICS:
(Usually you will only find plugs, tunnels, etc. in organics – not rings, bars, etc. – though you can get screw on/clip in balls/attachments made of/with organic material)
Name: Stone
Can you be allergic to this material? No reported cases!
Vegan? Yes
Autoclavable? No
Extra information: Stone is probably the most amazing natural material, purely for the sheer diversity of the types of stone, the polishes, and cuts available. It’s most likely to be shaped into the double flare saddle shape, as this gives the stone the most integrity. Stone’s a pretty heavy material, and not suitable for really long term wear. There are hundreds of different types, to cater for all tastes, which makes it versatile. It cannot be autoclaved, meaning it’s not suitable for initial piercing jewellery. It can be cleaned with warm soapy water, or dusted and polished with a microfiber cloth.
Name: Wood
Can you be allergic to this material? People can react to certain types of wood
Vegan? Yes, however some woods are finished with beeswax – always check with your supplier.
Autoclavable? No
Extra information: To quote a favourite jewellery company of mine, ‘Wood is Good’. It’s versatile, easy to wear and available in many different designs. Wood can warp if it’s left in water, so no swimming, showering or soaking with wood jewellery in! Wood needs to be oiled with an oil of your choice every month (depending on wear) to prevent it from drying out, and in some cases, cracking. As it’s not autoclavable, it’s obviously not okay for initial piercing wear. It shouldn’t be exposed to extreme temperatures either.
Name: Horn and bone
Can you be allergic to this material? They can cause irritation in rare cases
Vegan? No
Autoclavable? No
Extra information: If you’re going to buy horn or bone, always make sure that it’s been ethically sourced and gathered. They are animal products, and many people don’t agree with it. They need to be cared for much like wood (Horn, Bone and Wood come under the umbrella of porous organics) They should be cleaned very lightly with a damp cloth when desired, as to prevent cracking and warping. They are both very fragile and should be treated carefully, no exposure to water or extreme temperatures. Rub a little coconut or jojoba oil onto them to help retain shine, and make sure you don’t use wood treatment oils on them. Store them away from light if possible, as they are fragile materials and do need to be treated with respect.
MORE LINKS!
A very interesting and informative piece on allergies and body jewellery!
A dear friend and colleague of mine put together an informative and concise blog on WHY jewellery costs what it does – and why paying for quality is ALWAYS worth it!
Your piercing is a small puncture wound, so swelling, bruising, bleeding and pain/discomfort are all normal parts of initial healing, this should stop after a week or so. You may notice white/pale yellow discharge for the duration of your healing. Healing times vary from person to person and piercing to piercing, anything up to 6 months is to be expected for most piercings, but many people find they heal faster than this. Downsizing your jewellery is recommended about halfway through the healing time (see below for details). Return to your piercer for this, so that appropriate jewellery can be fitted in a clean and safe environment. This jewellery is to be paid for (not included in your procedure fee). Sometimes more than one downsize is required.
How Do I Clean My Piercing?
Let your body do the work; but help it along with the following. Wash your hands thoroughly, apply saline solution to the area at both sides of your piercing (either spray directly or use it on a clean cotton bud or gauze) use the damp cotton bud to wipe away any discharge or ‘crusties’, then dry thoroughly with another clean, dry cotton bud/gauze. Clean and dry your piercing twice daily – building it into your daily routine will help. Once a day, rinse your piercing with clean warm water (in the shower is ideal) then follow with a saline clean (one of your daily ‘cleans’). For oral (in the mouth) piercings, rinse with alcohol free mouthwash after everything you eat/drink/smoke/vape for the first week of healing, and then as needed after that (use saline as above for the end of the piercing outside your mouth – if applicable – for the entire healing time). For intimate piercing, using clean water and a tiny amount of intimate wash once daily is sufficient. ALWAYS dry your piercing thoroughly after getting it wet (baths/showers/cleaning it with saline). Use a dry cotton bud/gauze/tissue to dab the area dry, and then use a hairdryer (low power, warm temperature) to dry thoroughly. See below for approximate healing times and notes on caring for specific piercings.
Things You Can Do To Aid Healing
Maintain good health – a healthy body will create a healthy piercing (being ill or run-down and stressed can cause a longer healing time, or for settled piercings to revert back to their ‘healing’ phase). Taking multivitamins, especially Zinc, can help your piercing heal faster. Keep your hands (and other people’s hands and body fluids) off your piercing – touching or moving the jewellery can cause irritation bumps, which can be tricky to get rid of. Get plenty of sleep and stay hydrated to allow your body to do what it needs to. Protect your piercing with a dressing if you feel it is needed. A check up at around the halfway point of healing (see below) is advised, so feel free to call back. Keep the piercing clean, dry and avoid touching it or moving the jewellery (twisting, sliding, wiggling) as much as possible. Sleeping with your head elevated above your heart can help the swelling subside faster.
I Think There Is A Problem With My Piercing
Firstly, don’t panic! Return to your piercer or contact them as soon as you can if you are concerned in any way. If you want to, you can take anti-inflammatories and painkillers to help reduce swelling/pain provided you are OK to take them (read the label on ANY product/medication before using it; and follow the information/instructions closely). If you feel the piercing has swollen more than the jewellery will allow, return to your piercer ASAP to have your jewellery upsized – this will usually solve the issue. Infections are VERY rare in piercings, but irritation is often mistaken for infection. Signs of infection include: having bright red ring around the piercing, a constant darker yellow discharge and the area will feel warmer than usual. If you think you have an infection or any other issues, DO NOT REMOVE THE JEWELLERY and return to your piercer for advice. Unless you are extremely worried about your piercing, there is usually no need to seek medical advice, however if you feel it is urgent, it is advised to do so. All piercings can migrate or ‘grow out’ and leave scarring, you can minimise the chance of this by not touching/moving the piercing and retiring the piercing if it migrates too far – again, return to your piercer for advice. Lumps/bumps are a common issue, they are usually caused by moisture or movement, but makeup, hair products, sleeping on the piercing, improper cleaning and not downsizing your jewellery will also contribute to this. Return to your piercer (or contact them) if you need help or advice. Any issues with your piercing must be brought back to your piercer – if taken to another studio or piercer, we can no longer take responsibility. If medical advice is sought, that advice is prioritised over anything stated here.
Things To Avoid
Avoid swimming/chlorinated/shared water for as long as possible after being pierced (minimum 1 month). Do not soak your piercing for the first 2 weeks of healing (getting it wet is fine, so bath/shower as normal, just do NOT soak). Do not sleep on a healing piercing – this can cause it to heal at an angle which is irreversible. Do not fiddle or play with the jewellery or force it to rotate/move through the hole – this is the main cause of irritation bumps. Keep tight clothing, long hair, makeup, fake tans, hair products, perfumes, etc. well away from all healing piercings. Harsh chemicals can damage the delicate cells repairing your piercing, do not use any harsh astringents/chemical cleaners like Savlon, TCP, surgical spirit or any antiseptic creams or oils (lavender, tea tree, etc.) or soaps – these things can slow down your healing process.
Your Jewellery
The jewellery you have been pierced with is sterilized, implant grade titanium (unless stated otherwise by your piercer) all threading is internal or ‘push fit’ (post has a hole which the stick on the attachment screws/presses into) and is large enough to allow for swelling. Your jewellery size and type are written above. Jewellery is designed to be removed, so can come loose by accident (especially if the jewellery is being moved or played with) – make sure you check the threaded parts of your jewellery regularly to reduce the risk of lost jewellery (righty tighty, lefty loosey!). Piercings can close up very quickly so, even when healed, so never leave your jewellery out for any longer than absolutely necessary.
Ear Piercings
Avoid sleeping on your piercing – a U-shaped travel pillow or ‘doughnut’ pillow in bed will support your head/neck whilst preventing contact with your ear. Keeping headphones, mobile phones, etc. clean will minimise the risk of healing issues, as these are in contact with your ear, so any bacteria on them can cause problems. Take care when styling your hair – and warn your hairdresser about your new piercing. Downsizing piercings on the outer edge of the ear is very important – this should be done as soon as the swelling has subsided (6-8 weeks after piercing).
Lip/Tongue/Cheeks/Other Oral Piercings You will experience some swelling, which may make eating/speaking a little difficult. It is recommended that you change your tongue bar for a shorter one a week after having it pierced (return to your piercer). This will make it easier to eat/speak and avoid damage to your teeth – playing with the piercing in your mouth can cause tooth/gum damage at any time. Sleeping with your head elevated above your heart can help the swelling subside faster. Stick to eating soft foods such as soup, ice-cream, yoghurt, porridge, protein shakes, etc. until you feel comfortable eating solid food. Sucking on crushed ice-cubes/cold drinks can also help reduce swelling. Avoid spicy foods, smoking and alcohol for the first week of healing as these can irritate the piercing. You may notice a yellow/white furry coating on your tongue for the first week, this is normal. Use your toothbrush to gently brush away the coating. A new toothbrush after being pierced is recommended, and keeping your mouthwash in the fridge will soothe the piercing when it is used.
Navel/Nipple Piercings
Avoid tight clothing directly on the piercing area – waistbands of clothing on your lower half should sit below the navel, and any bras should have a smooth, soft surface in direct contact with nipple piercings (wearing a bra will minimise movement and stop the jewellery being snagged or twisted). In some cases, it can take over a year to fully heal nipple/navel piercings. Be patient, clean/dry the piercing regularly and return to your piercer if there are any problems, or if you are worried about your piercing. Be sure to clean and dry the inside of your navel as well as the outside. Avoid wearing dangly jewellery constantly in navel/nipple piercings as it can be easily snagged. Nipple and navel piercings can be kept in during pregnancy (your piercer can help advise about this – longer jewellery is needed). However, always remove nipple jewellery (choking hazard) while breastfeeding and replace once feeding is done.
Intimate Piercings In the case of intimate piercing, there may be some bleeding for up to 24 hours after getting the piercing and ‘spotting’ for up to a week. Wearing comfortable but fitted underwear (jockey-type shorts/full briefs) and padding around the area with tissue will hold everything still and minimise movement, wearing sanitary pads (whatever your gender!) for the first week will stop blood staining clothing. If you are worried about the bleeding, please return to your piercer or contact a doctor/hospital if you need help urgently. Always wear clean underwear during healing. Avoid contact with other people’s body fluids (saliva, sweat. semen, etc.) during healing. There is no reason to avoid sexual contact/intercourse after having a genital piercing done, as long as you feel up to it – which could take a few days to a week – but be sure to use barrier protection (condoms for example) until the piercing has healed fully. When the piercing has healed, take extra care to make sure that condoms aren’t torn or weakened by the jewellery, use a water-based lubricant (KY Jelly for example) to minimise the risk of this. Clean your piercing with clean, warm water after any sexual contact. Pregnant people are often advised to remove jewellery in the early stages of the pregnancy so that the area has fully healed and will not cause any complications while giving birth. Re-piercing is usually possible.
Surface Piercing/Microdermals/Skin Divers For divers/dermals your piercer will (when possible) cover it with a dressing once it’s done, a plaster or dressing should be worn for the first 24-48hrs. Clean the piercing (as overleaf but only ONCE a day after a bath/shower) and use a piece of tissue to ‘floss’ under the balls/discs, however most people find that leaving the piercing to heal on its own works well. Unwaxed/unfragranced dental floss is ideal to remove any build up under the discs/balls. Divers/dermals CAN be removed by your piercer – they do not require surgery. The jewellery which is under your skin (the implant base/staple bar) should NOT be removed, but the balls/discs can be changed after 3-4 months, once any swelling has subsided. Skin divers are a fixed piece of jewellery and cannot be changed. Microdermals and skin divers heal much faster than surface piercings, but they can be pulled or knocked out more easily than surface piercings, wear a dressing over the piercing if you’re concerned about this (especially if you are in an environment where the piercing could be pulled at). Surface piercings, microdermals and skin divers are tricky to heal fully and due to the higher risk of rejection/other healing issues than with other piercings, they are best viewed as temporary, even with the most careful aftercare.
Healing Times The times below are given as a guide, anything up to a year is normal for basic piercing. If you’ve had a longer healing period with previous piercings, you can expect a longer healing period than those shown. Just because a piercing is no longer red, swollen, crusty or sore this doesn’t necessarily mean it is healed (piercings heal from the outside in, so while the exterior will look healed, the interior will still be fragile). If in doubt, leave the jewellery in and return to your piercer for a check-up. You cannot donate blood or other body tissue for at least 4 months after getting a piercing. If planning on stretching a piercing, wait for it to heal fully plus another 4-6 weeks before starting to stretch.
Ear (lobe) – 2-3 months (downsize at 6 weeks)
All Inner Oral Piercings – 2-3 months (downsize at 4 weeks)
Septum – 2-3 months
Intimate – 4-6 months (downsize at 2 months)
Eyebrow – 2-3 months (downsize at 4 weeks)
Ear (cartilage) – 4-6 months (downsize at 6-8 weeks)
Industrial – 6-12 months (downsize at 2 months)
Nostril – 4-6 months (downsize at 2 months, ring can be fitted no sooner than 4 months)
All Standard Lip Placements – 2-3 months (downsize at 4 weeks)
Vertical Lip Placements – 3-4 months (downsize at 4 weeks)
Firstly, we’ll discuss how to prepare for a piercing (and tattoo). And then what to expect on the day. This info is especially important for first-timers, but even veterans may learn something! As always, any questions, just post a comment!
So… preparation!
This applies to tattooing and piercings too!
*Best thing to do is make sure you eat something before coming in. This keeps your blood sugar level up and stops you feeling faint. Plus, if it all gets too much and you need to be sick (rare, but it can happen), it’s best to have something to throw up! Ideally, eat something an hour or so before coming in.
*Bring a sugary drink with you (Lucozade is great!) and please tell your tattooist/piercer if you are diabetic and have your medication with you (this should be done on your consent form). I keep glucose powder in the studio to mix with water if you need it. If getting tattooed, especially for a long sitting, maybe have some snacks with you. Always ask your artist to stop if you need anything (something to eat or drink, a toilet break, etc).
*DO NOT have any recreational drugs OR alcohol in the 24hours before your procedure as it can make you bleed more (alcohol thins your blood), etc. Some people also say it makes the process more painful if you’re hungover (but to be fair, anything is more painful with a hangover!) and if there is anything in your system that could impair your judgement, your artist must refuse service.
*There’s nothing you really need to do for your skin, I guess having a shower before you come in is common sense – hell, you brush your teeth before going to the dentist – but there’s no need to put any special lotions, etc. on your skin. Eczema/acne-affected skin cannot be pierced (or tattooed), wait for the affected area to clear up. In the case of intimate piercings, some people will shave or wax the area, but unless you normally do this, there is no need. For a tattoo, your artist will shave the area if they need to – even fine body hair can get in the way, so will be taken off with a disposable razor. Unless previously agreed with your artist, do NOT use any anaesthetics. Personally, I will not pierce someone if they have used any topical anaesthetics, though some tattooists may allow this – check if unsure!
*Bringing a gaggle of friends with you may seem like a good idea, but it’s very off-putting for you and you might refuse to ask something important for fear of being laughed at by your friends. I NEVER allow anyone into the piercing room with the person I am piercing (with the exception of intimate piercing where, because of its nature, I will allow a partner/friend in with you). Your friends will have to wait in the waiting room for you. Several times I have had a client faint on me because they want to get out and show all their friends the piercing, even though they aren’t feeling too well, so always wait until you feel 100% before leaving the piercing area. Tattoo sessions are often long, so some people want a friend or partner/relative to chat to while it’s being done, this is usually fine, but only ONE person with you.
*DO NOT BRING CHILDREN INTO THE STUDIO. All studios operate differently, many will not allow children (people under 16) in at all. At present, we do not allow any children in the studio. If you bring children to the studio with you, you may not get tattooed or pierced. Even if children are permitted in the studio, sitting and waiting can be boring for little ones, so it is advised to leave them with a sitter or at home and come alone. If children are noisy, then you may be asked to take them outside (artists are trying to concentrate on their work) or if they damage furniture/books/portfolios/magazines belonging to the studio, you will be expected to pay for any damage.
*Think about where (on your body) you want your tattoo or piercing, and dress accordingly. If getting a tattoo on your leg, wear loose trousers or a skirt/shorts (no tights!). If getting a navel piercing, wear a loose top, a loose vest is ideal if you’re getting a tattoo on your chest or back and if getting an ear piercing, tie/clip long hair up and away from the area. If getting a facial piercing, make sure you don’t wear heavy makeup and if you have facial hair, you may need to shave for a lip piercing. If you want to bring specific clothing with you (shorts for example, to wear while getting a tattoo on your upper leg – so you aren’t sat in your pants!), you can always change into it once in the studio. Bear in mind, for a tattoo, you may end up with ink and/or blood on your clothing – tattoo ink does NOT wash out. So bear this in mind when picking clothes.
*Ask any and all questions before you sit down to get the piercing/tattoo done (this can be done in private – just ask!) be it a question about the procedure, or the aftercare, it’s not sensible to ask during/after the piercing. This way you’ll be comfortable with everything BEFORE the butterflies start! I offer a free consultation for any piercing, as do most other piercers/tattooists, you can call in to have a chat a few days before getting pierced so you have time to ask questions and look at jewellery options, etc. In the age of social media, I often have people contact me with a list of questions on Facebook or via email – which is also a great idea, so you don’t forget to ask things on the day.
*Some people like to do their research before coming in for a piercing (watching videos on YouTube is a favourite) this isn’t always the best course of action. Everyone has different methods, so seeing it done one way, but then your piercer using different equipment, etc could cause alarm, even though there are many appropriate ways to perform the same procedure. Someone’s reaction to the sensation of the procedure may put you off, whereas you may find it much less painful than anticipated! Plus some of the videos I’ve seen on there are the most unprofessional procedures I’ve ever had the misfortune to watch. I find looking on www.bmezine.com for experiences of other people, or asking friends about their experience, much more helpful.
*Show up on time for your appointment (if you have one). Call if you’re going to be late, no one can be on time ALL the time! Always bring photo ID with you, even if you have shown it before, just in case your artist needs to see it (again). We accept passports, drivers licence or provisional and any proof of age card which shows the PASS hologram.
So, you’re prepared, you’re ready, you’re on your way to the studio…. What can you expect to happen?
Obviously, it depends on the piercing as to how the procedure goes, though tattoo procedures are all similar but I’ll do my best to outline everything for you. Below is the procedure I follow. Other piercers may do things slightly differently, but there are multiple different ways to perform the same procedure equally safely.
PIERCINGS
Once you’re ready to get pierced, come in and see me, you don’t need an appointment for piercing (see my website for studio address, or contact me for more info). Most piercers work on the same system, but it’s worth calling ahead if you’re unsure of whether or not piercings are available on a walk-in basis in other studios.
It’s best to get a good night’s sleep before getting pierced. Have something to eat about an hour before coming in (this is especially important with tongue/lip piercings). If you’re getting pierced with me, you won’t be allowed anyone in the piercing area with you. The only exception is for intimate piercing, because of the nature of this, I don’t mind you having a partner or friend in with you. Other studios may have a different policy.
You’ll be greeted by a receptionist who will add your name to my waiting list, and give you an estimated wait-time. ALWAYS speak to a receptionist when you arrive, so we know you’re waiting! Once I’m ready for you, I’ll call your name, and ask what we’re doing – ALWAYS tell me everything (new piercings, check-ups, jewellery changes, etc. so we can do it all together). If you’re getting a new piercing, you may be asked for ID (see earlier in this blog for acceptable forms) and then asked to fill in a consent form, which you MUST DO HONESTLY, then you will be shown into the piercing room.
If you want to set your bag/jacket down in the piercing room, please ask where is safe to do this. I have hooks on the back of my door. I’ll then ask you where you would like the piercing (which ear, which side of the nose, etc.) Then check which jewellery you’d like, to make sure I use the correct piece. Bear in mind most of the time your new piercing will be fitted with jewellery slightly longer/wider diameter than needed as there will be a small amount of swelling.
I will wash and dry my hands, put on a new, clean pair of gloves and gather the equipment/jewellery needed (notice it is all in sterile packets). Before I start, I use an alcohol/chlorhexidine or iodine solution to clean the area being pierced (for piercings in your mouth, you will be asked to rinse with some chlorhexidine mouthwash, and for intimate piercing PurKlenz is used (alcohol free). The area will then be checked – usually poked and prodded with gloved hands, and sometimes a small torch will be shone onto the tissue (to check for blood vessels/scar tissue/etc.) and I will mark the piercing out with a sterile skin marker (looks like a felt tip pen) or a ‘pressure mark’ which will leave a small dimple on your skin.
You can check the marks in a mirror and make sure the piercing will be where you want it. If you are unhappy with the placement, ask me to mark it a little higher/lower/to the left/to the right. As long as there are no blood vessels in the area (which I always check for after a re-mark) it shouldn’t be a problem. Do not touch the area, as it has been sanitised with alcohol/iodine. ALWAYS tell me if you are unhappy with the placement. It is YOUR piercing and YOU call the shots when it comes to where the piercing is. I will always give advice on where the piercing should (or should not) be, but the final decision is down to you. Take your time with this, and always move your body to see how the marks will move with you.
If the piercing needs re-marking, that will be done, checked by you again, and once you’re happy with the placement (this may take a few re-marks, there is no limit on how many ties a piercing can be marked/re-marked), the piercing process can begin. I do not use any anaesthetics (please see my other blog about this, and the legalities, and why I do not use them).
To commence the piercing, there are a few methods that can be used – a pair of forceps (“clamp”) will be placed on the piercing, some piercings do not need forceps, inner ear piercings for example, which are often done with a receiving tube – a small metal tube – which is held on one side of the piercing, and the needle is pushed through the tissue and into the tube), and some piercings are done ‘freehand’ – with no tools at all. This is where there is the largest variation from piercer to piercer, and there is no ‘right’ way to work. I usually check the area once more with a torch if it’s in a vascular area, and make sure the skin in the forceps is positioned correctly; you may feel the forceps being taken on and off as I make sure the marks of your piercing line up correctly.
I usually ask if you are OK and then tell you to take a deep breath. Once you breathe in, I pass the needle through your skin and tell you to breathe out. You will feel some discomfort, but it will only last for a split second. The forceps will be removed (or receiving tube moved away) and the jewellery will be slid into the piercing via the end of the needle blade. This may feel a little tight at 1st, but the pressure will be relieved quickly. Then the only thing left to do is screw the end onto the stud/barbell or clip the bead into the ring. This will only take a few seconds and will not hurt, sometimes a pair of jewellery forceps – which look like little pliers – will be used to secure the jewellery.
And that’s it!
Now it’s up to you to take care of your piercing. You will be given an aftercare sheet (see my other blog for the aftercare sheets) with your jewellery size written on it. Following the aftercare sheet is very important if you want a well-healed piercing. The aftercare sheets are given to you for a reason. If you choose not to follow it and use a product which I don’t recommend, change the jewellery before it should be or fiddle with the piercing, then you are likely to experience problems with your piercing.
If you feel unwell after the procedure, or need to ask any questions, please do so! Your piercer will allow all the time you need to recover, if you need a lie down, a drink of water or anything else, just say so. Once you’re feeling 100% I will walk you back to reception, take payment, and then you’re ok to go! But if you’d like to stay in the studio a little longer (if not feeling well, etc) this is fine.
As with anything done by me, please call back if you have any concerns or questions. You can contact me via email or Facebook, but bear in mind that 99% of the time, I’ll need to see the piercing “in the flesh”, as it were, before I can give advice on it or advice on jewellery sizing.
TATTOOS
Tattoos are usually by appointment only, but if your design is small, you may be lucky to get a ‘walk in’ appointment, but as appointments are given priority, this may not be possible.
When you arrive, speak to someone on reception, if you have an appointment, give the appointment time and the name of the artist you will be with. You’ll be asked to take a seat and fill in a consent form (honestly!) – even if you have been tattooed in the studio before. You may also be asked to show photo ID, so be sure to have it with you. If your artist is running late, or if they need to check the design, etc, you will be told.
Your artist will come and collect you when they are ready, and show you your design – this is when you need to ask for any changes or alterations to it! If you aren’t happy with any aspect, SAY SO! Check any spelling, dates, etc to be sure they are correct – the responsibility for this lies with you!
If there are changes to be made, your artist will re-draw the piece for you (this will take 10-15mins minimum) they will show you the piece with the changes made once more to check everything is OK.
You’ll be shown into the tattoo area, if you want to bring one person with you, this is usually permitted, but do check as other studios may have a different policy. If you want to set your bag/jacket down, please ask where is safe to do this. Sometimes, especially if getting a thigh tattoo or something on your back, your artist will have advised you to wear (or bring to change into) certain clothing, so if you want to do this, now’s the time. You’ll be shown to a toilet or private changing area.
Your artist may have already set up their equipment, or they may be doing this now, they will ask you to take a seat.
When they’re ready to start, your artist will ask where the tattoo is going and then shave the area if needed. They will apply a liquid to the skin to clean it and help the tattoo transfer stick. Some artists will draw the design directly onto your skin with a marker pen, others will apply a transfer, and some will do both – using a transfer and then adding to it with pen. When your artist asks you to, you can look at this in a mirror. This is your last chance to make design changes! Make sure the design is exactly what you want, and it is positioned exactly where you want it. Move your body around, as well as looking at it relaxed to see how the design will move with your body.
Your artist will ask you to sit or lay down (depending on where on your body the tattoo is) and move you into a position where they can work on your tattoo most comfortably, if you are uncomfortable or don’t feel like you can hold that position, let your artist know. Once you and the artist are comfortable, they will ask if you’re ready for them to get started. Often, they will start with a few smaller lines (lines are done before colour/shading) so you get a feel for it, and then start to do the longer lines. If you feel comfortable, just let your artist crack on, but if you need to stop, say so. On larger pieces and longer sittings, you will have breaks every now and again – you can have a cigarette (outside!), a snack, a drink, a quick trip to the toilet, whatever you need. Make sure your artist puts a cover on your tattoo before you leave the procedure area.
You may be asked to move, hold your body a certain way, etc, while being worked on. If you feel uncomfortable at any point, ask your artist to stop.
Once completed, your artist will wipe down your tattoo, apply some cream or ointment (different tattooists favour different things) and ask you to check it in the mirror when you’re ready. If you want anything else doing to the design, or if you think an area has been missed – tell your artist NOW! When you’re 100% happy with the tattoo, your artist will dress it for you (usually cling film) and take you back to reception to pay and get an aftercare sheet for you.
If you have any questions, ask! But your aftercare sheet should have the studio’s contact details on in case you need to get back in touch. Follow the aftercare recommended by your artist, and always contact the studio if you have any concerns!
I hope this helps with any first-time nerves, but ask if you have any questions!
This is a question I get asked a LOT, and I’ve put this together to explain the things that factor into my answer – and why I can’t always just give you a number! I’ve had angry messages, disappointed clients and on one occasion a negative review simply because I wouldn’t do multiple piercings in one session. I hope that this blog will go some way to explaining WHY I must refuse/reduce the number of piercings one person can request.
It’s SUPER awesome you want to get looooads of piercings, and I’m here to help you with that – but I also have a duty of care to my clients to give them happy piercings, that will heal well and without complications. If this means splitting a project across several sittings (with a considerable amount of time between them) – that’s what I must do.
I get 16 year olds eagerly clutching their passport listing off the piercings they want “4 on this ear, 6 on that ear, my nose, my lip, my tongue and maybe my navel if we have time?” wanting to get as many as they can get while their parent(s) have allowed them to take their passport out of the house! And I hate having to be a ‘killjoy’ (I really do, I promise!) but I need my clients to be safe, and to have happy and healed piercings, even though I understand that ‘want’ for multiple piercings. I’m rubbish at being patient (there is a story to come about this, read on) so I 100% understand how hard it is to wait, to be patient and to be ‘sensible’ (I hate that word!) but I hope that by the end of this blog, you will understand why your piercings and your body will thank you for taking it slow!
IT IS NOT ABOUT HOW MUCH PAIN YOU CAN TAKE! So many times, people will see my hesitation to give them the 12 piercings they have asked me for and will say “I have a really high pain threshold” or “I don’t care how much it hurts, I just want to get them all done”. Even if this is true (on occasions where I have agreed to do 2 or more, we’ve done one, and then they have decided that one is enough for today – and that is 100% fine!) you being able to ‘handle the pain’ does not mean your body can ‘handle the healing’!
IT IS NOT ABOUT MONEY! I’ve had people ask me if their ‘money isn’t good enough’ or even ask if I ‘don’t like making money or something?’ – I have rent and bills to pay, and I don’t show up at work to do nothing, but I DO care about my clients and their health and wellbeing. Surely someone who makes money from doing something to you refusing service (to a degree) tells you that what you’re asking for isn’t a great idea?
So, those two factors being addressed, what are the things I will ask about, and what other things will influence “how many” piercings I will do in one sitting? My decision is based on a combination of the following.
HAVE YOU HAD PIERCINGS BEFORE? WHICH ONES?
If you have never had a piercing before, or if you have only had earlobe piercing, I will rarely offer more than one piercing in this first session.
If you are asking for ‘difficult to heal’ piercings or haven’t had something similar before, so say you want 3 ear cartilage piercings – but have had your lip, earlobes and septum done, I would be reluctant to do more than 2, but preferably only 1 – because this is a ‘new thing’ for your body to tackle.
WHICH PIERCINGS ARE YOU ASKING ME FOR?
As mentioned above ‘difficult to heal’ piercings or ones that can be more prone to rejection (snug, anti-tragus, navel, surface piercings, microdermals) are best done as a single, and then added to at a later date.
Snug and anti-tragus piercings can take up to a year – sometimes more – before they are healed, and I will not offer them at the same time as any other piercing, or if you are currently healing something else. They need all your body’s resources to stand a chance!
‘Easy’ piercings like a pair of earlobes – sure, I’ll do both in one session – but I wouldn’t want to do ONE earlobe and ONE cartilage piercing if that person has never had either before.
DO YOU HAVE ANYTHING HEALING? OR ARE YOU RECOVERING FROM AN ILLNESS/SURGERY?
I have to rely heavily on my client’s honesty here – not getting 2 piercings in the same session does not mean it’s ok to come back 3 days after getting one and get the other. Same as recovering from an illness – if your body has recently had to fight off a bug, or recover from an injury/surgery, giving it SOMETHING ELSE to heal can mean a slower recovery AND potential issues with healing your piercing. And even worse – your illness returning! If you have had surgery near the area we are piercing, I will always ask you to wait 6 months before getting the piercing (but would consider a different piercing, if you wanted something else done).
Your body’s immune system is like an army – it has a finite number of ‘soldiers’ that can fight off ‘attacks’. If you give your body too much to do, not only will you see longer/more problematic healing with a piercing, but you will also be more susceptible to infections (both involving the piercing, and other things like coughs, colds, etc). Overloading your immune system with piercings to tackle could mean a ‘perpetual healing’ phase where NOTHING heals.
Story time: many years ago, I had 6 piercings that were in various stages of healing (they were all done all within the space of about a year in 4 sessions) two of which were done by a dear friend of mine who has since passed away. Of those 6, I have 2 remaining. And I had to remove the two my departed friend did for me, which broke my heart. The lesson here – I lost 4 out of 6 piercings (which I paid for, sat through, and LOVED) simply through being hasty.
WHERE ARE YOU GETTING THE PIERCINGS?
Your body doesn’t care if both piercings are on the same side of your nose, one on your ear and one nipple, or microdermals at opposite ends of your body – it still has the same amount of ‘work’ to do. BUT if you get an ear cartilage piercing on either side, sleeping is more-or-less impossible without laying on one of your piercings – making healing much more difficult and problematic (and potentially having one or both piercings heal on an angle due to being slept on). So if I have a client who has had loads of cartilage piercings, and is very experienced in healing them, and they ask for one on each ear – I would still decline, and just do one (but offer to do 2 on the same side, heal those, and then do the other side).
ARE YOU GOOD AT HEALING?
Another instance I must rely on my client’s honesty, and most of the time people will say “yeah I healed all these in like a week”. Healing piercings FULLY takes time. Initial swelling and pain will usually subside within a week or so – but this does not mean they are healed. All bodies are different (my body SUCKS at healing), so we need to factor this into our decision. If I have a client in front of me asking for a piercing (1) and I can see others that are not healed, or have been neglected, slept on, etc – I may ask them to get the others settled BEFORE getting even one more. If I have a new client – someone who has piercings, but I have never pierced – I may not do as many as I would if it were someone I know to come back with consistently happy and healed piercings. I want to be sure my client can handle whatever we are doing and know that I can trust them to return to me for help (not slag me off on facebook) if they need help with something ambitious. But this is not an exact science – even a client with perfect healing-history may struggle with a single piercing, and we need to make this clear. Sure, we could work on the law of averages – if they got 2 piercings last time and didn’t see a huge increase in healing time, MAYBE we can try 3, but that doesn’t mean that there won’t be any issues.
WHAT JEWELLERY ARE YOU LOOKING TO GET?
When a piercing is healed – you can change it for anything your heart desires. And I will help you. But until it is healed, I want to get it to that stage in the shortest time, and with the minimum amount of fuss. This means that we need to consider simpler, more compact jewellery. Not all piercings can be done with rings as initial jewellery, but those that CAN, I will often use studs instead if doing multiples (double helix piercing for example) – if you ask me for ONE, I’ll offer a ring but explain that healing can be more problematic, if you ask me for TWO, I’ll [usually] only pierce with studs, for faster healing, then you can put rings in once healed.
“How long will I have to wait to get the additional piercing(s)?”
I usually recommend about halfway through the expected healing time for the new piercing. So, in the case of an ear cartilage piercing, which takes 3-4 months on average, I’d say wait 6 weeks to 2 months before getting another. BUT if the client returned at 2 months and the piercing was looking angry, I’d ask them to wait longer. This is something that will vary with each client, but as a ballpark figure, half the expected healing time. this means your newest piercing is out of the initial phase of healing, can be comfortably downsized (shorter jewellery put in) and will continue to heal well even after adding another piercing.
If the following can be said:
*Client has had piercings before, including similar tissue/placement to those requested.
*The piercings requested aren’t too difficult to heal (OR it makes more sense to do both in the same session – paired nostril, lip or nipple piercings for example)
*They are fit, healthy and have nothing else healing/recovering right now.
*They have a good history of looking after their piercings, and their body can accommodate the healing.
*They are choosing jewellery that will make healing as smooth as possible (or are happy to go with something that they know they can switch out once healed).
…Then, we can discuss multiple piercings. 4 is generally accepted as the absolute max it is sensible to carry out in one session, but my personal limit that *I* feel comfortable with is 3. However, I will usually only offer 3 if it makes more sense to do them in the same session than to split them into 2 sessions. I RARELY do more than 2.
Could my reply to the question “How many can I get at once” simply be ‘2’? Maybe, it’d mean a very short conversation (and you wouldn’t have had to read my ramblings!) but if this client showed up and asked for 2 piercings but I didn’t feel it would be right to do them both in the same session, this could result in a huge clash. I prefer to make my decision on how many (or how few!) to do in one session based on the individual, and not a cookie-cutter one-size-fits-all policy.
Every time you get pierced, you will (or rather you SHOULD) be given a consent form to fill in. A lot of people ask me why they need to do this, or why they need to fill one in with each piercing. Tattoos are the same (though on a tattoo which takes more than one sitting to complete, I have seen cases where the original form is doctored so that the one form will cover the whole of the tattoo, or that a date and signature is added with each sitting).
The reason for having to sign a new one each time is because a consent form is a legally binding contract. (Scary, eh?) Not just an inconvenience to fill in while you’re nervous. You are agreeing to a certain procedure (a certain piercing or design/placement) to be carried out on a certain day, so that there is a record of when the work was done. This way, if there is any problem with the work, the consent form provides evidence of when that particular piercing placement/tattoo design was done, who it was done by, and who it was done on.
Consent forms are usually 2-sided, and while layout and content will vary from studio to studio, it will be more-or-less based as follows (I have used my consent forms to build this blog). Many studios have digital consent forms too – these are perfectly OK to use as long as the studio handles digital data appropriately.
On the front, the consent form asks for a lot of info, and it may vary from studio to studio. The following things are what my consent form asks for:
Name
Date of Birth
Address
Phone Number
The reason we ask for the above is because the form contains medical details – we’ll get to that in a bit – and by law, you can view your medical records anytime (and as mentioned before, if there is any issue with the piercing or tattoo and the consent form needs to be referred to), these details are there so that we can make sure that you only view the consent form that belongs to you (if you ask for it) and so that the person on the form can be linked to the procedure carried out.
There are usually a series of Yes/No questions on the form, asking if you have certain conditions or allergies. The ones I ask about are:
Heart or liver disease/conditions
Keloid scarring
Haemorrhaging/haemophilia
Epilepsy (or other conditions which may cause seizures)
Any blood thinning medication in the last 24 hours
Any alcohol or recreational drugs in the last 24 hours
Pregnant or breast feeding
Prone to fainting or dizziness
Eaten in the last 4 hours
I see countless people read the first 2 or 3 lines and then skim down the list crossing out ‘Yes’ or circling ‘No’ without even reading the list. Please read what you are filling in, there are many common ailments asked about and it is important that your piercer/tattooist knows about these. The order above is the order these things appear on my consent forms, and the amount of times I have asked “So, you haven’t eaten today?” just to have the client admit they haven’t read the form, and have to go back and edit a lot of the details. It’s time consuming and while I appreciate that nerves will be playing on your mind, the consent form is a very important part of the procedure!
Looking at each point in more detail:
Heart/Liver disease
Generally, not something which will mean you cannot get pierced or tattooed. It’s always best to consult your doctor before getting tattooed/pierced if you have ANY long-term medical condition. As long as the condition is being managed and you aren’t on any medication which affects your bloods/immune system, there shouldn’t be a problem.
Keloid scarring
This is the one people ask about. Keloid scars are quite rare in people with white or Caucasian skin. It is more prominent in people with darker skintones, though anyone can suffer from it. People are usually told that they suffer with keloids when they’re young children and have a fall or a scraped knee. A lot of people tell me they’ve had keloids with other piercings, but in almost all cases these are hypertrophic scarring (agitated/swollen scarring which goes away in time), not keloids. If it goes away, it wasn’t a keloid. If someone did suffer from keloids, I would advise against a piercing, unless a previous piercing has been fine. Tattoos are rarely affected by keloids, but I would advise getting a smaller piece done as a first tattoo. Laser treatment is best avoided, as is scarification and other body modification procedures for people who suffer with keloids.
Haemorrhaging/haemophilia
People who suffer from blood thinning conditions or take medication (warfarin for example) should avoid piercing, tattooing and other body modification – consulting a doctor about stopping the medication for a few weeks to allow time for the procedure may be an option, but this would have to be discussed with the doctor. If haemophilia is managed well, it could be possible for piercings and small tattoos/shorter sessions, again, this is something best discussed with a doctor.
Epilepsy (or other conditions which may cause seizures)
Not a problem regarding healing a piercing (or getting one) as long as any medication doesn’t affect bloods/immune system and a doctor hasn’t explicitly advised against it. I usually ask the client what brings on the fits, if they know when they are going to have a fit and what should I do if they do have a fit. This is more for client safety than anything else. Studio policy is that if a fit continues for more than a minute or so, I would call an ambulance.
Diabetes
Any type of diabetes is not something that would stop a person being tattooed, pierced, etc. Most diabetes sufferers find that they have a longer healing period than others, and this is something I would discuss with the client, just to make them aware of it. If they are diet-controlled, I would check that they have eaten something and are feeling well. If insulin controlled, have they taken some, and if not, do they have it with them just in case. If someone is diabetic and faints (or feels faint), I would offer them water, but not with the glucose powder that I keep on standby, unless they tell me that they are OK to drink it.
Hepatitis (Any form)
No problem, as long as the procedure will not have any effect on their condition, and that their medication will not cause any issues with healing. I do recommend speaking to a doctor before getting anything done, just to be sure.
HIV/AIDS
No problem, as long as the procedure will not have any effect on their condition, and that their medication will not cause any issues with healing. I do recommend speaking to a doctor before getting anything done, just to be sure. If the client is taking the appropriate medication to reduce their viral load to zero, there is no risk of transmission. Side-note: it is illegal to refuse service to a person based on their HIV status.
Cold sores, ulcers or fever blisters
This tells me your immune system is weak right now (if you suffer with them regularly, consult a doctor, there could be an underlying issue). You may find healing time is increased. Take some zinc tablets and treat the cold sore/ulcer/blister as normal (medicated over-the-counter products). Getting a piercing or tattoo on or around the affected area is not a good idea, wait for the sore to clear up and then get it done. Using cold sore medication as usual to get rid of them is absolutely fine.
Dry and itchy skin conditions are not something that will stop you getting tattooed or pierced, as long as you’re working on somewhere on your body that isn’t being affected, but as with cold sores, wait for the affected area to clear up before getting tattooed or pierced in that area. If you find that the skin condition spreads to the area where you have been tattooed or pierced, use your medication as normal and care for your tattoo or piercing as normal, return to your artist if you feel it needs any attention. In the case of cellulitis (infection of the deeper layers of skin), wait for it to clear up before being tattooed or pierced at all. Dry skin conditions can cause a tattoo to fade more than usual – so a touch-up may be needed.
Asthma or any breathing problems
Always bring your inhaler with you in case you need it (I’ve never known anyone to have an asthma attack during a procedure, but there’s a first time for everything). As with epilepsy sufferers, you are asked about your asthma more for your safety than something that could make piercing you difficult. Asthmatics should not take ibuprofen (which is often recommended as part of aftercare). Consult a doctor or pharmacist for ibuprofen alternatives.
Irregular blood pressure (too high or too low)
Often people with irregular blood pressure are on blood thinning medication, this is why it is asked about. If you aren’t taking any medication for it, and just monitor your blood pressure, no problem. People with low blood pressure are often ‘fainters’ so this is something else you may be asked about. In general, not something that would stop you being tattooed or pierced, as long as your medication will allow you to.
Any blood thinning medication in the last 24 hours
As mentioned before, blood thinners are best avoided for as long as possible before being tattooed or pierced. Consult your doctor if this is something you take regularly, and see if a break in your course would be OK.
Any alcohol or recreational drugs in the last 24 hours
If you are planning a tattoo or piercing (or have an appointment) on a certain day, do everyone (including yourself) a favour and avoid alcohol for 24 hours prior to your appointment. ‘Dutch Courage’ is a bad idea. Alcohol thins your blood and can (as I’m sure many of you already know) make you have silly ideas that you may regret. We all know someone who went to some Mediterranean party town and came home with a tattoo that will embarrass them forever. If you walk into a studio drunk or smelling of drink, expect to be asked to leave. Anything that can impair your judgement is best avoided, and you will be refused service if you have had anything.
Pregnant or breast feeding
No. Just no. See my blog on the subject for more details:
Prone to fainting or dizziness
There’s no shame in it, just make sure you tell someone if you feel faint. If you have a habit of feeling dizzy or passing out, I will make sure you are given plenty of time to catch your breath after the piercing, and be prepared to get you laid down with a sugary drink if needed. While we’re on the subject, if someone passes out or feels faint, I will not allow them to leave the privacy of my room until I (not they) am satisfied that they have recovered fully. This may take 5 minutes longer than a regular piercing time, or it may take an extra half hour, or it may take more. If you are waiting to be pierced and someone has passed out, be patient, you would not want to be rushed if you were feeling unwell, so please extend this courtesy to others. My priority when working is to keep my client (whoever I’m working on at the time) safe and comfortable.
Eaten in the last 4 hours
This is very important. While I won’t outright refuse to pierce someone who hasn’t eaten, it really makes it a LOT easier for you if you have. This is especially true in the case of oral (in the mouth) piercings, where you may not be able to eat comfortably for a few hours. If someone is a ‘fainter’ I will always ask them to eat something before being pierced.
ALLERGIES!
You will be asked about allergies you have. Please state anything you know you are allergic to. Many aftercare products may contain things that could cause an allergic reaction and your tattooist or piercer will let you know about this. Important ones to remember are a latex allergy (many studios still use latex gloves, so will need to know about a latex allergy. I use only nitrile but take the opportunity to explain to a client that the gloves I will put on are latex-free). Studios who use latex should have a latex-free (usually nitrile) option available. If not, look elsewhere to be pierced or tattooed. Allergies to adhesives or dressings too, as you will have your tattoo wrapped up (or possibly a dressing on your piercing) before you leave. Allergies to any antiseptics/skin prep must also be stated.
MEDICATION!
Where asked, state any medication you are on – most meds are absolutely fine (multivitamins, contraceptive pills, anti-depressants, inhalers, insulin, etc. are all fine). Your piercer or tattooist will go through any medication with you and check that it is OK. In general, as long as it doesn’t affect your bloods or immune system, its fine. If you do not feel comfortable discussing any medication in public (the waiting room), ask to discuss it privately.
MEDICAL CONDITIONS!
Any other medical conditions you feel we need to know about – basically anything you know you are affected by that is not mentioned above.
The main reason we ask for all (seemingly irrelevant) allergies/conditions/medication is so that should anything happen during your procedure where your piercer needs medical assistance (an ambulance or paramedic for example), having all your meds, medical conditions, and allergies listed is important as this can be given to the paramedic, so they will know best how to treat you (it’s never happened to me before, but if it does, I know I am prepared!) A lot of allergies/medications/conditions will NOT affect a piercing/tattoo but we need them stated in case of an emergency.
The form will have a section where you or the studio will fill in the artist’s name, as well as what you are getting done (tattoo design) and where or which piercing(s) you are getting done.
Your signature stating that you agree to the conditions listed overleaf (see next paragraph) and that the info you have given is correct to the best of your knowledge and that you haven’t lied or left anything out.
The back of the consent form is usually a large bit of text – which you SHOULD read – which outlines what you are agreeing to. This part is for the clients’ protection just as much as the studio. Most places will have a solicitor look over the document to make sure it is correct. I won’t go into too much detail over this, as we’ll be here all day, but the main points it outlines are:
*You have been given opportunity to ask questions before the procedure begins (i.e. you have been in the studio and someone has spoken to you).
*You are 18+ for a tattoo/genital piercing/other body modification and 16+ for general body piercing and that you can prove it with valid photo ID if asked. (This will vary from studio to studio, as many have different age restrictions for piercings).
*You acknowledge the risks of your chosen procedure and the risk of an unknown allergic reaction becoming apparent.
*You have been given aftercare advice which you will follow – and if you do not follow it, any repair work is to be done at your expense.
*You are happy that in the cases where the tattoo/piercing/etc. is symbolic or has a meaning (or is a translation of text or images) that you have researched the symbolism and translation and are happy that it means what you want it to. Your artist is NOT responsible for any mistranslation.
*You understand that you will be shown the transfer of the tattoo (or marks of a piercing, where possible) before the procedure starts, and that once it starts, the design/size/placement can’t be changed.
*You are fully aware that this is a permanent change to your body and that in the case of piercing, a scar could remain after the jewellery is removed.
*You are getting tattooed/pierced/etc. on your own free will and that you give your full consent for the procedure to be carried out. (It is unethical for me to pierce someone who is not choosing this for themselves).
I think you will agree that these are very important points to be covered, it not only protects the tattooist or piercer, but also the client. Many people think that the forms are purely for the benefit of the tattooist/piercer. This is not the case.
It is so important to be honest on consent forms. If you lie or knowingly omit information, the consent form is void. And any problems with the tattoo, or fallout due to the procedure will not be the responsibility of anyone, because the consent form was not filled in honestly – which you are signing and stating it is. Lying about your age will get you (not the tattooist/piercer) into trouble. Personally, I ask for photo ID from anyone who looks under 25, then staple a photocopy of it to the form to prove that it was shown. If you use false ID or lie on the consent form, you can be prosecuted for fraud, perjury or misrepresentation. And you will not have a leg to stand on if something goes wrong with your tattoo or piercing.
In short, consent forms are much more important than you think. They protect you and your artist, and they should be taken as seriously as any other contract you will sign.
It is no secret that the number of piercers (and tattooists) working in the UK is on the rise. Studios are opening in every corner of every town, and this means that the public have a bigger and wider choice of artists than ever before (using the term ‘artist’ to cover both piercers AND tattooists).
But with a wider choice, it also poses the dilemma of who to go to? Back in the late 90s/early 2000s, an average-sized town might have 3 studios, but nowadays that number could easily have a zero added to the end of it. According to a recent (June 2019) survey by RSPH, the highest concentration of tattoo studios to a town or city is Blackpool, which has one tattoo studio per 2,867 residents! At time of writing, Middlesbrough had a population of approx. 139,000 – so for us to have a comparable concentration of tattoo studios, that would mean Middlesbrough (town itself, not surrounding boroughs) would have almost 49 tattoo studios! View the report here: https://bit.ly/2ZvjdwS
The important thing to remember is that YOU HAVE A CHOICE when it comes to tattoo studios. Clients can go wherever they want – and that’s OK. Sure, if you want to come and have work done from me (or another specific artist) that’s awesome! But you can choose to go elsewhere – no one ‘owns’ their clients, loyalty and repeat business is awesome, but you are never obligated to go anywhere in particular.
Without rambling about free will and a person’s right to choose, hell, people CHOOSE to go to home tattooists so I think that says it all! It’s important to have some guidance on HOW to make the decision on which piercer/tattooist is right for you.
Personal recommendation from friends is always a good indication (or from people you converse with – ask them who did their work if you like it!) but what works for one person doesn’t work for another. People clash, personalities don’t line up – and that’s no one’s fault! To quote Dita Von Teese “You can be the ripest, juiciest peach in the world, but there will always be someone who doesn’t like peaches!” but aside from looking at things on a personal level, what are things you can look for, and expect from your artist – again, I’m writing this from the perspective of ‘piercer’ but most of this applies to a tattooist too – and other practitioners!
Before we get into it, something that ALWAYS comes up in discussions about tattoos and piercings and where to go is the cost of the procedure. We as artists understand that people have budgets and limitations on what they can afford – everyone does! – But tattoos and piercings are a luxury item – not a necessity, you do not HAVE to get this procedure done. No one is saying that a higher cost equals a better job, but please think about WHY a studio may be cheap. If a piercer is charging £10 for a piercing, how are they making a profit if they are using all the equipment and products necessary. Simply the materials and products needed to carry out a safe piercing with a plain titanium piece of jewellery would cost £10-£15 (this doesn’t include rent/rates, wages, equipment like autoclaves, etc, other costs like paper, printing, additional training and seminars, etc). of course, this cost will change over the years, but at the time of writing, I cannot see how someone can run a studio and make a profit on £10 piercings…. Unless they are using sub-standard jewellery/products or omitting some of the items necessary to carry out the procedure. What are they not using that they should be? And do you really want to be the one to find out? My prices reflect the cost (to me) of what is needed to carry out a piercing APPROPRITELY, plus a charge for my time and experience, and contribution to the things listed above that are not included in the calculation of materials. Sure, I can go online and buy 100 labret studs for a tenner (not even joking) but they would NOT be appropriate for the service I offer. Please consider this when making your decision. Saving money is using a comparison site for your insurance, or looking for the same item cheaper in a supermarket….. it is not paying someone less so they cut corners when it comes to your body. A well-done piercing by an experienced piercer in a safe environment with appropriate materials and high-quality jewellery will cost more than a poorly-done procedure with sub-standard jewellery from a piercer who learned from watching a YouTube video. Why is that? Because they are two DIFFERENT services. A 3rd-hand older car will cost a lot less than a brand-new Porsche. Sure, both are cars, and both will get you from A to B, but they are different products. But what if that price difference was only 50% higher than the older car (say £500) for the Porsche (50% higher = £750), which would you go for? When it comes to piercings and tattoos, the difference is often a relatively small amount, but for that extra cost, you get a LOT more.
Factor in what it would cost for an experienced piercer to put this right if it helps – I will give verbal advice to anyone for FREE, but I will not mess with a piercing less than a month old, you need to return to your piercer for that – the reason for this is if I try and help and the situation gets worse, this is somehow my fault, so I have stopped offering any hands-on help to things I did not do. If I need to glove up and do anything past verbal advice, there is a charge for this. A large percentage of the time, I will have to remove an incorrectly placed/executed piercing and then the client would need to wait some time (couple of months minimum) to have this re-done – and then would pay my price anyway, after trying to save money by going elsewhere. I see it happen a LOT with tattoos too, they are quoted, say, £100 for a piece. They say a friend will do it for £50, then they return to that first studio with a poorly done tattoo and expect the tattooist to re-do it for the originally-quoted £100 – but fixing up will take a lot longer, and a lot more skill, so the price to FIX the tattoo will be, say, £150. So a £100 tattoo they didn’t want to pay for has become a £200 tattoo after paying for it twice.
Food for thought, indeed!
So, on with the main focus of this blog – below are the legal requirements for a tattooist or piercer to be working in the UK (bear in mind other countries will vary!) and things that are NOT a legal requirement but are things you should consider. More detail on each point below.
LEGAL REQUIREMENTS FOR A TATTOOIST/PIERCER
REGISTRATION WITH LOCAL COUNCIL
That’s it. ANYONE can apply for this, and most people who do will get it. It requires no skill, just an appropriate environment and a £60-£100 fee. If a studio has a premises licence and (if applicable) the person carrying out the procedure(s) has a registration, that studio is operating LEGALLY.
THINGS IT IS NOT A LEGAL REQUIREMENT TO HAVE FOR TATTOOISTS/PIERCERS
(but you should take these into consideration when choosing your piercer/tattooist)
APPROPRIATE TRAINING/EXPERIENCE
FIRST AID/CPR/BBP TRAINING
GOOD QUALITY EQUIPMENT/JEWELLERY
INSURANCE
DBS CHECKS (FORMERLY CRB CHECK) IF WORKING WITH MINORS
CLIENT AFTERCARE
ONGOING TRAINING
UKAPP MEMBERSHIP (piercers only)
Let’s look at each item in a little more depth…. May as well start with the only item on that ‘shopping list’ of things you want from a piercer that is a legal requirement, the council registration.
REGISTRATION WITH LOCAL COUNCIL
Council licencing/registration (premises licence, and most areas of the UK also require a personal licence for each person carrying out the procedure) is the only legal requirement for a person to be a tattooist/piercer. This is obtained after an inspection and brief (and I mean BRIEF) meeting with an environmental health officer (EHO) from the local council. The studio inspection is the ‘hard’ bit – without going into a whole other blog, the premises must be safe, suitable, and have appropriate facilities to safely carry out a tattoo/piercing. This includes (not limited to): non-porous surfaces in all treatment areas, clinical waste disposal contract and appropriate bins, hot running water, appropriate sterilisation equipment (if applicable – many tattooists are fully disposable, but all piercers will require an autoclave to process jewellery even if their tools are disposable). The licences are issued to people/studios on the condition that they adhere to the ‘Toolkit’ which is an [outdated in the eyes of this piercer] document which details safe practices in the studio, however there is no way to police studios to be sure this is followed.
The licencing/inspection does NOT include: the skill of the artist, inspection of the quality of equipment, viewing the person carrying out a procedure, looking at fresh or healed work, the duration of the apprenticeship/depth of training that the person has undergone, presence of first aid/BBP training, insurance (public liability or treatment) – none of these things are checked and none are a legal requirement for people to carry out the business of tattooing or piercing.
WHY IS THIS IMPORTANT?
By law, piercers must adhere to a [low] level of minimum standards, this licencing/registration is to ensure that they are.
HOW CAN I CHECK THIS?
Premises and personal certificates (again, not every council will issue personal certificates) should be on display in the studio. Our premises registration is on our reception desk and personal ones are on each of the artists stations/rooms. Most councils also have a list of registered practitioners on their website.
With that in mind, let’s look at the “non-essential” things you will look for in a piercer….
APPROPRIATE TRAINING/EXPERIENCE
This is absolutely the most important thing to have. A competent artist should have sat an apprenticeship with an experienced tattooist/piercer – duration will vary, but generally accepted that a year or more is appropriate. In this time, they will have learnt about the non-practical side of things, safe practices in the studio, and then done heavily supervised work – with the client being fully aware that this person is an apprentice/junior artist. In the humble opinion of this piercer, people who do courses have zero respect for the art of piercing/tattooing, the industry itself nor for other tattooists/piercers or their own clients.
A person who has done a ‘course’ will NOT have the appropriate experience and knowledge to safely carry out a procedure. People fresh out of courses should NOT be tattooing/piercing unsupervised.
WHY IS THIS IMPORTANT?
Everyone has to start somewhere. No one is born knowing how to do this. And everyone will make mistakes in the early stages of their career (and, indeed, at ANY stage!). But this is why being supervised is so important, your mentor can step in if they feel it is needed. Assisting in procedures, then slowly doing more and more of the procedure itself, eventually carrying out the procedure completely unaided with your mentor solely observing is the ONLY safe way to learn this kind of thing. This can take 20 or more procedures before you are piercing solo – that’s 20 or more FOR EACH PIERCING PLACEMENT, not in total. You could NOT gain this experience in a week of doing a few placements 2 or 3 times. No knowledge of irregular anatomy, how to work around pre-existing medical conditions, etc… But this type of knowledge and experience can ONLY be gained through working extensively on a range of people with different bodies and alongside an experienced and competent piercer in a structured apprenticeship.
HOW CAN I CHECK THIS?
Ask to see HEALED pics of a range of tattoo/piercing placements as well as fresh. Ask your tattooist/piercer about where they did their apprenticeship (if they didn’t do one, are you sure you want them working on you?). If your piercer’s portfolio (this could be an Instagram page, a facebook page, a website or a physical portfolio in the studio) is not visible – ask WHY. Please bear in mind that certain piercings (nipples/genitals) may not be on public display, but your piercer should have photos of these to show you on request in the studio (these must NEVER be shared digitally). Your tattooist/piercer should be able to show you pictures of the range of their work and should be open with you about how long they have been working, and only attempting procedures/work that is within their capabilities. It is easy to prove you are an experienced piercer WHEN YOU ARE.
It’s an easy thing to check, I see piercers who have used work that isn’t theirs to promote and use on flyers, etc…. I’ve even had MY work stolen! Reverse image search on google to check where they are from and ask the person whom they say has trained them or guided them through their apprenticeship. For the record, I have NEVER trained or apprenticed ANYONE. I have had people work alongside me learning studio management when I used to do this (a LONG time ago) but I have never instructed anyone on how to perform a piercing. Anyone who says they were trained by me or were my apprentice is being untruthful. And yes, I am aware of several people who have told clients that they ‘used to work with’ me. All untrue.
LOOK AT THEIR WORK (once you know it IS their work) – would you be happy with that? Remember, you have a choice. But please remember that there is no ‘qualification’ for a piercer or tattooist. Anyone who shows you a certificate and says they are ‘qualified’ as a piercer/tattooist is bullshitting.
FIRST AID/CPR TRAINING AND BBP TRAINING
Oddly this is NOT a legal requirement! This piercer thinks it should be (and if the current guidance that public health Wales are hoping to roll out happens, it WILL be!) a requirement for anyone working in a tattoo or piercing studio to have a first aid training certificate. Bloodborne Pathogens training is another important thing for anyone working in an environment where they may be exposed to blood and body fluids. Knowing what to do in an emergency situation is paramount
WHY IS THIS IMPORTANT?
Do I really need to explain this? You are in an environment where you will be exposed to blood and body fluids, knowing about cross contamination is an absolute minimum (BBP training) and if something happens during your procedure (fainting, excessive bleeding, allergic reaction, epileptic seizure, shock, panic/asthma attack, etc) and your artist doesn’t know what to do, your health is in danger until medical assistance arrives.
HOW CAN I CHECK THIS?
A certificate for both should be present – ask to see it. BBP training is usually a 1-year renewal, and first aid is usually 3 years, but do check expiry dates.
GOOD QUALITY EQUIPMENT/JEWELLERY
Other than an APP/UKAPP membership, there is no stringent standards set for jewellery or equipment. The EU Nickel Directive means that only appropriate jewellery is used for piercing, but there is absolutely nothing to stop a piercer buying sub-quality jewellery and using it in piercings. Equipment, jewellery and other materials used (needles, gloves, dressings, skin prep, forceps, tubes, cleaning products) are NOT monitored – the ‘Toolkit’ issued by the council offers some guidance on what is appropriate, but as mentioned earlier, it is not policed thoroughly. Good stock rotation to ensure stock is not expired before use, constantly updating the products you use when new things are available, knowing how to use each product/piece of equipment properly, kill-times, dilution ratios, appropriate application…. Does your piercer know this?
WHY IS THIS IMPORTANT?
These are the products that are being used on YOUR body. Would you be happy with some expired skin prep? A marker pen that has been used on 10 clients before you? A needle that isn’t as sharp as it could be? A bench that has been cleaned with a disinfectant that is too weak? It’s all ‘boring’ stuff, but it is SO important!
HOW CAN I CHECK THIS?
It’s hard to check, as what one piercer uses versus another may BOTH be appropriate, but different. Ask your piercer if unsure, and look at what they are doing – is everything thrown away after use? Are tools placed in a separate, labelled container after use to be reprocessed? Is your jewellery internally threaded or threadless? Is it a smooth surface finish? Are the gems sparkly? Did everything during your procedure come out of a packet? Were gloves worn at all times? Do you feel confident in this studio?
INSURANCE
No one likes paying for this…. But it is SO IMPORTANT! Unlike driving a car, insurance is NOT a legal requirement, but a piercer/tattooist SHOULD have this. Public liability AND treatment insurance should be obtained by anyone in the body art industry.
WHY IS THIS IMPORTANT?
Hopefully nothing WILL go wrong – but if it does, what then?
HOW CAN I CHECK THIS?
They should have a certificate which is visible in the studio – ask to see it if you can’t! (and check the dates!)
DBS CHECK (FORMERLY CRB CHECK) IF WORKING WITH MINORS
If a piercer offers piercing for people under the age of 16, it is NOT a legal requirement that they have a DBS check (as with first aid, it is something that public health Wales are trying to make mandatory if a piercer is to work with someone under the age of 16). In a nutshell, DBS checks make sure that a person who is expected to be in contact with children and/or vulnerable people has no past convictions pertaining to things like assault, abuse, etc. It’s something that every teacher, doctor and specialist police officers have as part of their job. Piercers who offer any services to under 16s should (in my eyes) also have a DBS check. One could argue that as the child would have a parent with them at all times, that this is unnecessary, but in horrific cases of children suffering abuse at the hands of those who should be protecting them (teachers. carers, etc) the trust was simply ‘a given’. Maybe I’m going a little over the line suggesting this, but I do truly believe it SHOULD be done if a piercer is to offer any services to minors.
WHY IS THIS IMPORTANT?
Children should be protected at all costs. Cases are coming to light this year of tattooists and piercers who have taken advantage of and assaulted (or been inappropriate with) their clients. Thus far, these have all be adults. I hope that there is NEVER a case of a piercer abusing a child, but a DBS check would stop a repeat offence.
HOW CAN I CHECK THIS?
Unfortunately, there is no way for a member of the public to run a DBS check on another member of the public. You can request a check for yourself (there is a fee to pay) if you’re curious to how it works, but if this were made a requirement for council registration, then you could be confident that anyone registered with their local council to pierce (remember, this is the ONLY legal requirement) has passed a DBS check.
CLIENT AFTERCARE
How a client is treated and cared for AFTER the procedure is equally important. If there is a problem – will your piercer or tattooist fix it? Jewellery fault? Longer jewellery required? Tattoo faded after a couple of months? Query about aftercare? Something’s gone wrong! Will they fix it for you? Does your artist know what to do if there is a problem, and when it’s time to tell you to seek medical attention? Is your artist easily contactable to help you with these issues? If you have a pre-existing medical condition (asthma, etc), medication you take or allergy had your piercer adjusted their aftercare instructions to allow for this?
WHY IS THIS IMPORTANT?
Whether it is your first piercing or 100th, things can go wrong. Your piercer needs to know how to deal with anything that may happen – and they also need to know what is beyond their capabilities as a piercer, and when they need to send you to a doctor. They also need to adapt the instructions you are given. For example: If you have an allergy to ibuprofen, your piercer instructing you to take ibuprofen is DANGEROUS! If your jewellery is faulty (happens to the best of us!) your piercer should replace it. Please note that ‘lost ends’ does not mean you get a free replacement; I will ALWAYS give a free plain titanium ball on anything lost that was fitted less than a week ago though.
HOW CAN I CHECK THIS?
Unfortunately, this is something you often only find out about AFTER your procedure! But before getting pierced/tattooed, contact the artist and ask questions – do they get back to you? Ask them if they will be able to help with future jewellery changes, etc. Ask if aftercare information will be given? Do they have a physical studio you can call into (‘mobile’ practitioners are impossible to track down if there is a problem!!!) – does your artist make you feel safe and confident?
ONGOING TRAINING
This one is SO IMPORTANT!!! No, I don’t expect everyone to be attending a seminar every month and paying out thousands of pounds for a degree in brain surgery (but wouldn’t that be cool as fuck?) but updating their practices – attending workshops and seminars, guest spots to gain experience in another studio, further learning like first aid courses, etc. if your artist is not constantly expanding their skill set and pushing industry standards higher, are they in this to be good at it…. Or are they in it for the money? Sure, we all have bills to pay – but in industries like mine, growth and change is both terrifying and necessary!
WHY IS THIS IMPORTANT?
You want the artist to be using the most up-to-date techniques and methods to ensure your procedure is done to the highest possible standard – many procedures and practices that were industry standard 5 years ago are no longer appropriate, certain products that were recommended for aftercare have changed their formula and are no longer recommended. Artists need to adapt to these changes.
HOW CAN I CHECK THIS?
The beauty of social media is that you can see what your artists are up to – they will post pictures of conventions, conferences, guest spots and any other training they do. There are forums and facebook groups available for both tattooists and piercers to submit work for peer review and to share tips and tricks as well – it has never been easier to ‘up your game’!
UKAPP MEMBERSHIP (piercers only)
Yeah, as a past board member and founder, of course I am a little biased at this! BUT! All these things that are not a legal requirement are things that the APP (our American big-sister organisation) and the UKAPP ask for as part of membership. Imagine the line set by the council is 6 inches from the ground. There ARE standards that need to be adhered to, but they are the bare minimum and easy to obtain. If you go above these standards, great, but there is no recognition. APP/UKAPP set a line 4 feet from the ground. Meet or surpass these requirements (and apply for membership!) and you get a membership to a non-profit organisation whose sole purpose is to promote safe piercing! A UKAPP (or APP) member is working to the highest standards with industry standard jewellery and in an environment which is the safest possible place to be pierced! You can read more about the UKAPP and the work we do at http://www.ukapp.org.uk/
WHY IS THIS IMPORTANT?
UKAPP membership means that the piercer is working to a much higher standard than ‘minimum’ and can prove it. This means that as a client, the hard work is done for you! You can go to this piercer KNOWING that they meet all the requirements above!
Due to the recent influx of people contacting me asking about training and apprenticeships, I’ve written this blog to try and answer any questions. This blog will give you pointers on ‘getting your foot in the door’ as it were. I don’t want to sound patronising or preachy in this (or any other blog) but I do not want to sugar-coat anything either. I’m not a tattooist, but I have worked in tattoo studios my entire adult life, so I have observed what a tattooist looks for and expects from an apprentice.
PLEASE NOTE, I am NOT looking for an apprentice.
I have neither the time nor need to train an apprentice – I couldn’t offer a job at the end of the apprenticeship, so I do not feel it’s fair to train someone but not have the resources to offer them a job at the end of it. If I were to take on an apprentice, I would ask around people I know who I feel would be suited to the post. Which is how most studios work, or they will advertise online.
Do I really want to do this?
OK, so you want to be a tattooist/body piercer? Firstly, this is not a job. It is not a career. It is a WAY OF LIFE. Unless you eat, sleep and breathe tattooing/piercing, you’ll lose interest. You need to prove yourself to a tattooist/piercer, who will then [hopefully] offer you an apprenticeship. Piercing apprenticeships and tattoo apprenticeships are very different. A would-be tattoo apprentice should have a full portfolio of ORIGINAL (not traced) artwork, drawings, sketches, etc. to show their potential teacher that they can draw. Digital art is great to include – but original, hand drawn design work in your chosen medium should be the bulk of your portfolio. The style is – arguably – unimportant, as long as it shows skill and commitment to a piece. A small collection of good, solid well thought out drawings or paintings is preferable to a whole folder of ‘doodles’. For piercings, there’s not much drawing involved (but when looking at other body modification work, like scarification, it would help). Wannabe piercers knowing their stuff with jewellery sizing, types and general sensible practices is of the utmost importance. A piercer friend once gave the best, most simplistic advice to a would-be apprentice “if you want to be a good apprentice, firstly, you need to be a good customer”. Showing a respect for the industry, looking after your own work (tattoos and piercings you’ve had done by others) and making a good impression on your piercer/tattooist is absolutely the best start.
Lots of people are trying to get into the industry because they’ve watched “Miami Ink” or other TV shows based around the industry and think it’s a fast-track route to a rock star lifestyle. It isn’t. The hours are long and unsociable, the work is hard and the pay is low (I’ll cover that later). And that’s when you get good at the job. When you’re an apprentice, you STILL work hard for unsociable hours and often little to no pay. Not very “rock star”. Many people have seen “Tattoo School” on The Learning Channel and think this is an acceptable route. It isn’t (I’ll cover that later, too).
For tattooing, there is a simple way to tell if you’re cut out for it. Every day, use an online ‘art prompt’ or get someone to give you 2 random nouns (flowers + water, space + green, tiger + sunglasses, etc) then draw a design in your own style incorporating these two things. Most tattooists have 1-4 clients a day, so this means between one and four new, unique designs that they don’t get to decide on the subject matter for. These design(s) are generally created a day or two before the relevant appointment. If you can’t do a ‘dummy run’ of this, you’ll struggle to succeed as a tattoo artist.
It’s worth noting that while a job as a piercer (or tattooist) is the obvious position within the industry, there are many other roles that are equally important and may be better suited to your skillset. Reception/front of house staff, jewellery sales, cleaning/housekeeping, studio manager, online admin roles, working for a jewellery company or as a sales rep for supplies, if you are a ‘tradie’, fitting out studios and working on interiors specific to the industry, jewellery stylist, working in jewellery or supplies manufacture, designing and building furniture and studio décor, website building and industry specific tech, environmental health team member, and while it pains me to say it, I do know tattooists who have ‘personal assistants’ too. It may be worth considering the range of careers within the industry – because you could already be suited to one of these roles!
How will I learn?
Piercing (and tattoo) apprenticeships are tricky to find. But they are the ONLY safe way to learn. Most studios will not take on an ‘experienced’ piercer/tattooist who hasn’t got any studio experience (so buying your own stuff and piercing/tattooing from home, then trying to get in at a studio is NOT a good way to start). We’ll cover courses later on. Apprenticeships in a tattoo/piercing studio are NOT a ‘college course’ or any kind of institution-based learning. They vary in duration from apprentice to apprentice. There is no formal qualification to being a tattooist or piercer. There are NO standardised/nationally recognised ‘qualifications’ in piercing. A piercer/tattooist declaring they are ‘a qualified piercer/tattooist’ is greatly misinformed, and the statement is dangerously misleading and inaccurate.
What goes wrong?
I have seen a lot of ‘apprentices’ who just fall by the wayside, give up, lose interest, etc. This is how I know they were not right for the job. They get bored with the jobs they are set – cleaning, answering the phone, the day to day running of the studio, dealing with customers, cleaning and sterilizing equipment, taking payments, computer/desk work, making appointments for clients, everything EXCEPT tattooing/piercing. This is something you have to learn before you can start to learn to pierce/tattoo, that’s how it goes.
The industry is currently saturated with ‘piercers’ and ‘tattooists’ of an average and below average standard, this is due to the number of mediocre artists offering apprenticeships, usually to boost their ego, and then neither the artist nor the apprentice takes the apprenticeship seriously. I have seen this happen many, many times, and have also seen apprentices who – on obtaining the apprenticeship – relax, as they think that their mentor will carry them through their apprenticeship and in a year or two, they will be a tattooist/piercer and all will be well. If you are lucky to be offered an apprenticeship by a well-known, reputable studio, relaxing should be the last thing on your mind. I have seen SO MANY apprentices work very hard and very well and show lots of promise in the first month, and then they relax and stop caring so much, simply because they love to tell people they work in a tattoo studio, with that pending title of ‘tattooist’ or ‘piercer’ and end up with rock star egos before they’ve even picked up a needle. This happens more times than you could imagine. The apprentice gets complacent, loses their job and blames everyone but themselves. They then go ANYWHERE that will take them on (usually to that mediocre artist we mentioned earlier) and because they have ‘studio experience’ they are taken on.
Personally, I would be VERY reluctant to take on anyone who has worked elsewhere, not only because they may have picked up a bad habit or twelve, but the reasons for them leaving/being told to leave the position often only become clear after a few weeks of working. If you want an apprenticeship, choose where you want to learn carefully and do NOT piss anyone off, as you’ll find it very difficult to be taken on elsewhere. The tattoo/piercing community is very tight knit, most studios know all the other studios in the area, whether they are friends or not, and will know the comings and goings of the staff members. To quote someone I used to work with “you never know who you might have to ask for a job in the future”.
Where will take me on? (And where will YOU take on?)
Think about WHERE you want to learn, WHO you want to teach you. There’s no point going somewhere that you know is below a good standard for piercing/tattoos. They’re the person teaching you, so if THEY are sub-standard, YOU will be sub-standard. Find somewhere reputable, where you are happy with the level of work being done.
Unless you are over 18 years of age, there’s no point in even trying (sorry, but it’s true). Tattoo and body piercing studios are adult environments and under-18s cannot by law have tattoos/certain piercings, so it’s not very logical to let them pierce/tattoo others. Similar kind of rule as working in an off-licence – You have to be 18 or older. Anyone with a drink/drugs/attitude/drama problem will not be taken on by me, nor will they be taken on at any reputable studio. Most places simply do not take people on because they don’t need anyone else. It’s not personal, they just don’t need another member of staff.
How do I apply for an apprenticeship?
Try looking in tattoo magazines (showing my age there!) and on forums/facebook groups and industry-specific websites online, as studios will advertise in their classified sections for any available apprenticeships. Studios will also advertise on their social media platforms for experienced piercers/tattooists to fill a position, as well as offering apprenticeships. DO NOT call studios who have specified that experience/references/portfolio is necessary UNLESS YOU ACTUALLY HAVE ONE! It is wasting their (and your) time.
If you’re asking around in reputable studios for work (not applying in a specific one), go to the studio IN PERSON to enquire about any available work – prospective tattooists, take a portfolio of artwork if you have it (prepare for heavy criticism). Go in alone, don’t bring a gaggle of friends with you, and never EVER get someone to ask for you. Both of these things will get you nowhere. I have had parents contact me for their son/daughter and I cannot stress enough how bad it looks getting someone to do this for you. You wouldn’t do it for any other job, so don’t do it for this one. Getting someone else to ask for you shows that you aren’t comfortable talking to people (you’ll have to do a lot of that in a tattoo studio) and that you can’t even be bothered to go and ask yourself. Even over the phone or via email/social media contact, it looks lazy. Having friend(s) with you when you go in shows a similar thing, your mates hanging around ‘for support’ means that you look like you need someone to hold your hand, again, you wouldn’t do this for any other job interview, so please don’t do it for this one.
Show me the money!
So going into ANY job, the amount you will earn (or potentially earn) is important. Everyone has bills to pay. I hear people saying “Oh I just want to learn, even if I’m not getting paid!” This is not something you can learn quickly, and your bills will still need paying. Apprenticeships are largely unpaid, and almost all apprentices will have a second (and sometimes third!) job, and have to fit their apprenticeship around this job (that’s what I did – alongside my apprenticeship I was working as a cleaner in the evenings, and in a large retain chain when I wasn’t in the studio, 2 paid jobs and one unpaid apprenticeship – I worked 7 days a week for about 18 months). Although a lot of apprentices will also work in the studio as a receptionist/cleaner/etc. and SHOULD be paid for those duties, they can’t sit and watch the tattooist/piercer at work, draw, assist and LEARN until their ‘paid-for’ duties are done. And as anyone in the industry will tell you, those jobs are NEVER truly finished; there is always something to be done in the studio. Please ALWAYS have your expected duties/hours/wages defined IN WRITING, especially if you are going to be paid for them, so that you and the studio are in agreement. Minimum wage should be paid for any ‘work’ you do – however that is defined and agreed.
Most tattooists and piercers (working full time, not as an apprentice) are self-employed and pay structure is usually one of two options:
COMMISION BASED: The artist has to pay for some of their own equipment, with the studio paying for the rest of the supplies (agreed between the artist and studio). The studio also takes a LARGE cut (usually 30-50%) of their earnings on each tattoo they do.
RENT A SPACE: The artist pays for most of their own supplies – with the studio supplying the basics. The artist pays a set day/week/month ‘chair fee’ to the studio but keeps 100% of payments for their work
A tattooist or piercer is only earning WHILE THEY ARE TATTOOING/PIERCING. Cleaning, doing admin work, photocopying, sterilizing tools, talking to customers, replying to messages and emails, etc. is unpaid – so these are usually the tasks that will be given to the apprentice, meaning that the tattooist or piercer can spend more time tattooing/piercing (and therefore making money!) A lot of tattooists/piercers who have an apprentice will give them a few quid here and there, but as mentioned, apprenticeships are largely unpaid (unless a wage or payment was agreed at the start of the apprenticeship). There’s no hourly pay for your attendance in the studio, whether you’re an apprentice or a full-time tattooist/piercer, just for the work you are doing.
I’ve seen somewhere looking to take someone on – What do I do?
OK, firstly, FOLLOW THE INSTRUCTIONS ON HOW TO APPLY! Many places will ask you to email or call into the studio to apply. If they ask you to email – email them. Showing up in the studio is not what they asked you to do. A lot of places will give you a specific subject/heading/title for the email – make sure you use this subject. Places may even give a silly subject to test you out. If you can’t follow instructions correctly on how to apply, you probably won’t be selected.
READ THE DESCRIPTION! If you’re looking for a tattoo apprenticeship, and the job advertised is for a piercing apprenticeship, or a desk work position, or a cleaner…. Don’t apply. If a studio wants an apprentice, they will ask for one. If you wanted to be a barperson, would you apply for a job in a clothes shop? No. See what the job will entail (and if this isn’t clear, ask when you contact the studio). Duties, hours, expectations and pay are all there to be discussed. As previously mentioned, apprenticeships are usually unpaid, so if you are not prepared to do unpaid work when it is specified, don’t apply. I supported myself with 2 other jobs through my unpaid apprenticeship – it is possible.
See what the studio wants from you as a potential apprentice – most places will sift through all emails, CVs, etc. and make a shortlist of people they want to see, they will then offer the shortlisted people an interview and possibly a ‘trial shift’ in the studio (usually one or two days – unpaid, yes, this is unfair and I do NOT agree with someone having to give free labour, but this is how it is in this industry). These people may be asked to bring a portfolio of artwork (for tattoo apprenticeships) or something similar with them to their trial day. Show up without it, and you will likely lose any chance of an apprenticeship – so always ask if you need to bring something like this with you. If you don’t have it, don’t apply. You may not be expected to bring anything with you, but this would be something to ask the studio about.
If you’re given a trial or interview, show up on time, by yourself and with everything you have been asked to bring with you. If you’re doing a day’s trial, you may want to bring some lunch with you. There is rarely a dress code in tattoo studios, but you should look smart (not suit-and-tie-smart, but well presented). I would say to wear something you are comfortable in and that you feel reflects your personality. These people are strangers right now, you’re here to make a good impression and give them the idea that you would slot into the studio like a jigsaw piece. If you’re doing a trial day, you may end up with ink or cleaning products on your clothes. Just a heads up.
Be friendly and talk to the other members of staff, introduce yourself and don’t be afraid to ask questions, or ask if you don’t fully understand something. You will probably be given cleaning tasks, small jobs in the studio, possibly some work on the computer and most likely you’ll be supervised for everything you do. Don’t answer the phone or deal with customers unless you’re asked to (but there’s nothing wrong with asking a customer to wait while you get someone who can deal with them). YOU WILL NOT GET TO TATTOO OR PIERCE ANYONE ON YOUR TRIAL DAY. Ask questions about the day-to-day running of the studio (all studios will vary) and at the end of the day/interview, make sure you take your portfolio away with you, and ask for some feedback on the artwork in it.
Don’t expect an email or phone call in less than a week, there may be other people to interview/try out and the staff will all be consulted on who they feel is right for the job. If you haven’t heard anything back after a couple of weeks, maybe contact the studio to ask. Remember, there will be a lot of people applying for the position (especially in a really good studio), so while it’s important to apply and try your best, don’t be disappointed if you aren’t chosen. You weren’t right for this one, but you may be in the future. If the same studio advertises again for the same/similar position, give it another go – but bear in mind, you will have to go through the same process again. If you are unsuccessful, ask for feedback on where you can improve.
So, there’s this course…
Stay away from courses. They will charge you an obscene amount of money and show you how to perform a very small selection of piercings (you sometimes get to do each of these piercings once and once only, no mention of anatomy variations – inverted nipples, asymmetrical features, etc.) and sometimes even use piercing guns. For a ‘tattoo course’ they will show you how to set up and operate a machine, some basic drawing and observed tattooing on (usually) pig skin or fake skin. The duration of the course ranges from a few hours to a few weeks. You get no training or experience in safety, customer service, the legalities of tattooing/piercing, customer care, etc; and the experience you would gain from a studio (consent forms, setting up, dealing with aftercare, problems people sometimes experience with healing, etc.) is completely absent from the course. To learn to tattoo or pierce safely takes time, practice and constant supervision and guidance. You get none of this with a course. You can learn how to operate a car within a few hours, but you do not learn how to drive until you have spent many hours behind the wheel. At the end of the course, you will get a certificate which says that you ATTENDED the course (no qualifications for tattooists/piercer, remember). You will have no experience (nor any knowledge of health and hygiene laws/procedures), and nowhere reputable will take you on, (would you go to a dentist who attended a dentistry course but had never done a filling?)
A studio I previously worked at started offering 3-day piercing courses. Clever wording and manipulative website layout made it appear that it was myself offering the training (it wasn’t). They used my experience and skillset, as well as pictures of my work to advertise it. £500 and 3 days and you are a piercer. I teach at conferences, which are supplementary learning to industry professionals, that are LONGER than 3 days. They recently (Summer 2025) changed it to £2,000 and 3 weeks. You cannot learn an entire career (ANY career) and be competent, efficient, SAFE, and able to be unsupervised doing it in three weeks. This same studio makes its potential reception staff undergo a SIX MONTH probationary period where they are supervised and monitored. But you can be a piercer in 3 weeks, apparently.
A dear piercer friend of mine, David (@angelespiercing on Instagram – go check out his work, he is a DARLING) made a very accurate post on Instagram, stating that piercing courses are best viewed like an ‘experience day’. I can pay to drive a ‘supercar’ or formula 1 car around a track. Does this make me a F1 driver? No. I can operate the machine (car), but I do not fully understand the skills and mindset that comes with being a F1 driver. And, should I be put in a F1 race, I would most likely come last, and probably destroy the car in the process!
What qualifications do I need?
There are no formal qualifications or exams in tattooing or professional body piercing (health and beauty courses that have a ‘piercing’ module are dodgy and will show you how to use a piercing gun. They count for NOTHING in tattoo/piercing studios). Doing a basic 1st aid/CPR/BBP/health and hygiene/sterilization course is always a plus. It shows that you are keen about the “serious” side of the profession. A customer’s safety is paramount and sterilization of equipment is required by law. An apprenticeship in a tattoo/piercing studio is not a formal qualification (like an electrician or mechanic), it is one of the few professions or ‘crafts’ that do not have a standardized test to ‘qualify’, and the industry likes it this way. Your experience (as a tattooist or piercer) is your qualification, and it is the quality of the work you are putting out there that shows how much experience you have. As long as there are REAL tattooists/piercers (people who have learnt the “hard” – apprenticeship – way), any ‘qualified’ tattooist/piercer with 3 course certificates on their wall but who has never tattooed/pierced anyone before, will be snubbed and their lack of experience will be their downfall.
Courses and ‘tattoo schools’ are multipying by the day, and as a result of this, many studios offering jobs are stating that they will not take on any ‘graduates’.
I’ve bought a ‘kit’! Am I a tattooist/piercer yet?
No. You’re a scratcher. You are the bane of any reputable tattooist/piercer’s existence.
Please, DO NOT be tempted to buy some equipment from eBay/Amazon or a “Starter Kit” and start piercing or tattooing people without any prior knowledge, you will lose a reputation as a piercer/tattooist (before you even make it as one) and probably a few friends as well. It is dangerous and you can cause serious and permanent damage to people unless you know EXACTLY what you are doing (correctly sterilized equipment is required by law for anyone tattooing and piercing – as is a licence and a clinical waste and sharps disposal contract with a company offering the service. Pretty sure eBay doesn’t sell those). “Starter Kits” for tattooing and piercing are usually 2nd rate (cheap machines, poor quality ink, jewellery and needles and the design sheets you get with them are awful). They come with ‘instructions’ in the form of a DVD which is just laughable. I won’t go into too much detail, as I can feel the vein in my neck sticking out just though thinking about it, but I have seen a lot of people trying out heavier and more extreme body modification procedures on themselves (and friends) with disastrous consequences. Soldering iron brands, strike-brands, having cheap body jewellery implanted under the skin, etc. It is professional piercers, tattooists and medical professionals (doctors, etc.) who have to fix these things when they go wrong. If I know you’ve done something like that, you will NEVER be my apprentice.
Piercing is often seen as a secondary industry to tattooing (bah!) and while many tattooists are quick to scream ‘scratcher!!’ at someone tattooing with no knowledge, they are also quite happy to buy their girlfriend one of the aforementioned ‘starter kits’, with some garbage jewellery, a box of whatever needles their tattoo supply company have and some tools off eBay and proudly declare “body piercing now available at [studio name]”. No. Bad tattooist.
It’s a long, hard road…
There’s a lot more to piercing and tattooing than picking up a needle. It requires dedication, hard work, nerves of steel (you have to have the balls to pursue this!) and an understanding bank balance. Most people (myself included) will work for a year or more (cleaning, sterilizing, tracing up designs, making coffee, dealing with customers, hoovering, answering the phone – basically doing EVERYTHING EXCEPT piercing or tattooing) without pay. And when you start being shown bits and pieces, you’ll need a very understanding client base (usually close friends and your own body) to practice on. Until you have at least 3 years of experience tattooing or piercing FULL TIME in a studio, you will find it hard to be taken on by anywhere else, so treat the person who has taken you under their wing with respect, don’t be tempted to start tattooing/piercing people from your home, thus stealing their clients and ruining any reputations.
I have seen other blogs/articles up about this, and I would love to add any links on the subject here, so please pass them on if you see them.
I can’t think of a good way to end this blog, so I will quote George Burchett, from his book “Memoirs of a Tattooist”
“Tattooing is easy to do badly, difficult to do well. The personal experience of the tattooist is of utmost importance, and so is the collective experience of other tattooists, past and present, from whom one learns habits and methods which are valuable, and tricks, short cuts and failures which must be avoided if the highest standards are to be maintained.”
I would like to take this opportunity to with you the very best of luck for the future, KEEP TRYING!
If you want it bad enough, you will find a way – everyone has to start somewhere. Please contact me if you’d like more info or want to comment on anything!
One thing that comes up in every discussion about tattoos & piercings is age. I’ve had a lot of mail from people recently asking about legalities and so on. It seems a lot of people are getting mixed messages about what is legal and what isn’t. This blog should clear up some misconceptions. If you have any queries about a specific case or scenario, please get in touch.
TATTOOS
TO BE TATTOOED IN THE UK, YOU MUST BE 18 YEARS OF AGE OR ABOVE. It doesn’t matter if you are 18 next week, come back next week. Here’s a link to the full write-up of the law (Tattooing of Minors Act 1969):
It states that the only exception for someone under the age of 18 receiving a tattoo is if it is for medical reasons, and that a doctor has stated that it is part of a treatment or medical procedure (examples of this are for reconstruction of nipples after surgery, or skin pigmentation to aid a plastic surgery procedure. It doesn’t happen anymore but when identical twins were born, doctors used to tattoo a small dot on the bottom of one of the babies’ feet – so they could always be told apart).
If a tattooist tattoos you and KNOWS you are underage, they are breaking the law, if you lie about your age/date of birth (or show fake ID), the tattooist can use that as a defence, but at the end of the day, if someone looks under 25 (as per the recommended ‘Challenge25’ policy), they should be asked for photo ID to prove that they are 18 or above. This is standard practice in tattoo studios and responsibility for this lies with the tattooist carrying out the procedure.
I am aware of several studios that knowingly tattoo people underage, as well as countless ‘Scratchers’ (people tattooing from home) who aren’t even licenced, and will tattoo anyone who asks. A lot of people think that the law is a guideline, it’s not. You can be fined and have your licence confiscated. If you are unlicensed, you can also be charged with tattooing without a licence. I have another blog up on this subject for further reading.
Many people seem to be under the impression that if you are over 16 and a parent/legal guardian gives consent, then this is legal – it is NOT. There is no legislation to allow a parent to consent for a tattoo procedure on their child.
If you have found someone willing to tattoo you underage, think about this: if they are willing to disregard the law when it comes to whether or not they can tattoo you, they could be ignoring the laws which tell them they should be using appropriate and safe equipment and materials to do your tattoo.
It is fine to approach a tattoo studio and have a chat about a potential tattoo if you are under 18, and then make the appointment for the day of (or after) your 18th birthday.
INSTANCES WHERE A PERSON UNDER 18 HAS BEEN TATTOOED AND NEEDS HELP/ADVICE
If you get tattooed underage, chances are it will not be from a reputable studio, possibly from a ‘home tattooist’, and the work will more than likely be below an acceptable standard. If you want to have it put right, you’ll have to wait until you are 18 to have it fixed/covered in a reputable law-abiding studio. Laser tattoo removal is a grey area in the law. Often hospital/private clinics will offer it to under 18s as long as there is a parent or legal guardian present. However, most tattoo studios will be reluctant to offer it to anyone under 18.
I recall one instance, a boy of 14 came into a studio I used to work in and asked for aftercare advice, according to him, his mother’s friend had tattooed him (with her permission) and rolled up his sleeve to reveal a half sleeve (shoulder to elbow) of lined and partially shaded tribal of a questionable standard. We gave him verbal advice on how to care for his tattoo, and were reluctant to hand out an aftercare sheet as we did not want to be associated with that piece. Most studios will offer advice to anyone, regardless of age, with any aspect of tattooing, though nowhere reputable will offer the procedure.
If your child (under 18) has been tattooed in an unlicensed studio/someone’s home, I would recommend a blood test (speak to your GP) to safeguard their health, and if you wish, you can contact your local council to give details of the person who carried this out (if they are in a studio OR working from their home) to prevent more people being put through this, but prosecutions of this nature are few and far between despite it being a law broken.
PIERCINGS
THERE IS CURRENTLY NO LAW ON AGE FOR GENERAL EAR/BODY PIERCING IN THE WHOLE OF THE UK. There should be, but the only law with piercing is for genital piercing (where you must be 18 or older). Wales recently (January 2018) introduced a law that ‘intimate’ piercing (nipples, genitals and anywhere surrounding them and the buttocks, and tongues) are restricted to people 18+, it is expected that this law will be extended to the rest of the UK in due course. Some councils have bylaws for other piercings, but this will vary. A lot of the restrictions with age are down to the piercer’s discretion. Many places will pierce under 16s if they have a parent or legal guardian with them, and as long as the studio/piercer is insured to do this, that is perfectly legal. An easy way to remember the rules with intimate piercing and nipple piercing – If I cannot legally own a photo of it, I cannot pierce it.
I used to – many years ago – offer SOME procedures to under 16s (no one under 13, only ears, navels and some facial piercing with parental consent and parent present), but at one point, I had a lot of abuse/hassle from a girl’s stepmother, as I would not allow her to sign the form for her 15-year old step-daughter. Step parents have no legal hold or responsibilities for the child unless they have adopted them, and I could only pierce her with one of her ‘real’ parents there to sign the form. I decided, after quite a heated discussion, that going forward, I should change my policy and offer piercing to people 16 and above ONLY, and to ask anyone who looked under 25 for ID to prove they are 16 or above – which is my current policy. However, many places will still pierce under 16s, this is not against the law, but I just find it simpler to stick to people 16 and above. One issue recently raised in a discussion with other piercers is that only one parent is needed to sign for their child – therefore if one parent allows it, and the other won’t, this could cause ructions. Although the piercer would be – from a legal standpoint – completely within the law.
Insurance for piercing under 16s is harder to get/more costly and many insurance policies that WILL allow piercing for under 16s will only allow certain placements, and the parent signing must provide their own valid photo ID – as well as some for the child – and be present for the entirety of the procedure. Any piercer offering services to clients under 18 years of age should be ‘DBS Checked’ meaning a background search is done on the piercer to highlight any activity or previous convictions that would indicate that they are a risk to vulnerable people or people under 18. This is NOT a legal requirement for piercers in England, which is a whole other discussion in itself.
Many children (school age) cannot wear earrings for school – and if they are permitted, they have to be taken out for PE – an earlobe piercing will need around 2 months to heal fully, the piercing being taken in and out will cause a prolonged healing time and the potential for more issues. I have yet to hear of a school that will allow facial piercings as part of the uniform regulations, so these would have to be removed for the duration of the school day – again, this can cause problems with healing and it’s likely that the piercing will ‘close up’.
For little ones (realistically, I’m talking under 10), getting pierced can be frightening and painful (we all know it hurts!) especially when they haven’t asked for it themselves and it’s the parent making that call for their child (often with babies and toddlers). I do not have children, so as a non-parent, I’m being cautious with my words here! Ear piercing is a non-essential procedure. It is painful and can be scary for small children and babies (hell, it’s painful and scary for adults too!) You would never want your baby to have to go through surgery, and many people feel awful having to take them to get their ESSENTIAL injections and vaccinations (anti-vax comments will be deleted, don’t bother), so why put them through a non-essential injury? Once they are old enough to ask for it themselves, and fully understand the procedure, the fact that it will hurt, the importance of aftercare (cleaning their piercings), THEN (in my humble non-parent opinion) and only then, should you as a parent consider allowing it. Take them to a reputable piercer, avoid guns, and be prepared to show ID. Call the studio in advance to ask about their policies for children’s ear piercing (a lot of studios still have a minimum age for piercing under 16s).
For babies and children, having their ears pierced while they are still growing (bear in mind that most people continue to grow well into their late teens) can often mean that when they are done at a young age, the child’s ears will develop and change shape, and this could result in the piercings being uneven or placed incorrectly.
For genital piercing the law is that you have to be 18 (if you look under 25, expect to be asked for ID to prove you are 18+). There is no legislation for nipple piercing in the UK (other than Wales, as mentioned earlier), and council bylaws vary, but I have adopted a policy of only offering nipple piercing to people aged 18+. When girls are in their mid-teens, they are still growing and developing, we all know someone who was an early bloomer, and someone (like me!) who didn’t grow anything until they were 15, obviously people are going to vary with development, and this fact doesn’t affect boys, but I have decided that this is the way I would be most comfortable to work.
Surface piercing, microdermals and skin divers, I only offer to over 18s, simply because they are much harder to heal and the chances of a scar (permanent change to someone’s body) being left are much higher.
Cheek and dahlia piercing gives the piercee ‘dimples’ in the cheeks/corners of their mouths. However, I only offer this to people 18 and above, as the scarring left creates permanent dimples, which I feel is akin to tattooing in its permanence. There are procedures to remove the scarring left by cheek piercing, but they aren’t available to anyone under 18, and they are not done by many practitioners.
INSTANCES WHERE A PERSON UNDER 16 HAS BEEN PIERCED AND NEEDS HELP/ADVICE
I see a lot of people under 16 for body jewellery sales and I am happy to fit jewellery for anyone, regardless of age, as long as the piercing is not a genital/nipple piercing (18+). If someone has had a piercing done elsewhere (as long as it is not in the aforementioned placements which I will not fit jewellery in) I will help in any way I can to fix it and happily give a consultation, clean-up and advice/jewellery change. Though I (and other piercers) would charge for this. Jewellery changes are free with a jewellery purchase from me.
If your child (under 16) has been pierced without your permission, and if you wish to pursue the matter, you can contact your local council to give details of the person who carried out the procedure (if they are in a studio OR working from their home) to prevent it happening again, but prosecutions of this nature are few and far between as there are no actual laws with piercing.
OTHER BODY MODIFICATION
Other procedures like play piercing, suspension, corsets, stretching piercings, scarification and branding are only available for people 18 and above. Again, there is no law on these things, it is just something that has been adopted by piercers in common sense, the scars left by play piercing, suspension and corsets (and the designs left by branding and scarification) are permanent and may not ever fade. I will not stretch piercings on anyone under 18, as this is also a potentially permanent change to their body. As with tattooing, repair work on botched body modifications will not be available to people under 18. In the UK, no ‘heavy’ body modification is permitted, I forward any requests for these procedures to CALM in Sweden.
ACCEPTABLE FORMS OF ID
Reputable studios will ask you for ID if you look under 25. Yes, it sucks, but it keeps us all right and makes everything a lot safer. I cannot speak for other studios and artists, but I will NOT accept anything that is photocopied/scanned and printed or photos on phones (it’s easy to alter things when you can use Photoshop). I will not accept a parent or guardian as proof of age, you have to show your own ID. I will not accept birth certificates, national insurance cards, college/university cards or library cards as they don’t always have photographs on them, and most state that they are not proof of age/identification.
I will only accept the following forms of ID, and each of the following myst be IN DATE and the information on it must match the information on your consent form:
*Passport.
*Driving Licence or Provisional.
*Any proof-of-age card bearing the ‘PASS’ hologram.
One of the UK’s most widely accepted ‘proof-of-age’ cards, CitizenCard, have kindly offered me a discount which is EXCLUSIVE to my clients! Get a standard application which is usualy £18 for just £5! To get a code for this insane discount, email me (skinseamstress@hotmail.co.uk) with the subject ‘CitizenCard Discount’ and I’ll send you a single-use code! CitizenCard is the UKs most widely accepted proof of age card, and carries the required ‘PASS’ hologram.
If I think something you give me is fake or that you are using someone else’s ID, I will not accept it, and I will not pierce you until you provide me with an alternative.
Hope this answers a few questions and sets a few records straight, the law is always altering and I will do my utmost to add anything to this blog as and when. If anyone has any opinions and experiences about this, I would love to hear them.
I ask for ID because the council and my insurer need me to.
I ask for ID because it is good practice.
As with ANY profession/workplace that required proof of age (supermarkets, tobacco shops, bars/nightclubs, cinemas, DVD/video game sales, etc.), we ask because it is our JOB. And if we ask and you do not have it, this means we cannot offer you the service you have requested.
We do not ask for ID…
…to be a dick.
…to ruin your fun.
…because your ‘money isn’t good enough’.
We ask for it because we HAVE TO.
I can have my registration revoked with the council (meaning I cannot work), I can be fined, I can have my insurance refuse to cover me, and I can be put on the sex offenders register (yes, yes I can).
I (and most other age-restricted sales/services) operate on a ‘challenge 25’ – meaning if I think you could be under 25, I will ask you for proof of age (16+ for most piercings, 18+ for nipples, microdermals/skin divers, surface piercing, intimate piercing and other body modification procedures… and it’s 18+ for tattoos while we’re on it).
The reason that these are the ages I stick to are:
It’s what I feel comfortable with.
It’s what (in the case of genital piercing) is required by law OR is stated by my local council as a mandatory minimum.
It is what my insurer will cover me for.
If you want a break-down of all this, see these blogs:
What’s My Age Again?
WHY Won’t you Pierce Kids?
And the reason I ask for ID is because I need to make sure you are at or above the ages I require. Your ID is the proof of your age – your Mam or Dad being there is not, you telling me your age is not, your Facebook page, 16th birthday card, note from your Mam, your bank card, your friend’s ID….. these are not proof either.
So, what do I factor in when I ask for ID? – Spoiler, its not just about how old you look….
How old you look – obviously.
How you are behaving.
If in a group, do other members of the group look ‘young’?*
Are you ‘trying’ to look older?
School uniform?
Are you with someone who looks like they may be a parent?
Have I previously seen this person and they DIDN’T have ID with them?
Is it a school holiday?
Do I recognise you from a facebook/social media exchange in which I thought “this person looks young, I’ll ask them to bring ID”?
*fun story – I once ID’d a 40-year-old mother who was in with her 18 year old daughter for this reason!
I accept the following forms of ID. Each of these MUST be in-date and the info on it MUST match the info you state on your consent form (I ask for a preferred name and pronouns if your legal name is not the one you go by). If your ID is NOT one of the following, then no, I do not accept it.
Passport
Driver’s Licence
Provisional Driver’s Licence
Proof of age card (any company as long as it bears the ‘PASS’ hologram)
If I believe you are showing a fake ID, or that the ID you are showing me is not yours, I will refuse service. It is my right to do so. I do not accept photos of the above, it must be the actual item (pictures can be photoshopped, and we are instructed NOT to accept them).
I feel that all this needs spelling out, as I’m seeing an increasing number of people reacting in an aggressive manner to being refused service. I have never made a secret of any of the above, so this is here to serve as a reminder.
Stomping out and shouting that you will “just go to [other local studio]” will do nothing to change my mind. Nor does it bother me, for three reasons:
You came to me first….
[Other local studio] SHOULD be operating the same as me and being insistent on appropriate, valid photo ID being shown. If they aren’t, good luck to them if something goes wrong, or the council want to see some paperwork.
You have a choice on where you go for a service. You could have chosen to go there at any point. I regularly send clients to other studios (reputable ones that WILL insist on seeing ID) if they ask for something (a service, jewellery, whatever) that I can’t give them.
I hope this goes some way to explaining the situation I am in every time someone walks through the door.